HarveyWildes
Member
- Joined
- May 3, 2016
- Messages
- 984
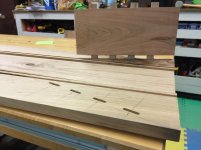
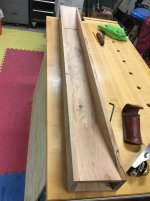
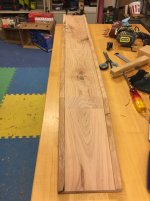
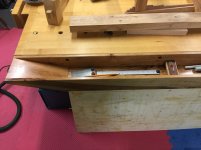
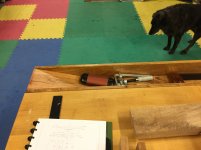
I'm building a tool well for my bench, and wanted the ends of the well to slant up to make it easy to slide things out. The bottom is attached to the sides with glued tongue and groove. I was able to glue it because the ends are oriented (as you'll see) in the same direction as the bottom - everything will move together.
Problem - how to slant the sides with some real joinery, not just sandwiching them at a slant between the sides.
(1) Glue with multiple dowels - requires drill holes that are precisely spaced, and positioned exactly. I wanted some wiggle room to make sure I could get the slanted ends to fit tightly against the bottoms. Maybe with a drill press created jig it would have worked.
(2) Put a tongue on the ends that would fit in a slanted groove up the sides. That would require (a) jigging up a router to make the groove, or (b) a fancy jig for my plough plane - nah. But the router setup would have been my second choice.
(3) Forget the joinery and just sandwich the slanted ends in. Nope - I wanted the extra strength and precise alignment of a mechanical joint. I could have done this and drilled dowels into the sides (a la Miller Dowels) but I didn't want exposed joinery.
(4) Biscuits - Whoops, gave my biscuit joiner away when I bought my domino.
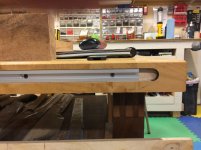
As it turns out, Dominos provided really good mechanical strength and the setup was way easier than anything else except maybe biscuits. Mark it, set up a reference surface on the sides to cut them on a slant, and I was good to go. In addition, by setting the Domino to cut wider mortises than the Dominos I was using by about 6mm or so, I had the wiggle room I needed to make sure that the ends could be glued against the bottom.
Problem - how to slant the sides with some real joinery, not just sandwiching them at a slant between the sides.
(1) Glue with multiple dowels - requires drill holes that are precisely spaced, and positioned exactly. I wanted some wiggle room to make sure I could get the slanted ends to fit tightly against the bottoms. Maybe with a drill press created jig it would have worked.
(2) Put a tongue on the ends that would fit in a slanted groove up the sides. That would require (a) jigging up a router to make the groove, or (b) a fancy jig for my plough plane - nah. But the router setup would have been my second choice.
(3) Forget the joinery and just sandwich the slanted ends in. Nope - I wanted the extra strength and precise alignment of a mechanical joint. I could have done this and drilled dowels into the sides (a la Miller Dowels) but I didn't want exposed joinery.
(4) Biscuits - Whoops, gave my biscuit joiner away when I bought my domino.
As it turns out, Dominos provided really good mechanical strength and the setup was way easier than anything else except maybe biscuits. Mark it, set up a reference surface on the sides to cut them on a slant, and I was good to go. In addition, by setting the Domino to cut wider mortises than the Dominos I was using by about 6mm or so, I had the wiggle room I needed to make sure that the ends could be glued against the bottom.