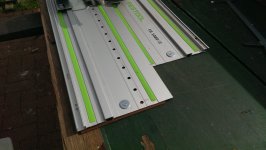
Did a little experiment today to see if it was possible to convert a standard rail to a holey rail and I am pleased to announce that it worked.
The things that you need are the LR32 router plate, a 6mm router cutter and any holey rail, you can then easily convert any length rail to a holey rail. The router cutter that I used was a single flute solid carbide one and it was not designed to drill down into aluminium. It worked but if you can get one that is designed to drill it will be easier.
I didn't take any photos while I was doing it so I will repeat the procedure, photograph it and add the photos later.
This procedure also assumes that the router plate is correctly set up with no excess play or slop and the guide pin is always correctly located in one of the holes. The location of the holes in the lengthwise direction is not critical as all future measurements and settings are from the holes.
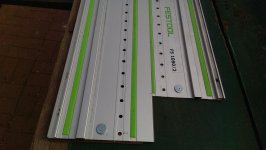
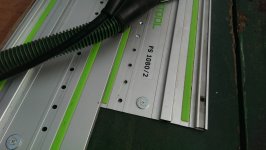
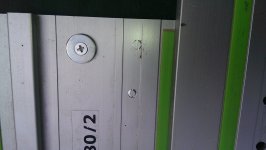
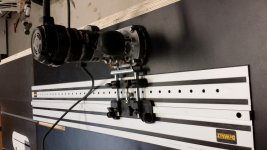
You screw the two rails, with their two sacrificial strips towards each other, to a solid flat surface using washers and screws thru the large holes in each end. The holey rail sits over the other and is lifted about 3mm with a thin packing piece to level it (I used a bit of Masonite). Initial positions are fixed by estimating the location of the new holes using the notch in the router plate. Lowering the cutter to touch the rail, while spinning, will leave a shallow circle mark. This mark, if it is slightly off, will be the only way you will be able to tell which is the copy.
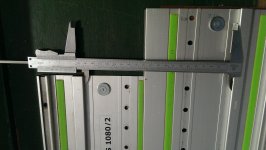
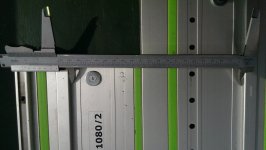
Then accurately measure (I used a vernier caliper) the distance from the ridge in the rail to each side of the slot in the holey rail and adjust the rails so that the new hole would land on one end of the required slot. Adjustment is achieved by loosening one of the screws holding the holey rail and gently tapping with a piece of wood, when the dimension is correct, tighten the screw and do the other end.
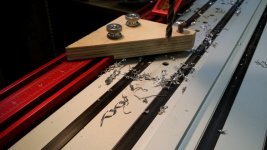
After repeating the measurements, and if necessary readjusting your settings, you are now ready to drill the holes. I used a spray lube on the cutter after each hole to stop the aluminium sticking and galling on the cutter.
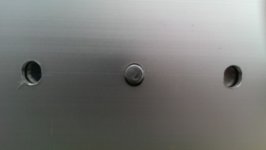
You then move the holey rail 1 mm in whichever direction you need to elongate the holes, drill them again and you have a finished holey rail.
To extend the length of the new rail longer than the original one, move the holey rail along, drop the stationary cutter into one of the new holes, and start the procedure again.
I was actually surprised how quick and easy it was once I had the rails screwed in the right position. I will convert the rest of my rails this time photographing the process and post the pics.
For those of you that don't already have a holey rail a suggest you try to borrow one and produce as many as required.
The things that you need are the LR32 router plate, a 6mm router cutter and any holey rail, you can then easily convert any length rail to a holey rail. The router cutter that I used was a single flute solid carbide one and it was not designed to drill down into aluminium. It worked but if you can get one that is designed to drill it will be easier.
I didn't take any photos while I was doing it so I will repeat the procedure, photograph it and add the photos later.
This procedure also assumes that the router plate is correctly set up with no excess play or slop and the guide pin is always correctly located in one of the holes. The location of the holes in the lengthwise direction is not critical as all future measurements and settings are from the holes.
You screw the two rails, with their two sacrificial strips towards each other, to a solid flat surface using washers and screws thru the large holes in each end. The holey rail sits over the other and is lifted about 3mm with a thin packing piece to level it (I used a bit of Masonite). Initial positions are fixed by estimating the location of the new holes using the notch in the router plate. Lowering the cutter to touch the rail, while spinning, will leave a shallow circle mark. This mark, if it is slightly off, will be the only way you will be able to tell which is the copy.
Then accurately measure (I used a vernier caliper) the distance from the ridge in the rail to each side of the slot in the holey rail and adjust the rails so that the new hole would land on one end of the required slot. Adjustment is achieved by loosening one of the screws holding the holey rail and gently tapping with a piece of wood, when the dimension is correct, tighten the screw and do the other end.
After repeating the measurements, and if necessary readjusting your settings, you are now ready to drill the holes. I used a spray lube on the cutter after each hole to stop the aluminium sticking and galling on the cutter.
You then move the holey rail 1 mm in whichever direction you need to elongate the holes, drill them again and you have a finished holey rail.
To extend the length of the new rail longer than the original one, move the holey rail along, drop the stationary cutter into one of the new holes, and start the procedure again.
I was actually surprised how quick and easy it was once I had the rails screwed in the right position. I will convert the rest of my rails this time photographing the process and post the pics.
For those of you that don't already have a holey rail a suggest you try to borrow one and produce as many as required.