Hi there!
I'm about to build a couple of cabinets and started looking at the Festool LR32 system. I have recently invested in a TS55 and an OF1010 and feel that I have stretched my budget a bit. Actually I think the LR32 pricing is reeeeaally high considering that you only get a hole drilling jig on speed.
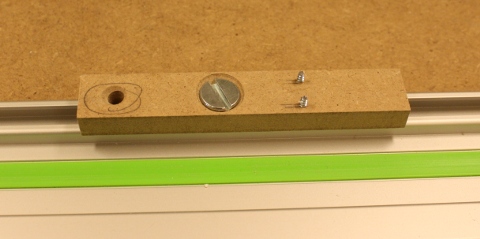
So I decided to build my own el cheapo LR32. My system consists of a base plate on witch the OF1010 is mounted, a standard FS 1400 guide rail, a separate hole strip and a pin (as seen in the picture below). The picture also shows a jig to align the hole strip to the sheet edge.
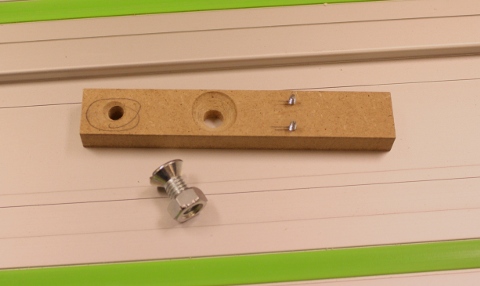
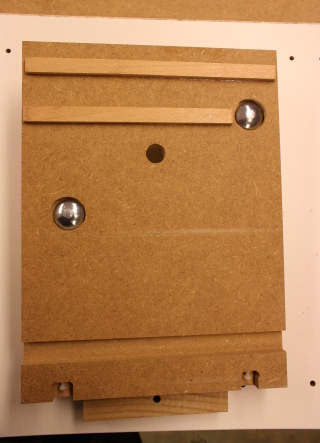
The base plate from below. Note the small M3 nylon screws at the bottom. These can be adjusted to get a really nice fit on the guide rail. Te two small strips of hardwood are added as a support so that I don't need the small support "shoe" on the OF1010 to get good support when sliding the base plate on the rail.
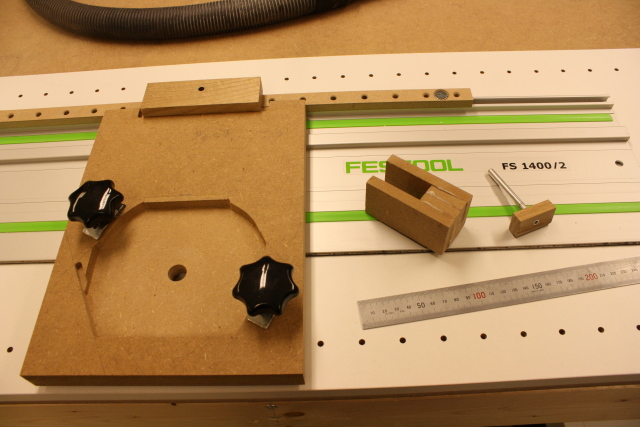
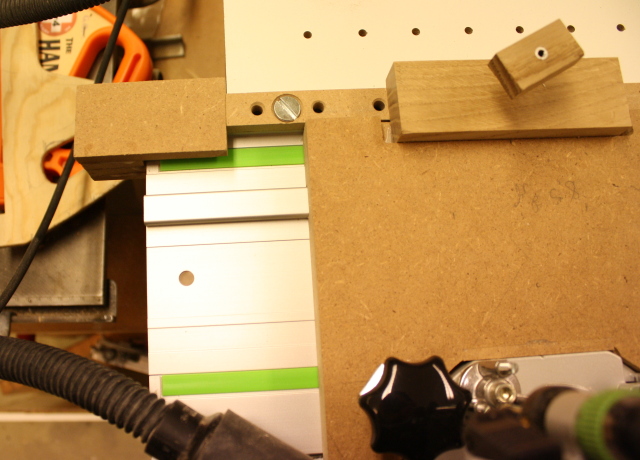
To drill a row of holes I do as follows. I place the guide rail on the sheet material where I want my row of holes. The center of the OF1010 is placed at a exact 25mm offset from the _aluminum_ part of the guide rail (just as the LR32). I then mount the separate hole strip on the guide rail. The hole strip is cut exactly 16mm from the center of the outmost hole at both ends. On the picture below I use the jig to align the hole strip so that the first hole is placed 16mm from the sheet edge. The hole strip is then tightened to the guide rail with two screws. The base plate is placed on the rail and fixated at the first hole position using the pin. Then the first hole is drilled. Because of the nifty design of the OF1010 handles, only one hand is needed to operate the router and the other can be used to lift the pin, move the base plate and insert the pin.
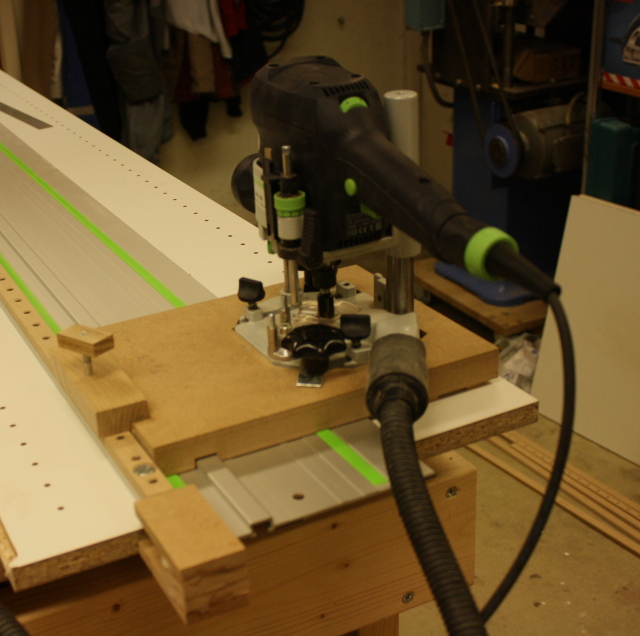
Final picture (wrong focus point, sorry...) of the setup.
If I need to drill a long row of holes, I combine two FS 1400 rails. When the last hole of the hole strip is drilled, I just turn off the router and lock the drill bit in the drilled hole. I then remove the pin, loosen the hole strip, move it and insert the pin again.
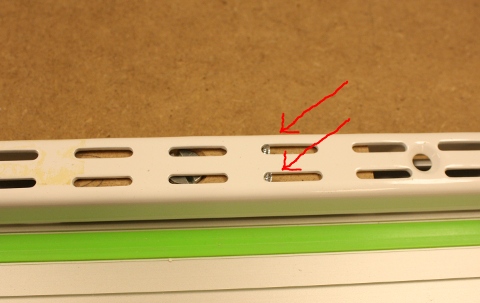
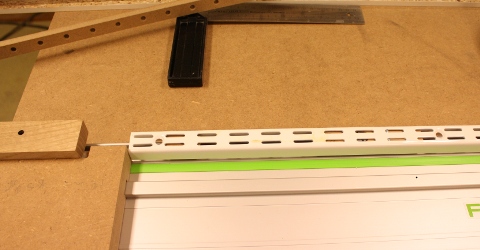
I used a wall shelf console rail common in Europe (see picture below) to drill the holes in the hole strip. These console rails have a lot of cutouts with cc 32mm. For the holes in the sheet material, I use the Festool 5mm router bit from the LR32 system.
I'm about to build a couple of cabinets and started looking at the Festool LR32 system. I have recently invested in a TS55 and an OF1010 and feel that I have stretched my budget a bit. Actually I think the LR32 pricing is reeeeaally high considering that you only get a hole drilling jig on speed.
So I decided to build my own el cheapo LR32. My system consists of a base plate on witch the OF1010 is mounted, a standard FS 1400 guide rail, a separate hole strip and a pin (as seen in the picture below). The picture also shows a jig to align the hole strip to the sheet edge.
The base plate from below. Note the small M3 nylon screws at the bottom. These can be adjusted to get a really nice fit on the guide rail. Te two small strips of hardwood are added as a support so that I don't need the small support "shoe" on the OF1010 to get good support when sliding the base plate on the rail.
To drill a row of holes I do as follows. I place the guide rail on the sheet material where I want my row of holes. The center of the OF1010 is placed at a exact 25mm offset from the _aluminum_ part of the guide rail (just as the LR32). I then mount the separate hole strip on the guide rail. The hole strip is cut exactly 16mm from the center of the outmost hole at both ends. On the picture below I use the jig to align the hole strip so that the first hole is placed 16mm from the sheet edge. The hole strip is then tightened to the guide rail with two screws. The base plate is placed on the rail and fixated at the first hole position using the pin. Then the first hole is drilled. Because of the nifty design of the OF1010 handles, only one hand is needed to operate the router and the other can be used to lift the pin, move the base plate and insert the pin.
Final picture (wrong focus point, sorry...) of the setup.
If I need to drill a long row of holes, I combine two FS 1400 rails. When the last hole of the hole strip is drilled, I just turn off the router and lock the drill bit in the drilled hole. I then remove the pin, loosen the hole strip, move it and insert the pin again.
I used a wall shelf console rail common in Europe (see picture below) to drill the holes in the hole strip. These console rails have a lot of cutouts with cc 32mm. For the holes in the sheet material, I use the Festool 5mm router bit from the LR32 system.
") And, as I have told you before, this jig looks really nice!
And, as I have told you before, this jig looks really nice!")