Federal Inspired Cellarette

atogrf1

Member
Joined
Sep 17, 2007
Messages
154
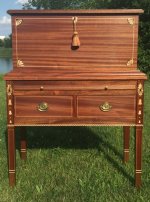
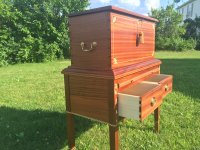
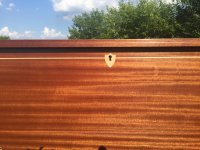
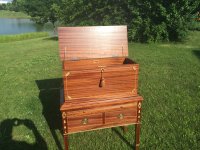
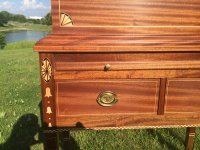
Here is a Federal Period inspired cellarette that I made.
Used Festool routers, TS55, Domino, and multiple sanders during it's construction.
View attachment 1
 

Attachments

  • Cellarette - Front View (darker).jpg
    Cellarette - Front View (darker).jpg
    131.7 KB · Views: 325
Awesome job!  I'm sure lots of hours on the string and marquetry.  What finish did you use?

Regards,
Gerald
 
Thanks Gerald!!!!
I logged my time and it took exactly 107 hours and 20 minutes.  (I work slowly as you can see).  [big grin]
I used General Finished Arm-R-Seal and Seal-A-Cell on it.  Then I finished it off with some Renaissance Wax.
 
That is beautiful!

What woods did you use for the case and the inlays?  Any more pictures?

Thanks for posting!

Mike A.
 
Thanks Mike!!!!
I used Sapele Mahogany for the main wood and Maple for the drawer boxes.
The inlays are made from Holly, Pale Sycamore, black dyed Costello, Maple, and Walnut.
The hardware is all period correct from Horton Brasses.
I do have some more photos and will post them below.
Thanks again!!!!

View attachment 1View attachment 2
 

Attachments

  • IMG_0539.JPG
    IMG_0539.JPG
    3.9 MB · Views: 179
  • IMG_0530.JPG
    IMG_0530.JPG
    3.4 MB · Views: 184
[member=1999]atogrf1[/member] Yes, you did use sand shading on the fan inlays.  Fantastic!  [thumbs up]

I was wondering when I first saw it, but I couldn't tell for sure until you posted the detail photos.  What was your technique and any tips you might have?

Thanks,  Mike A.
 
This is wonderful. It really looks stunning in the sun. And the sand shading makes in the inlay pop. Also, thanks for the high pixel count pictures! I really like getting in there!
 
Mike_aa,
There are woodworkers named Robert Millard and Steve Latta.  I purchased their videos and learned how to do the sand shading and inlay work from watching the videos and using their techniques.  Steve Latta has a line of tools for doing the stringing work through Lie-Nielson (I believe), and they have the videos there.
At first, I was intimidated, but after doing it, I realized it was easier than I thought.
One tip, though....As you can see by my ovals in the legs, some of the shading is darker and some is lighter.  Make sure you know the hot spots in your sand and how long to keep it in there.  I learned my lesson on the ovals and think I did a better job when making the fan inlays.
Below are some photos I took of the progress when I was making them.  Hope they help.

Dubcraftee,
Thank you very much.  To be honest, I got lucky with the resolution of the photos.  I don't know much about photography and just uploaded what I had.  LOL.  Glad you liked it though an hope the detail answered any questions you may have had.

View attachment 1View attachment 2View attachment 3View attachment 4
 

Attachments

  • IMG_0475.JPG
    IMG_0475.JPG
    1.8 MB · Views: 119
  • IMG_0465.JPG
    IMG_0465.JPG
    2.5 MB · Views: 108
  • IMG_0304.JPG
    IMG_0304.JPG
    1.7 MB · Views: 114
  • IMG_0294.JPG
    IMG_0294.JPG
    2.1 MB · Views: 149
Back
Top