First Domino 500 project.

adsjoin

Member
Joined
Jan 15, 2014
Messages
71
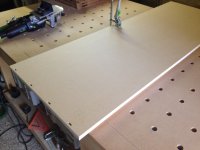
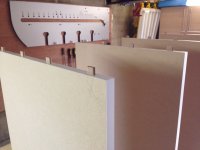
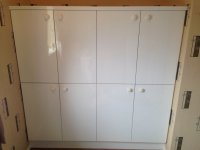
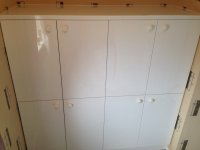
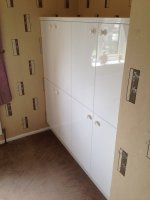
So after owning my 500 for a month or so I finally get to use it in the real world, and not practise pieces  [big grin] two storage cabinets measuring 1.440 high x .800 width with three shelves in each,  for a bedroom. They will be fitted with a white gloss top, plinth and white gloss doors once fitted on site. So after spending half a day cutting the boards down to size (TS55) and edging them (mums old iron  [wink]) it was time to put the domino to use. The boards were 18mm mdf (nothing fancy)
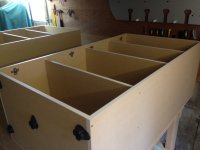
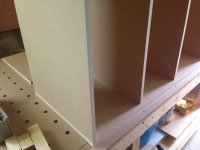
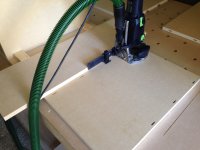
In the pictures you can see I used the cross stop which made life so much easier, I used 5 x 30 dominos. Once the base was dry fitted onto the side I simply used timber spacers as a guide for the domino to get the desired shelf spacings.
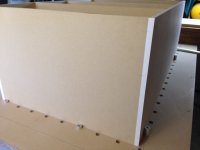
I used the bench dogs to square the cabinet before fixings the back in place. I know it's only a simple project but I feel a lot more confident with the Domino now and can't wait for future projects. All in all I love the tool and well worth the money!  [big grin]
 

Attachments

  • image.jpg
    image.jpg
    686.9 KB · Views: 520
  • image.jpg
    image.jpg
    751 KB · Views: 509
  • image.jpg
    image.jpg
    689.3 KB · Views: 571
  • image.jpg
    image.jpg
    638.9 KB · Views: 478
  • image.jpg
    image.jpg
    645.2 KB · Views: 469
  • image.jpg
    image.jpg
    718.9 KB · Views: 569
  • image.jpg
    image.jpg
    777.6 KB · Views: 695
I like your method on doing Dominos in the middle of a board.  I've been trying to solve that issue with a cabinet I'm building. 
 
stphnlwlsh said:
I like your method on doing Dominos in the middle of a board.  I've been trying to solve that issue with a cabinet I'm building. 
thanks, it did work well. I've seen videos of others using a piece of timber clamped to the sides, but I know by using the method I do both sides will be bang on the same as each other using the base as a datum.
 
Here are the finished pics, appoligise for the door knobs (customers choice :/ ) all doors have soft close hinges, all the boarding & doors are gloss white.
 

Attachments

  • image.jpg
    image.jpg
    669.5 KB · Views: 493
  • image.jpg
    image.jpg
    661 KB · Views: 385
  • image.jpg
    image.jpg
    782.2 KB · Views: 422
Very nice! Did you make the doors? If so I was wondering how you created the gloss finish.
 
cliffp said:
Very nice! Did you make the doors? If so I was wondering how you created the gloss finish.
The doors were off the shelf at B&Q! And the cupboards made to suit. I wouldn't have a clue where to start getting a gloss finish to that standard.
 
My kitchen has gloss doors from B & Q. The gloss front is a moulded plastic  cover. I found to my cost that you have to make sure no steam or other heat gets near it as it deforms and becomes very unsightly!
 
cliffp said:
My kitchen has gloss doors from B & Q. The gloss front is a moulded plastic  cover. I found to my cost that you have to make sure no steam or other heat gets near it as it deforms and becomes very unsightly!
I know what you mean, not the beys quality doors but thankfully I don't think these doors will see much steam/heat in the bedroom! Did that sound rude lol :)
 
Back
Top