Guide Rail Case +

Joined
Oct 25, 2013
Messages
431
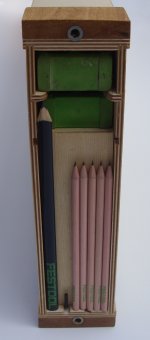
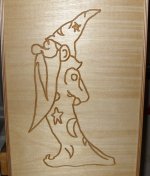
Guide rail case made from Idigbo, 9mm and 6mm BB plywood, with routed dado joinery throughout. The only metal in the construction is 4 x 6mm machine screws and 4 threaded inserts that hold the ends on because I really wanted to avoid using any hinges and latches. Strap was from a retired Festool guide rail bag. Cost of materials was about £22 and it took about 8 to 10 hours in total as it was over a few days to build, freehand rout logo on each side and to apply 3 coats of Danish Oil. There's baffles for the 800 rail and the steel rule. Should be strong due to I-beam torsion box type construction and the bolted on ends. Total weight fully loaded is almost 17 kilos, but it does safely hold many long items:

2 x 1400 guide rail
800 guide rail
2 x pairs of connector bars (left in rails)
Betterley connector
1400 level
800 digital level
1000 steel rule

And at the other end is

6 x Festool pencils
key for rails


Attachments

  • SDC12793.JPG
    SDC12793.JPG
    1.7 MB · Views: 4,946
  • SDC12783.JPG
    SDC12783.JPG
    1.4 MB · Views: 9,457
  • SDC12779.JPG
    SDC12779.JPG
    700.2 KB · Views: 3,570
Ah you finished it.

Looks real nice.

I got to get me one of those scribing bits ad play with it.
 
Cool project, I have a rail bag but not too fond of its shortcomings so I may try something like your project.  One thing I don't quite get, using the threaded inserts, do you have to use a screwdriver to open the box every time?  In my world the closest screwdriver always seems to be out in the truck very far away, I also understand you not wanting latches or hinges. 
 
The intention was to use a screwdriver (an 18v drill) to undo and fasten the ends on but I just turn them in with my fingers. Besides it's only the top screw that has to come out and the lid will rotate on the bottom screw when loosened slightly.

Two thirds the price of a Festool guide rail bag. Carries far more stuff. And it's way better looking...
 
I assumed that's how you did it but wanted to make sure I wasn't missing something really clever.  I have a small set of rare earth magnets that may just work for this application.
Thanks,
CB
 
Woodwork Wizard said:
Thank you Ron and JMB.

Slingers are currently selling the Festool script cutter bit for £21.54 and it is brilliant for freehand routing with an OF1010.

http://www.slingers1858.co.uk/festool-s8-d11-60-script-cutter-hw-shank-8-mm?utm_source=google_shopping&gclid=CjwKEAjw7O6vBRD


Hey Woodwork Wizard I bought the bit.  Looking fwd to playing with it.

Your carvings really impressed me.

I used the 2 angle stops for my MFT fence and it works great. I also just got the slop stop. Man what a difference. Im getting the square cuts I always wanted with the festool system. I have come close, but now Im dead nuts on square.

I did some test cuts using the 5 cut method and checked square with my woodpeckers square. I could not see any light on all 8 corners.
I have not had that good of cut even with my delta stationary saw.
 
Thank you Ron and Edward.  Ron - I can't remember if I gave you a demo of freehand routing, but with the OF 1010 it's very easy if you guide the router from the base and with the clip on dust cover removed so you can see what you're doing and follow the drawing.

I use an overhead projector to get the drawing on the board. I prefer the more natural man-made look of freehand routing on wood compared to the exactness of a CNC and I reckon I can rout the pattern almost as quick as a CNC machine would do it. I think the guide rail case is very strong, well made and carries a whole heap of long things very safely and well organised etc. etc., but my favourite part of the whole thing is the business logos routed on each side. Otherwise it's just a box...

 
Alan,

I really like that wizard design. Im going to start playing with my router to see how good I can scribe designs into wood/ ply. Although I don't have the scribe bit yet. I got one that will work.  Im just going to draw something easy like a Happy Face for starters see how it comes out.
 
Having 2 x 1400 guide rails and connectors is very useful for on-site work, but including an 800 rail is so much better if let's say you have a number of doors to trim. Connect the 2 long rails for long cuts and use the 800 for any small cuts - way better than connecting and disconnecting rails to make different lengths of cut.

 
Back
Top