Oak and Walnut Side Unit

Chems

Retailer
Member
Joined
Mar 7, 2010
Messages
98
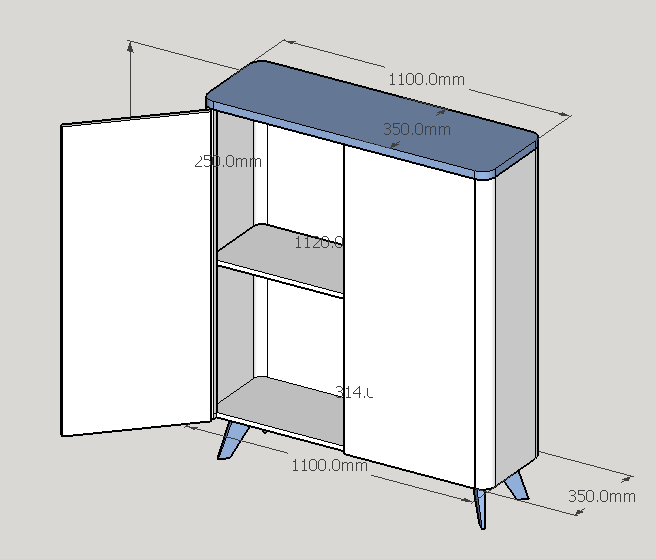
Hi all, haven't done a WIP in ages so I started a project today so here goes. Its a simple side unit for storage with a 50mm radius on the sides. Other than the radius it is a fairly straight forward build. The body will be oak with the back and shelves made from oak veneered MDF. The top and feet will be made from ABW.

The design: The blue bits will be ABW.


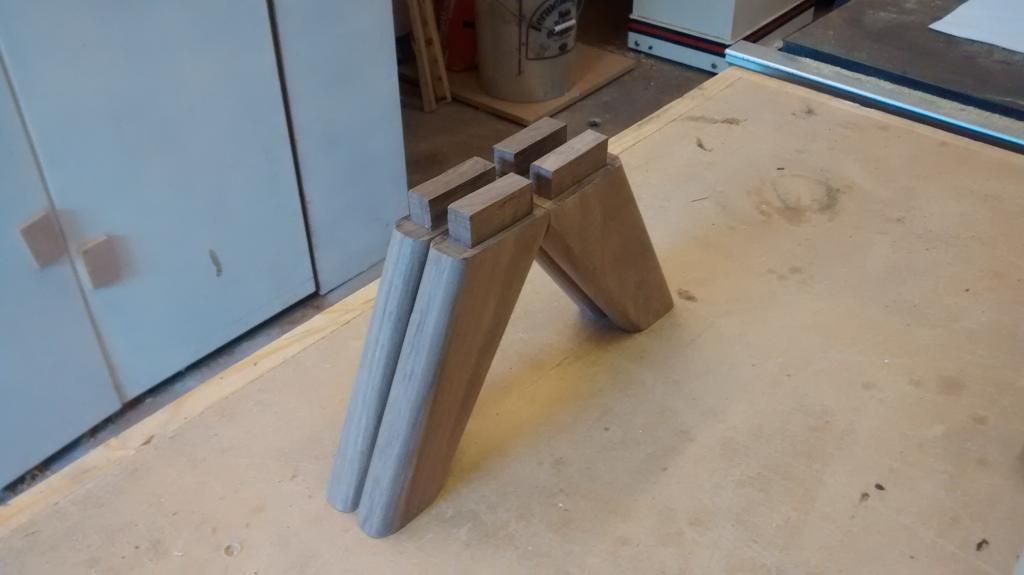
Starting at the bottom, here are the feet:


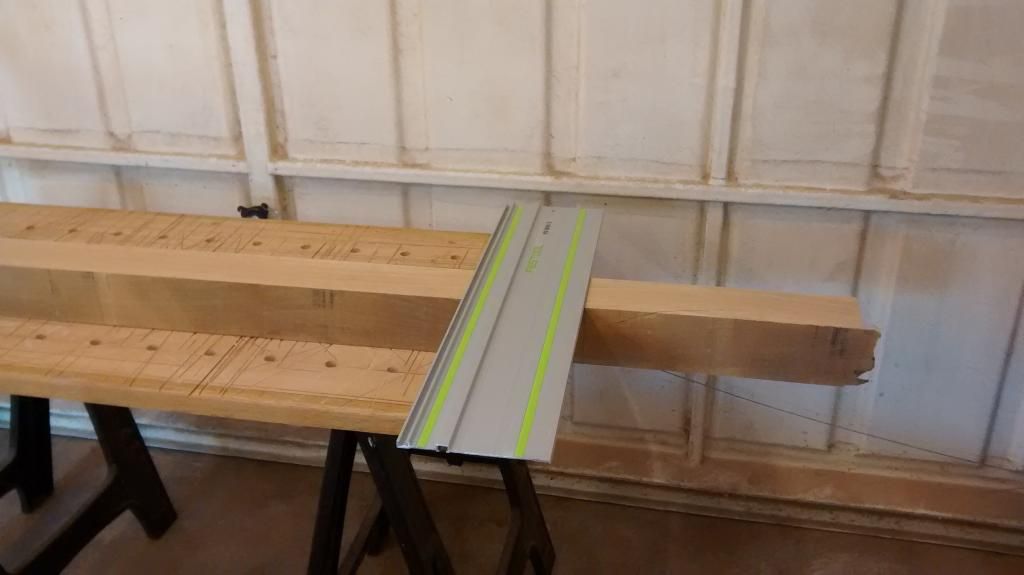
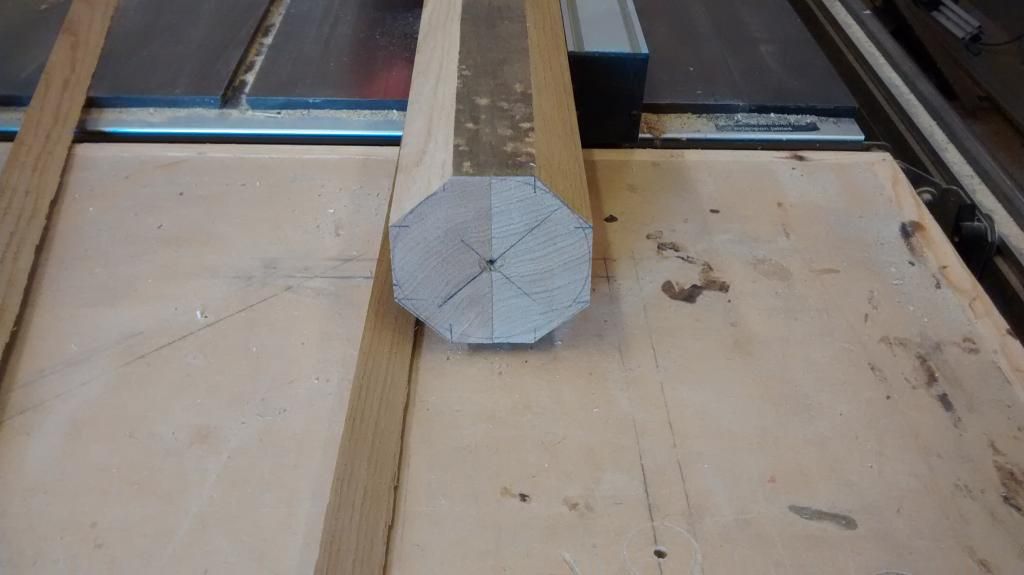
For the curves I'm using a 100mm x 100mm piece which will be rounded and then quartered.


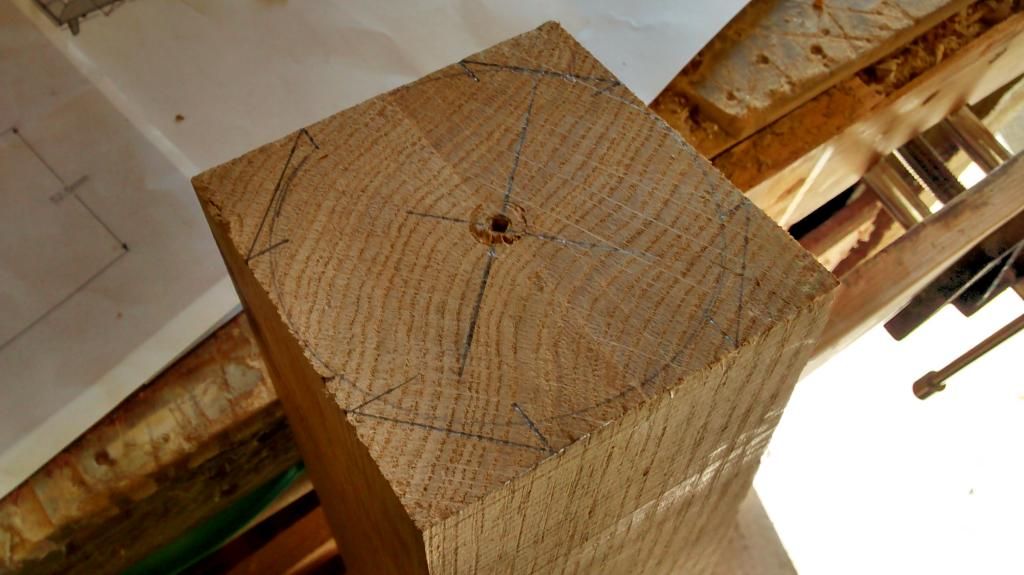
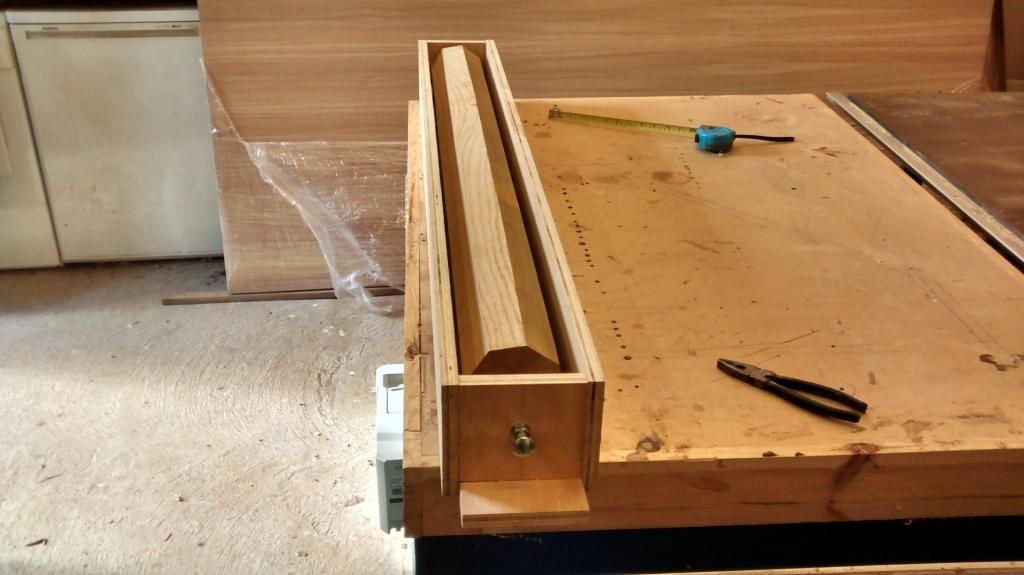
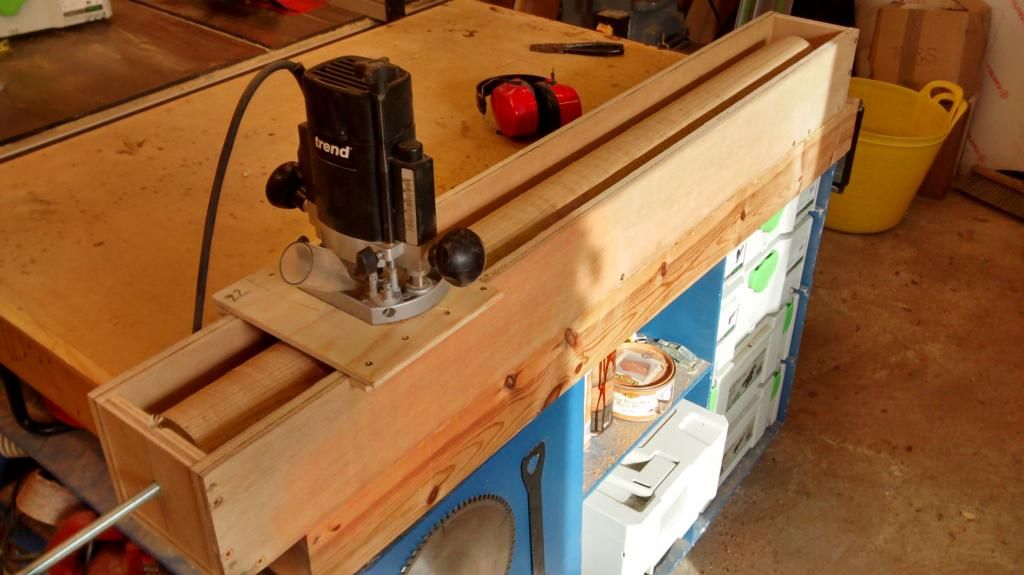
As I don't have a lathe I used a router jig to make the cylinder:


Good video of the jig here:

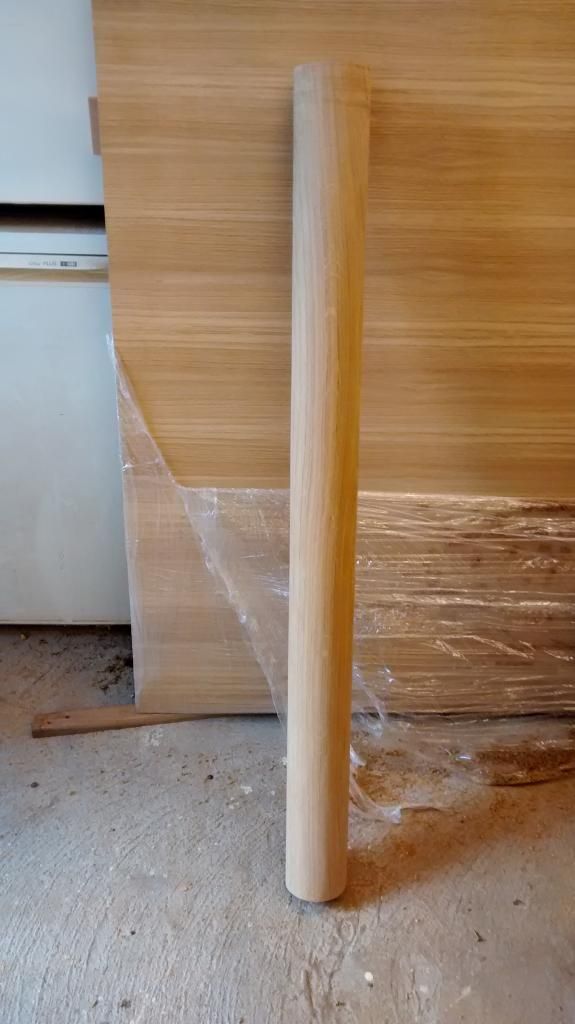
I then used the Rotex to smooth it out, just keep it moving to avoid flatting the cylinder and ended up with:


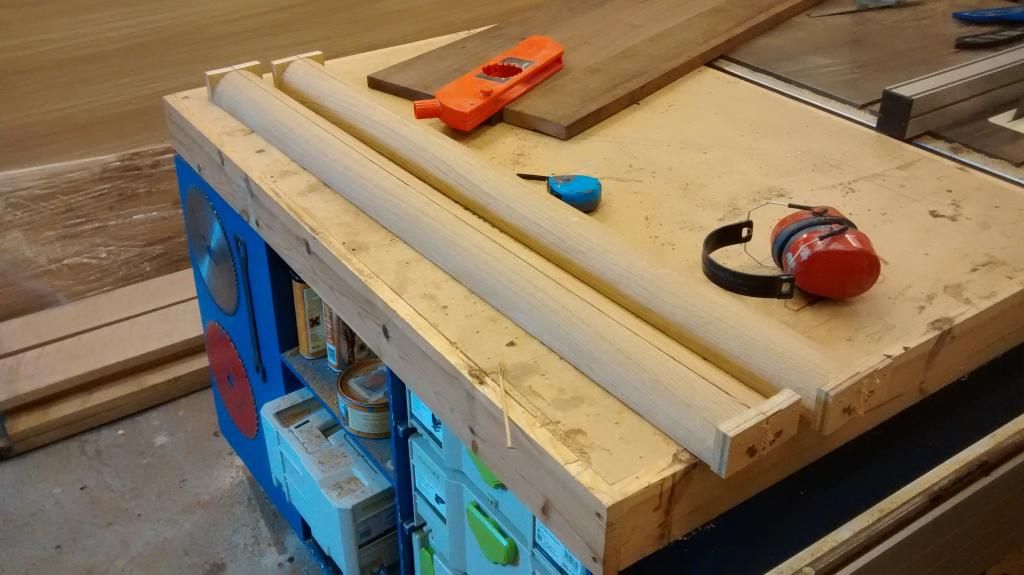
I then fixed on some end blocks and quartered the cylinder into quadrants with the TS:


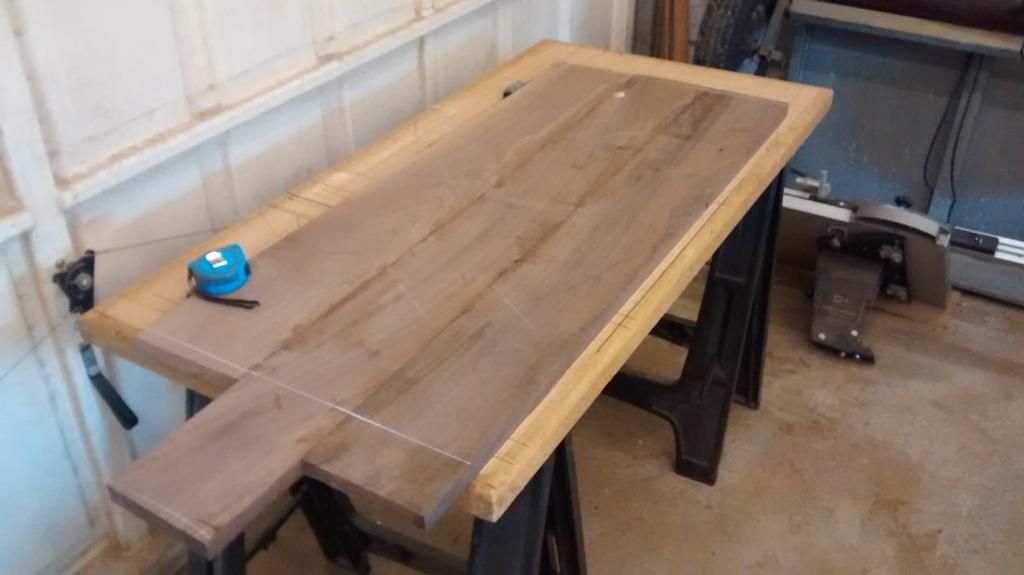
And that was as far as I got in 3-4 hours this afternoon. Tomorrow I'm hoping to get the base of the unit made and the sides and back on. The only really tricky bit is truing up the quadrants on the planer (jointer for americans) to ensure the corners of the unit do end up as 90. I've got the most beautiful pieces of ABW for the top and am really looking forward to getting it finished and seeing the oil go on! Here it is from a few days ago. I've since ripped off one of the boards as its a little lighter than the other two. I'll replace it with a new darker one I've had delivered.


Very cool. That why I love the fog so many crazy jigs and experience is shared. Will definetly make one not sure for what project yet but sure I will find one.
 
I think it would also work really well to power sand the cylinder if you moved it up to the top holes and spin it then hand sand the cylinder for grain direction sanding. Just a thought.
 
That is a great use of your tools.  Can't wait to see the project finished.
 
Long time no update, but I have still been doing a little on this and hope to have it mostly finished by the end of the weekend.

Firstly I didn't use my router lathe created quadrants. I found that there was a 1-2mm difference in diameter between each end and then when cut on the table saw they just weren't accurate enough for the corners of the unit. I also found that even if they were good I couldn't apply any decent clamping pressure to the quadrant. All good lessons learned! I instead used 50x50mm pieces, glued them up, took off the majority with the table saw on bevel and then used my LN planes to round it over and finally sand it smooth. Worked really well:


I've used veneered MDF for the interior surfaces with a little bit of oak as glued on and planed down, no contruo here.


The same issue with the rounded sides make it difficult to clamp up so I used a pair of ratchet clamps:


The doors have been made up and I will hang them and round them tomorrow. Then top on and final clean up, feet morticed on and it should be ready for finish. I'm most looking forward to getting the top on as its a lovely piece of ABW.

Thanks for reading.
 
I was wondering how the quartering was going to work, as I've tried it before and just couldn't hold the accuracy. I see that you had the same issue. I'm sorry it didn't work for you either. It sounds good in theory though, doesn't it?

:-)

Nice job on the hand planing! I am not skilled enough to do that. I think I would have ended up spending $$$ on a big ole shaper bit to do the job.

I'm a big fan of mixing oak and walnut, and now I am anxious to see the finished result as well. Please be sure to post it!

 
Yeah it did sound good in theory. The redeeming factor is that I can use the jig for table legs or something in future. The hand method is pretty quick. Obviously if you had a load to do the shaper/spindle would be the way to go.

Some more progress, doors and feet on:

No drill press so router for the 35mm cup holes.


Doors on, need shaping and trimming in.


Bulk of the material taken off on the table saw:


Initial hand planning:


A 22mm deep mortice for the feet:


Getting there:


Just the top to trim and fit and then final sanding and it'll be ready for tung oil and wax.
 
Lookin' good, Chems! Keep those photo's coming...
 
Excellent step-by-step technique.

That walnut veneer will look great when finished.

neil
 
Thanks guys, I'll get the final photos this weekend when I finish it up.

@Neil, the walnut is all solid. Just veneer on the oak internals,  shelves and back panel.
 
Very nearly done. Took me hours to fit the doors for a perfect gap in the middle and neat on the edges. No more progress until I get some more pads for the rotex to get it ready for finish.

Fitting the push to open.


Top screwed on from beneath then traced the shape ready for trimming to size. TS55 and carvex make quick work of that.

Once it was on I flushed it right to the body with the rotex.


Got some lovely tear out on the walnut top so need to restock on some brilliant2 pads to sort it out. Walnut panels are always tricky I find. The grain is just so interlocked and switches direction it's impossible to plane I find.
 
Final installment:

Setup my router table, not quite the CMS but works fine to make some beading for the edges of the shelves. I should have rebated the shelves into the uprights for a really neat finish but I didn't!


Reinforcements arrive in the week in the shape of 100 x brilliant 2 80g pads an another 50 x 150g pads. With its new pads the rotex got the top smoothed out. I took it off an applied a coat of danish oil to the bottom to hopefully avoid any bowing. Then I applied the danish oil to the top wiped it down and sanded it with 320grit to fill the open grain of the walnut. No pictures of that as my hands were too messy! Then I appled a single coat of tung oil to all the oak and wiped/buffed it to a smooth finish. Finally a coat of clear black bison wax to the top to give it some extra sheen.

Excuse the darkness, its not dried off yet:


It's off to its new home tomorrow, thanks for reading!

 
I really like that chems

Nice clean lines

Just being nosey .did you make it for yourself ?and what's it to be used for ?
 
Thanks guys.

I didn't make it for myself. For a lady who commissions intresting pieces that I make when I can. Its gone in an alcove and will be used to store bedding.
 
Ah that makes sense will be perfect for that .

Makes me want to build stuff .seem to spend all my time getting workshop ready
 
Gotta have a good shop. I'm a bit the opposite, anything made for the shop is rushed or doesn't happen. I've vowed that my next project will be a big roubo style workbench.
 
Chems said:
Thanks guys.

I didn't make it for myself. For a lady who commissions intresting pieces that I make when I can. Its gone in an alcove and will be used to store bedding.

Can I ask what you charged for it? I'd like to start accumulating ideas of things I can build on spec and what to charge for them.
 
Back
Top