Paul Marcel's MFT 1080 video has some great ideas. Don't know how many folks here still use this table instead of the MFT/3, but I do. I only recently found the "half-inch shy" videos and loved the idea of increasing cutting capacity by eliminating the protractor head. I happened to have two complete sets, so I had the required two stops for the back fence.
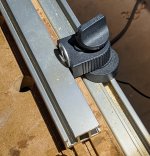
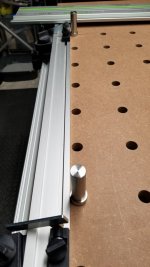
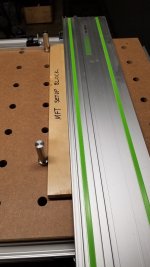
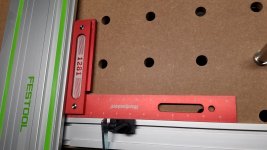
However, I didn't like that the fence wiggled up and down. Going through all the old threads on this, Paul said that he had never had the fence move out of alignment, even though it wiggled up and down. I played with it last night, trying to find a way to firm up the grip, and I stumbled upon one. If you put a 1/16" spacer between the back of the fence and the stop, it will force the front of the fence down to the table. It is absolutely rock solid and completely non-destructive to the components. I used a 3/8" flat washer on both stops and my rail is now flat on the table and completely secure. I'll be making a more elegant 1/16" spacer to replace the washers...probably mill down some phenolic.
However, I didn't like that the fence wiggled up and down. Going through all the old threads on this, Paul said that he had never had the fence move out of alignment, even though it wiggled up and down. I played with it last night, trying to find a way to firm up the grip, and I stumbled upon one. If you put a 1/16" spacer between the back of the fence and the stop, it will force the front of the fence down to the table. It is absolutely rock solid and completely non-destructive to the components. I used a 3/8" flat washer on both stops and my rail is now flat on the table and completely secure. I'll be making a more elegant 1/16" spacer to replace the washers...probably mill down some phenolic.