Old tool cases to Systainers

Sign Guy

Member
Joined
Nov 25, 2013
Messages
11
Thanks to all who welcomed me....
(free keg of homemade T-Loc IPA brew headed your way)
.
I should have qualified above that I'm focusing on storage only. No Festool tools at this time.
I already own most tools, hence, only drooling over the Festool tool product line.
That said, I have many custom cases to convert.
.
To wet your whistles start by showing a few in no particular order .....
.
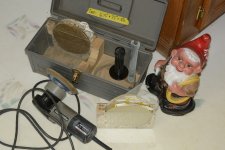
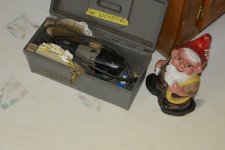
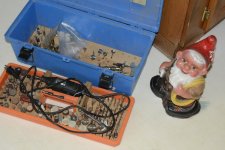
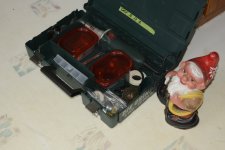
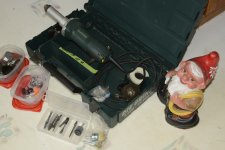
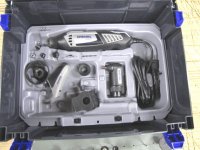
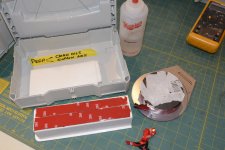
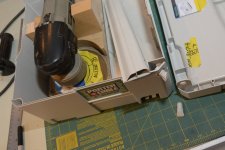
Tool:        6" random orbit Porter Cable
History:        light regular use since '92 - has seen -10 °F - 100 °F
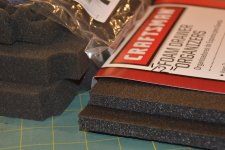
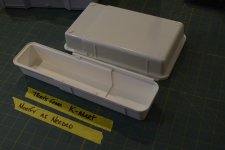
Current Case: embossed, Craftsman - fitted 10 years ago
Notes:      ) wish I had a dime for every psa disc that's been on it
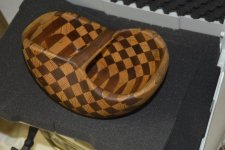
                ) the dopey disc holder is awesome
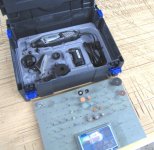
Target case: SYS 2 - note the 8" ht -


Attachments

  • _FSC1826.JPG
    _FSC1826.JPG
    608.7 KB · Views: 1,423
  • _FSC1829.JPG
    _FSC1829.JPG
    492 KB · Views: 1,236
  • _FSC1828.JPG
    _FSC1828.JPG
    448.2 KB · Views: 1,256
Tool:        common Dremmel
History:        light regular use since '80's - has seen -10 °F - 100 °F
Current Case: screened - Builder's Square - fitted 15+ years ago
Notes:      ) currently an OK system
                )
Target case: ?
 

Attachments

  • _FSC1740.JPG
    _FSC1740.JPG
    733.6 KB · Views: 1,425
  • _FSC1830.JPG
    _FSC1830.JPG
    631.8 KB · Views: 1,257
Tool:        (2) camera bodies, (3) lenses, flash and smalls.
History:        daily use for business - any hot mature who will look at me - front row center for Ted each year
Current Case: Lowe bag - no issues
Notes:      ) Will NOT use dopey Kaizen foam. Case must look clean.
                )
Target case: SYS 2 Vari - may use som, all, or none of the Vari guts. Have to analyze the foam when it arrives.
 

Attachments

  • 190_0172.JPG
    190_0172.JPG
    124.4 KB · Views: 1,249
  • _FSC1737.JPG
    _FSC1737.JPG
    503.2 KB · Views: 1,191
  • _FSC1738.JPG
    _FSC1738.JPG
    801.3 KB · Views: 1,297
cool gnome.

i recently got a drawer systainer, the large one, from lee valley to go with my 10 or so other systainer boxes, sys cart, etc.
i found it even better than i thought it would be- super useful, well thought out.
basically all of my small tools specific for the cabinet making end of things fit in the drawers.
not cheap, but i recommend considering one.
 
thank you up there "panelchat"
.
Labels: have started laying them out even though I aint got any systainers yet !
At this time I have (1) only $50 tote tray.
(10) stytainers are on the way as well as a starter of open and closed cell foams.
I am in the graphic business so licensed logos are easy to steal. I meant available.
If ya look close there is a "common template" to adhere to. At least at this point.
Probably spent a whole day on those dopey labels already.
 

Attachments

  • _FSC1895.JPG
    _FSC1895.JPG
    741 KB · Views: 1,084
  • _FSC1896.JPG
    _FSC1896.JPG
    752.5 KB · Views: 1,015
Tool:        Variable Speed Die Grinder
History:        occasional use - 1 yr old
Current Case: embossed, Metabo - EBay Case that sorta fits
Notes:      ) not bad as is
                )  hog out a lot of holes with it
Target case: ? 19" x 12" x 4" currently - begging for foam
.
am i boring anybody?
.
Hello? Hello?
 

Attachments

  • _FSC1820.JPG
    _FSC1820.JPG
    488.4 KB · Views: 1,110
  • _FSC1819.JPG
    _FSC1819.JPG
    539.3 KB · Views: 1,148
Try this for your Dremel. This is in a Sys- II.

[attachimg=#]    [attachimg=#]

[attachimg=#]    [attachimg=#]

Seth


Attachments

  • IMG_3564.jpg
    IMG_3564.jpg
    78.6 KB · Views: 3,001
  • IMG_3565.jpg
    IMG_3565.jpg
    101.3 KB · Views: 2,955
  • IMG_3572.JPG
    IMG_3572.JPG
    96 KB · Views: 3,275
  • IMG_3574.jpg
    IMG_3574.jpg
    33.2 KB · Views: 2,912
For the PC sander you mention  "note the 8" height" . Not sure of your planned layout but the Sys - II is 6" tall and the Sys- III is 8" tall. 

Seth
 
Sign Guy said:
Tool:        (2) camera bodies, (3) lenses, flash and smalls.
History:        daily use for business - any hot mature who will look at me - front row center for Ted each year
Current Case: Lowe bag - no issues
Notes:      ) Will NOT use dopey Kaizen foam. Case must look clean.
                )
Target case: SYS 2 Vari - may use som, all, or none of the Vari guts. Have to analyze the foam when it arrives.

You might want to look at some of the things guys on this forum have done or google Kaizen foam images and look at that. Done with some care and craftsmanship this can have an extremely professional and clean look not dopey at all.
 
"... or google Kaizen foam images and look at that....."
Yes Uncle Joe i did. That's the problem. I have yet to see a single "clean" project.
The best argument against K-Foam is their own website.
Most inserts look like they were cut/ peeled at a camp for special kids.
I have watched a dozen or so You Tube videos peeling the stuff from gun cases to tools.
One video made me spit coffee on my screen.
.
To keep it nice and humor Uncle Joe,
That stuff may be fine your rusty farm tools at "Shady Rest Hotel, Hooterville".....  but I prefer to shop in "Pixley" for clean separate layers and (try to) laminate myself.
...
For the record Uncle Joe I knew I liked matures at an early age. How are the girls?
 

Attachments

  • p2.jpg
    p2.jpg
    9.3 KB · Views: 997
  • P Junction.jpg
    P Junction.jpg
    76.1 KB · Views: 1,326
Guilliaume woodworks said:
... I'm anxious to see if ,Sign Guy, has any skills at all...or just good at rambling his mouth

correct. proof is always in the pudding.....and galleries? - anyone can talk or slap woodworker on the end of their name.
wish me luck on the cases. just wantin good lookin cases.

cheers - cold drink your way
 

Attachments

  • _FSC1912.JPG
    _FSC1912.JPG
    332.9 KB · Views: 1,001
gotta admit I am new to clean cases. Heck, my background is just birdhouses !
I have never made a dime in the woodworking trade.
I genuflect to the real guys. With real Festools.
keeping it nice.....
we all seek accuracy and clean work?
coopering (barrel staves) is one test of that.
consistent inside is a good test for beginning woodworkers.
Still have the original magazine issue from around '87 showing how to turn those.
Have made 50 or so of those.
let them air out for 2 years prior to hanging due to fumes from finish.
sorry to bore......
 

Attachments

  • _FSC1908.JPG
    _FSC1908.JPG
    529.2 KB · Views: 1,055
  • _FSC1904.JPG
    _FSC1904.JPG
    649.6 KB · Views: 1,076
  • _FSC1900.JPG
    _FSC1900.JPG
    536.7 KB · Views: 1,004
  • _FSC1899.JPG
    _FSC1899.JPG
    709.5 KB · Views: 1,082
Guilliaume woodworks said:
....maybe Sign Guy has two good skills.
3 actually - peanut bowl on lathe
yes it was made almost entirely on a lathe.
 

Attachments

  • _FSC1944.JPG
    _FSC1944.JPG
    614.2 KB · Views: 1,047
back to cases...
photo 1) my order came in fellers, woot woot
.
photo 2) SYS 2 Vari - mystery solved on what foam comes in it.
              Sorry, the catalog isn't clear and neither of our local dealers has one on display to touch/ feel. Not complaining.
              For those who haven't touched one, the center pair are one type of foam and the bottom is similar but different cell structure.
              Each is a soft durometer. Center pair is pluck the entire thickness and bottom non-pluck.
              For a 20v drill you want firmer. For a drill charger its about right.
Note 1: bottom is cut differently due to molded shape of case sides and rear ribs.
Note 2: center ones will fit in button with a few minimal knife work. (1) beverage job for the uber-anal among us.
Note 3: my center pair aren't cut consistently. the draft angles on the sides are wopper-jiggy
Note 4: the bottom does not have the "X-shapped" relief cutout as seen on some Tanos photos.
.
photo 3) SYS 1 Vari - as above - less off (1) center layer
.
photo 4) foam kit - mystery solved again. Catalog unclear on density. 
            Same as what comes in a Vari. This foam is the same as description above.
.
photo 5) foam kit - mystery solved again. Catalog unclear on density.
            This foam is the center pair of a SYS 2. Both soft.
Note: this pair is cut clean and stacks. They are book matched. Unlike my pair above. ACHTUNG ! 
.
photo 6)  discontinued - bottom - I ordered one to solve the mystery.  Dealer says discontinued.
              Catalog and website show it ? but even still description on density should be clear.
Note: Have to guess that others might want a firmer density bottom option. Seems reasonable to need one.
          Time to figure out Tanos mysteries.
.
photo 7) Craftsman foam - this is a medium density - closed cell in nature - $10 yields 2.0" (four 1/2" layers) in a Sys
              Might make a nice foam bottom in a Maxi?


Attachments

  • _FSC1950.JPG
    _FSC1950.JPG
    717.1 KB · Views: 1,054
  • _FSC1952.JPG
    _FSC1952.JPG
    748 KB · Views: 1,085
  • _FSC1949.JPG
    _FSC1949.JPG
    644.8 KB · Views: 1,018
  • _FSC1951.JPG
    _FSC1951.JPG
    657.8 KB · Views: 982
  • _FSC1939.JPG
    _FSC1939.JPG
    471 KB · Views: 1,056
  • _FSC1938.JPG
    _FSC1938.JPG
    554.1 KB · Views: 1,105
  • _FSC1934.JPG
    _FSC1934.JPG
    501.3 KB · Views: 1,113
In photo 2.... What are the  3 stacked boxes with clear tops in the background.? The new sys tool box?
Re: photo 1....the sexiest thing Peoria has seen since......aww heck, sexiest thing Peoria has seen, ever.
  The craftsman foam looks interesting.
 
Tool:        multimeter - Fluke 76
History:        ~20 yo
New Case: Mini
Mods:      ) acrylic manual holder
                ) modded KMart tray
.
photo 1) before
.
photo 2) after
.
photo 3) KMart tays
notes: sanded bosses on bottom, narrowed sides, height is perfect
.
photo 4) 3M VHB tape
notes: lacquer thinner prep, tray aint goin anywhere soon
.
photo 5) acrylic holder for original manual,
.
Hours: 2 hours on case,  2 hour on labels
Beverage Rating: 4 if at night
 

Attachments

  • manual holder.JPG
    manual holder.JPG
    355.1 KB · Views: 950
  • tape apply.JPG
    tape apply.JPG
    640 KB · Views: 1,049
  • kmart trays.JPG
    kmart trays.JPG
    417.1 KB · Views: 1,062
  • after.JPG
    after.JPG
    517.8 KB · Views: 1,204
  • before.JPG
    before.JPG
    534.7 KB · Views: 1,051
project:        Label making
Hours:  ~12+ includes creating template size, sourcing the mfr logos, cad work, printing, laminating and trimming.
Cost:  $10 of stuff on hand and 12 hours lost customer work.
.
photo 1) applied a few labels and they look OK. Great Festool cases deserve a decent label.
.
photo 2) shows the laminate used for front of label and rear psa options.
notes: everything was on hand and have made similar before.
.
photo 3) midstream photo - there is nothing glamorous about making labels and its tedious.
.
photo 4) scanning O.E.M. labels - I scanned a few for the heck of it. Doubt I will use them.
              Basically peel the original case label off slowly➞lay on scanner➞import to P.C. ➞ save as .eps
.
Notes: If I had someone else make these and they said they had 12+ hours in them I might have asked
            what they did for the last 8 hours, but the labels don't jump on the cases.
.
time to get back to real work. . . . . .
 

Attachments

  • results.JPG
    results.JPG
    445 KB · Views: 1,124
  • 2 face tapes.JPG
    2 face tapes.JPG
    691.3 KB · Views: 1,023
  • trimmings.JPG
    trimmings.JPG
    724.9 KB · Views: 3,717
  • scand orig  labels.JPG
    scand orig labels.JPG
    746.9 KB · Views: 1,091
Project:        6" random orbit sander
.
Notes: just getting starting...stroking my new SYS 2 - scratching my chin how to cram
a 5.50" tall sander inside with only about 5.12" available in rear...yada yada...fumbling with the lid
when Shop Gnome walks in w/ fresh coffe and says "hey stupid, why don't you take the lid off first....."
 

Attachments

  • remove lid pins.JPG
    remove lid pins.JPG
    579.7 KB · Views: 971
old-tool-cases-to-systainers


I like your sense of humor Sign Guy!
 
Back
Top