Simple Present Ideas - Videos

Stone Message

Magazine/Blog Author
Member
Joined
Apr 13, 2011
Messages
4,550
Hi Everyone

I know that Christmas is a long way away but presents are needed all the year around. So...

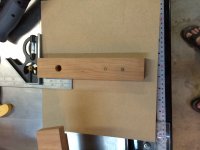
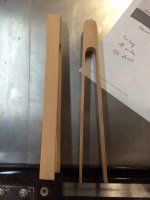
I have put together a pair of videos showing four very simple, easy to make, ideas. They are aimed at the "confident DIY" standard person who might be forgiven for spending so much on all of those tools by giving their loved one something that they have made especially for them.

The presents that people remember most are the ones that have been made by the giver, no matter what standard has been achieved.

Here are the links:

Present Ideas #1-3:


Present Idea #4:


I may make some more of these later in the year.

Peter
 
nice work peter! i was thinking of what i could do with the left over jarrah from my deck
 
Great fun to watch and very nice ideas, thank you!!

I also like this quote,

The presents that people remember most are the ones that have been made by the giver, no matter what standard has been achieved.

Which I is quit true I think, look what I got for fathersday  [smile] !!

[attachthumb=#]
 

Attachments

  • WP_001750.jpg
    WP_001750.jpg
    1.6 MB · Views: 158
NL-mikkla said:
Great fun to watch and very nice ideas, thank you!!

I also like this quote,

The presents that people remember most are the ones that have been made by the giver, no matter what standard has been achieved.

Which I is quit true I think, look what I got for fathersday  [smile] !!

[attachthumb=#]

Perfect.

Every year we put the Christmas decorations on our tree that our children made when they were little  - it gives me great joy to see those wobbly bits of cardboard and plastic there every year. The family are also very kind about some of the rubbish that comes out of my workshop.

Peter
 
Peter

Did you get the CMS router table recently, I remember your video about the other you had.

Bruce
 
BMH said:
Peter

Did you get the CMS router table recently, I remember your video about the other you had.

Bruce

Hi Bruce,

I have had the CMS-OF for quite a while but it has just not managed to get a starring role before. I have always been used to two router tables (check my early videos) - I had one big solid one and another that sat at the end of my MFT3. I like to be able to do two operations, one after another, hence the two tables. The UJK table, with the cast iron top, is a super solid bit of kit and is used for the bigger jobs. The CMS-OF could handle anything thrown at it but tends to be used for the finer work - I can move it around the workshop very easily.

Peter
 
HI Peter,

Being on vacation in south of France I had the chance to go over some of you prior videos that I miss and see the advantage of two routers tables. Maybe one day when I have a bigger shop I will splurge and get a second one, my next buys is going to be a band saw and a jointer plus a domino 700 and a conturo when available in USA.

I recently discovered Osmo oil, it was secondary to installing live edge Oregon black walnut floating shelves in our new kitchen. Osmo being non toxic and food compatible was perfect. I followed up recently with walnut bed frame for my daughter and was not as happy.  I had a little over build up of wax in certain areas of the frame and I was following the manufacturer recommendations. I found this video on a different way of applying Osmo that made more since to me and kind of reminded me of the surfix system. I don't know if you ever tried it. As I live in the USA we don't have much experience using this product but being from Oregon we are into enviromental safe products and be happy to hear your thoughts on it.

Bruce
 
BMH said:
HI Peter,

Being on vacation in south of France I had the chance to go over some of you prior videos that I miss and see the advantage of two routers tables. Maybe one day when I have a bigger shop I will splurge and get a second one, my next buys is going to be a band saw and a jointer plus a domino 700 and a conturo when available in USA.

I recently discovered Osmo oil, it was secondary to installing live edge Oregon black walnut floating shelves in our new kitchen. Osmo being non toxic and food compatible was perfect. I followed up recently with walnut bed frame for my daughter and was not as happy.  I had a little over build up of wax in certain areas of the frame and I was following the manufacturer recommendations. I found this video on a different way of applying Osmo that made more since to me and kind of reminded me of the surfix system. I don't know if you ever tried it. As I live in the USA we don't have much experience using this product but being from Oregon we are into enviromental safe products and be happy to hear your thoughts on it.

Bruce


Hi Bruce

It was hard work watching all 27 hours (it seemed) but I got there...

I think that the method shown is excellent. I used to teach French polishing and I have often mentioned that I use similar techniques with Osmo - building up in thin layers. I like the idea of the white pad and will try and find some in UK.

What the video makers do not know is that Osmo has recently started shipping a new product - PolyX Gloss (product code 3011). I have just used it for my pedestal desk and I am really pleased. I would normally French polish an item like that but the new PolyX Gloss gives an excellent result in less that 90 minutes (two lots of 45 mins) for the whole desk. It is not as shiny as new French polish but has a sheen that older French polished wood will have after it has been lovingly polished for a few decades.

Here is a shot of the desk:

[added later]
I have just spoken to the marketing director of the UK arm of the French parent company who make that white applicator pad and should have a sample piece in the next week or so. I will let everyone know what it is like and try and get some stockist details for everyone.
 

Attachments

  • Walnut Desk- email.JPG
    Walnut Desk- email.JPG
    965.7 KB · Views: 243
The tongs are a great project to the many cutoffs we end up with...

Thanks
 
GPowers said:
The tongs are a great project to the many cutoffs we end up with...

Thanks

I forgot to say in the video (but it is obvious) that you can scale them up to BBQ tong size - I have some somewhere.

Peter
 
Hi peter,

Good interview plan and editing is the key to a successful video and we are spoiled with the work you and other share on this forum. I call it the festool effect, faster better, smarter.

It is hard to judge on a picture ( very nice desk by the way) the sheen, but I am very familiar with that older French polish wood look as I was raised in France with furniture from 1670 to 1950. I have been trying different stains and oil but decided in the past days, that I need to concentrate on one line of product and try to master it. Osmo is going to be it and wii use my lot of small cut off pieces of solid wood and plywood with different veneer to experient with. If you can send me the name of the product French name I would be grateful and will try to buy some before leaving France.

Bruce

 
BMH said:
Hi peter,

Good interview plan and editing is the key to a successful video and we are spoiled with the work you and other share on this forum. I call it the festool effect, faster better, smarter.

It is hard to judge on a picture ( very nice desk by the way) the sheen, but I am very familiar with that older French polish wood look as I was raised in France with furniture from 1670 to 1950. I have been trying different stains and oil but decided in the past days, that I need to concentrate on one line of product and try to master it. Osmo is going to be it and wii use my lot of small cut off pieces of solid wood and plywood with different veneer to experient with. If you can send me the name of the product French name I would be grateful and will try to buy some before leaving France.

Bruce

Hi Bruce,

Osmo is Osmo all over the world. The best subtle sheen for a modern look is with PolyX but for a deep finish (like French polish after 50 years of loving care) try PolyX Gloss which I have used on the walnut desk.

Peter

[more info...]
I have continued to research the applicator idea and have also discovered that 3M make a something that looks suitable. 3M are sending me a sample and I will report back on that as well as the other.
 
Peter- Tried the tongs and something I did was incorrect - Any ideas are appreciated.

Cut the piece to size
drilled the center
mounted on the mdf
2 1/2 degree cuts - right side was not the same thickness
tried to trim it up to match - that's when it decided to break apart

Thanks,
Frank
 

Attachments

  • tongs 3.JPG
    tongs 3.JPG
    503.1 KB · Views: 170
  • tongs 5.JPG
    tongs 5.JPG
    503.1 KB · Views: 173
  • tongs 4.JPG
    tongs 4.JPG
    564.9 KB · Views: 175
  • tongs 2.JPG
    tongs 2.JPG
    544.4 KB · Views: 158
  • tongs 1.JPG
    tongs 1.JPG
    479.2 KB · Views: 161
Hi Frank,

I am not certain what went wrong but...

When I was planning the very first cut I took account of the saw kerf and the need for about 3 mm of thickness to the long part of the tongs. In my case that meant that my outer cuts only just started at the end of the wood nearest to you when making the cut.

The screws must be holding the wood to the MDF nice and tight.

Everything should be symmetrical if your 15 mm forstner hole is central.

The second cut on each side (the one that parts off the long part of the tongs) should not break into the 15 mm hole. It should leave about 0.5 mm of material. After these second cuts you should have to do another cut to separate the small piece needed (that goes between the long tong pieces) from the remainder of the lump of wood.

In every case when sawing you must allow the Kapex blade to come to rest before raising it up or backing it off after the cut - this is probably the most likely cause of the problem. The MDF (and the wood screwed to it) must not be allowed to move at all during any cut - clamp it in place if necessary.

In at least one of your pictures it appears that the cut did not go all the way to the back of the stock - that should not be the case.

Remember that the wood is screwed to the MDF for your safety and therefore it must be secure. You must wear eye protection at all times and never allow your hands (or any other part of you) near that saw blade.

Take care - and if you feel worried do not try to do this again.

Peter
 
Peter
I believe it was not tight enough and I should have used 3/4 MDF instead of the 3/8 scrap I had. I also didn't eyeball the first cut accurately. Rewatched the video and was successful - I also made the blank a little wider - 1st try was 1 3/4 and the next one was 2inches wide.

Thanks
Frank
 
Zacharytanner said:
Peter
I believe it was not tight enough and I should have used 3/4 MDF instead of the 3/8 scrap I had. I also didn't eyeball the first cut accurately. Rewatched the video and was successful - I also made the blank a little wider - 1st try was 1 3/4 and the next one was 2inches wide.

Thanks
Frank

Well done Frank. Just watch those fingers !  Peter
 
First 2 sets in cherry - first coat of linseed oil

Thanks Peter for the tips

Frank
 

Attachments

  • image.jpg
    image.jpg
    635.8 KB · Views: 164
  • image.jpg
    image.jpg
    677.8 KB · Views: 148
  • image.jpg
    image.jpg
    780.9 KB · Views: 161
  • image.jpg
    image.jpg
    597.8 KB · Views: 171
  • image.jpg
    image.jpg
    757.8 KB · Views: 152
  • image.jpg
    image.jpg
    771.4 KB · Views: 177
Hi Frank

Now that looks like some fine work - well done. The only slight worry is that two of them look as though the grain is running across the long tong bit rather than along its length. If that is the case they will break - perhaps I am misreading the image.

Lovely work.

Peter
 
Back
Top