Simple Walnut and oak bookcase

Nice!  It would be kind of neat to use the knot in the bottom rail of the face frame as a hidden release button for a secret compartment under the bottom shelf. 

[smile]

 
Very nice bookcase.  I like the contrast between oak and walnut and use those two together often.

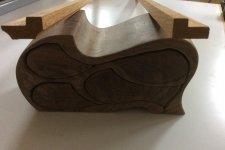
I don't know how wide it is, looks about a meter?  If so, you might want to reinforce the shelves to prevent sagging - depending upon what weight they will see.  I made a bookcase from oak a while back, about the same size, and used supports on the front and back of each shelf.....see attached photo.  These were a couple of extras left over, worst of the lot, now in the scrap bin. The left one goes on the front, obviously, that leaves the right one for the back.  The shelves sit of the rabbet and add strength to the shelves.  As can be seen, the left one that goes on the front is more decorative, and these are somewhat simple to make on a router table with a couple of bits.  Just something to consider....
 

Attachments

  • image.jpg
    image.jpg
    864.7 KB · Views: 314
A nice job. i like the contrast and the imperfections of knots and erratic grain patterns add to the interest.
I have some White Ash and some walnut on my rack and have used the contrast for several projects.  Mostly small up to cutting board and tray sizes.  The contrast is always great.  I also did Ash paneling in kitchen and bathroom with Red oak trim in kitchen and Walnut trim in bathroom.  the ash has darkened with age, but still looks great with contrast.
Tinker
 
Thanks guys, regarding the size, internally the shelves are around 750mm, I tend to use the sagulator with a pinch of salt when looking at spans and load and so this came up ok on that, had they been fixed shelves rather than adjustable I would of fixed/supported all round.
On a side note since this is the fog, unfortunately only the domino was used on this project for jointing of boards and joining of the cabinet, mt55 for ripping the boards, cross cutting and mitres done with handsaws, and routering for back board and shelf brackets done with router plane, also finished with cabinet scraper and hand sanding...went more back to basic with this one!
 
Back
Top