onocoffee
Member
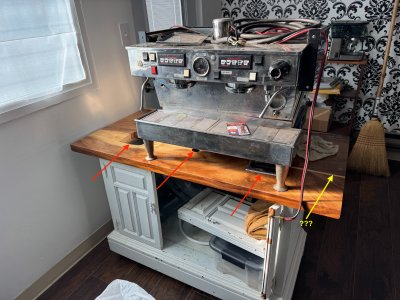
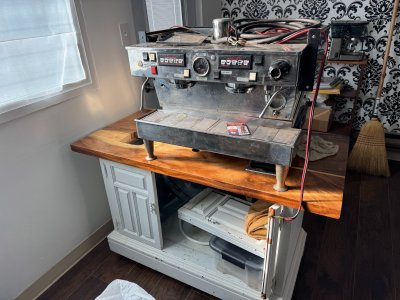
It's not going to be immediate but sometime soon I want to refinish the top of this coffee cart and fill in the void. I got it from a friend a couple years ago and it's been sitting in storage but soon it will be time for it to work. Looks to be a slab with some kind of thicker poly coating that looks and feels very plastic-y. I kinda hate it and would like to strip it and finish in something nicer - perhaps Waterlox Original.
Any suggestions on how to best remove the finish? And my friend had cut out a hole for a knockbox and I hate the hole too. Whats the best way to "fill" it with wood?
Thanks!
Any suggestions on how to best remove the finish? And my friend had cut out a hole for a knockbox and I hate the hole too. Whats the best way to "fill" it with wood?
Thanks!

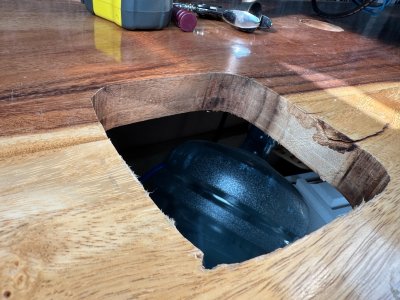
") I'd go for something in a circular form just to make everything easier. I'm not a coffee drinker so I don't know what type of accoutrements are used with one of these carts.
I'd go for something in a circular form just to make everything easier. I'm not a coffee drinker so I don't know what type of accoutrements are used with one of these carts.