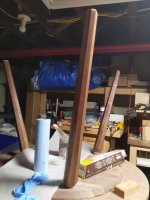
My brother and sister in law could use a new dining table for their condo in Brooklyn. They could have used it a couple years ago, too, but I work pretty slowly. It's not the biggest place, and having something that could accommodate a couple guests would be good. It would be nice if could also be easily moved, since it's a 4th floor condo and no elevator. I remembered seeing a cool table in Christopher Schwarz's book The Anarchist Design Book, where the legs joined the table through a fat sub-base and connected via 2" round tenons and corresponding mortises. The table was designed to be 'knock down' in the sense that the legs didn't have to be glued in. I also thought it looked pretty darn good and also appropriate for their use case. I sent a couple photos of it to my brother and he liked the idea.
link to the inspiration
Earlier this year, I got a decent sized (for me) stack of 5/4 and 8//4 walnut lumber from a local woodworker who had gotten some fallen trees milled and air dried them for the last year or so. Many of the boards are quite nice in terms of color and grain, though the presence of pith in a number of them is something I could do without (more on that later). The price was very good, so i bought more than I probably should have, but I'm glad I did as this let me be more picky about grain.
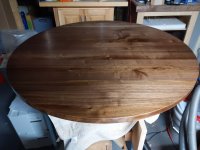
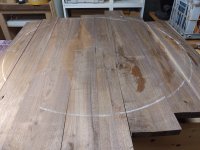
The top of the table is 1" thick and about 40" in diameter. Wide, and a bit awkward to handle, especially before cutting out the circle. I milled the boards down over a period of about a six weeks to 1 1/8" thickness (these were all roughsawn to a very fat 5/4, which gave me a lot of room ) - 3 milling sessions in total.
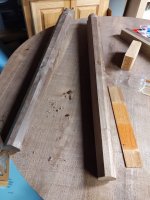
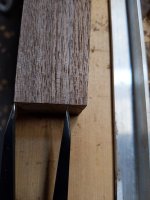
Here's what it looked like during the initial phase of layout:
[attachimg=1]
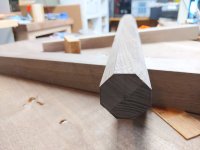
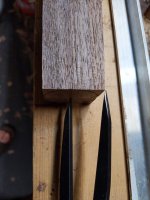
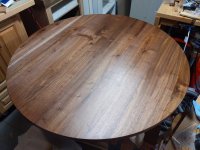
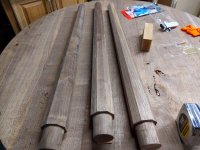
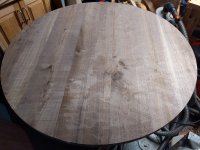
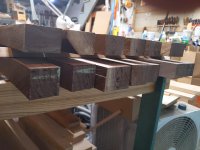
And then during a second pass:
[attachimg=2]
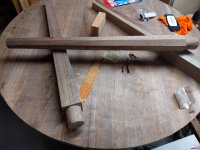
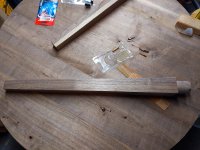
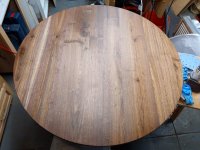
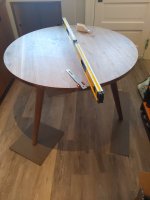
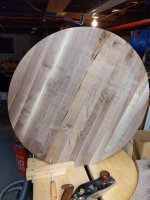
And finally:
[attachimg=3]
Obviously, this still needs to be smoothed out a bit, but I've gotten it very close to flat w/ my jack plane traversing and on the diagonal.
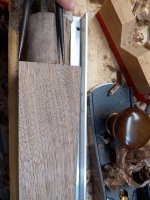
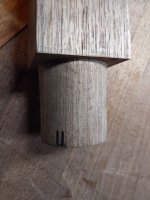
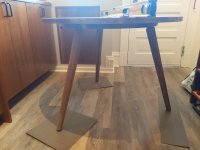
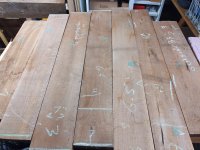
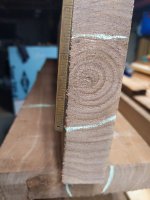
One small issue I ran into is that a fair number of the boards I was working with had the pith in them still.
[attachimg=4]
I know that some folks don't find pith in walnut to be a significant issue - it's not like red oak in terms of instability - but I wasn't comfortable with it, particularly on a table top where I'm hoping it stays relatively flat over 40" in every direction. So, I ended up 1) pulling some more boards and finding some other interesting pieces to use 2) finding pith in those as well, and cutting out the pith, sometimes at interesting angles relative to the initial rectangle I was working with 3) jointing and regluing those boards back together.
Incidentally, this much jointing (and at these lengths) has highlighted to me that my jointer plane is not flat. It's an old bedrock #7 with a new PM-V11 blade in it. It isn't out by a lot, but it's enough that I get a more concave edge with that than my low angle jack plane. I'm sure some of it is my technique, but I'd rather blame the tool.
Speaking of jointing, I also had the occasion to finally try the 'mirror cutting' technique I've read about on here. While most of the joints on the top are a mild spring joint, springing two 20" wide pieces of 1" thick walnut is difficult at best. The spring joints from the other boards also meant my jointed center seam was not quite right once I had glued the other sections together. So, I clamped everything snug and took a couple passes with a 28t blade. This worked out well! The joint wasn't perfect - just the slightest line compared to a hand planed joint, and I needed to use three clamps instead of one to get it closed all the way across (I'm becoming very conservative about clamping pressure, so I only tighten to where my fingers feel resistance -- no bearing down for me). When all was said and done, though, the joints look good to me.
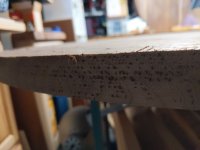
I cut out the circle using a quick home-brewed router jig (a scrap of plywood, a trim head screw, and a couple countersunk holes) and my OF1400 with a straight bit as well as a jigsaw to rough cut most of the waste of. This is an area where I did run into something new to me.. some very rough end grain tear out from the router.
[attachimg=5]
I'm not sure how I'm going to repair this yet. I don't think it's going to look right if I try to sand down the tearout, and I think epoxy would only highlight the pattern. In the past, I've done okay with using hide glue and sanding dust/saw dust to repair some pretty rough chip out, so I might go down that road. Perhaps someone on here will have a better idea. For what it's worth, I'll probably be finishing the table with a hardwax oil finish.
link to the inspiration
Earlier this year, I got a decent sized (for me) stack of 5/4 and 8//4 walnut lumber from a local woodworker who had gotten some fallen trees milled and air dried them for the last year or so. Many of the boards are quite nice in terms of color and grain, though the presence of pith in a number of them is something I could do without (more on that later). The price was very good, so i bought more than I probably should have, but I'm glad I did as this let me be more picky about grain.
The top of the table is 1" thick and about 40" in diameter. Wide, and a bit awkward to handle, especially before cutting out the circle. I milled the boards down over a period of about a six weeks to 1 1/8" thickness (these were all roughsawn to a very fat 5/4, which gave me a lot of room ) - 3 milling sessions in total.
Here's what it looked like during the initial phase of layout:
[attachimg=1]
And then during a second pass:
[attachimg=2]
And finally:
[attachimg=3]
Obviously, this still needs to be smoothed out a bit, but I've gotten it very close to flat w/ my jack plane traversing and on the diagonal.
One small issue I ran into is that a fair number of the boards I was working with had the pith in them still.
[attachimg=4]
I know that some folks don't find pith in walnut to be a significant issue - it's not like red oak in terms of instability - but I wasn't comfortable with it, particularly on a table top where I'm hoping it stays relatively flat over 40" in every direction. So, I ended up 1) pulling some more boards and finding some other interesting pieces to use 2) finding pith in those as well, and cutting out the pith, sometimes at interesting angles relative to the initial rectangle I was working with 3) jointing and regluing those boards back together.
Incidentally, this much jointing (and at these lengths) has highlighted to me that my jointer plane is not flat. It's an old bedrock #7 with a new PM-V11 blade in it. It isn't out by a lot, but it's enough that I get a more concave edge with that than my low angle jack plane. I'm sure some of it is my technique, but I'd rather blame the tool.
Speaking of jointing, I also had the occasion to finally try the 'mirror cutting' technique I've read about on here. While most of the joints on the top are a mild spring joint, springing two 20" wide pieces of 1" thick walnut is difficult at best. The spring joints from the other boards also meant my jointed center seam was not quite right once I had glued the other sections together. So, I clamped everything snug and took a couple passes with a 28t blade. This worked out well! The joint wasn't perfect - just the slightest line compared to a hand planed joint, and I needed to use three clamps instead of one to get it closed all the way across (I'm becoming very conservative about clamping pressure, so I only tighten to where my fingers feel resistance -- no bearing down for me). When all was said and done, though, the joints look good to me.
I cut out the circle using a quick home-brewed router jig (a scrap of plywood, a trim head screw, and a couple countersunk holes) and my OF1400 with a straight bit as well as a jigsaw to rough cut most of the waste of. This is an area where I did run into something new to me.. some very rough end grain tear out from the router.
[attachimg=5]
I'm not sure how I'm going to repair this yet. I don't think it's going to look right if I try to sand down the tearout, and I think epoxy would only highlight the pattern. In the past, I've done okay with using hide glue and sanding dust/saw dust to repair some pretty rough chip out, so I might go down that road. Perhaps someone on here will have a better idea. For what it's worth, I'll probably be finishing the table with a hardwax oil finish.
")