derekcohen
Member
- Joined
- Jun 22, 2008
- Messages
- 923
Not quite 4 weeks ago, a good friend, Rita, brought along an entrance hall table she wanted me to fit a drawer into ...
(Note that these photos were taken in my entrance hall, not Rita's).
It was really a boring ... okay, ugly table. I thought that the proportions were completely ugh, and the legs reminded me of detention in a classroom. The table had been a kerbside salvage by her late husband, a close friend of mine, and a very good woodworker in his own right. It had been used as a work table. Rita had just moved into a new home, and the table was used because the width of the top fitted an alcove in the entrance hall.
I said to Rita that I would re-build the table. "But I must have a drawer", Rita emphasised.
The wood was good Jarrah. The first step was to pull it apart. This was not so easy as simply unscrewing the clips for the top ...
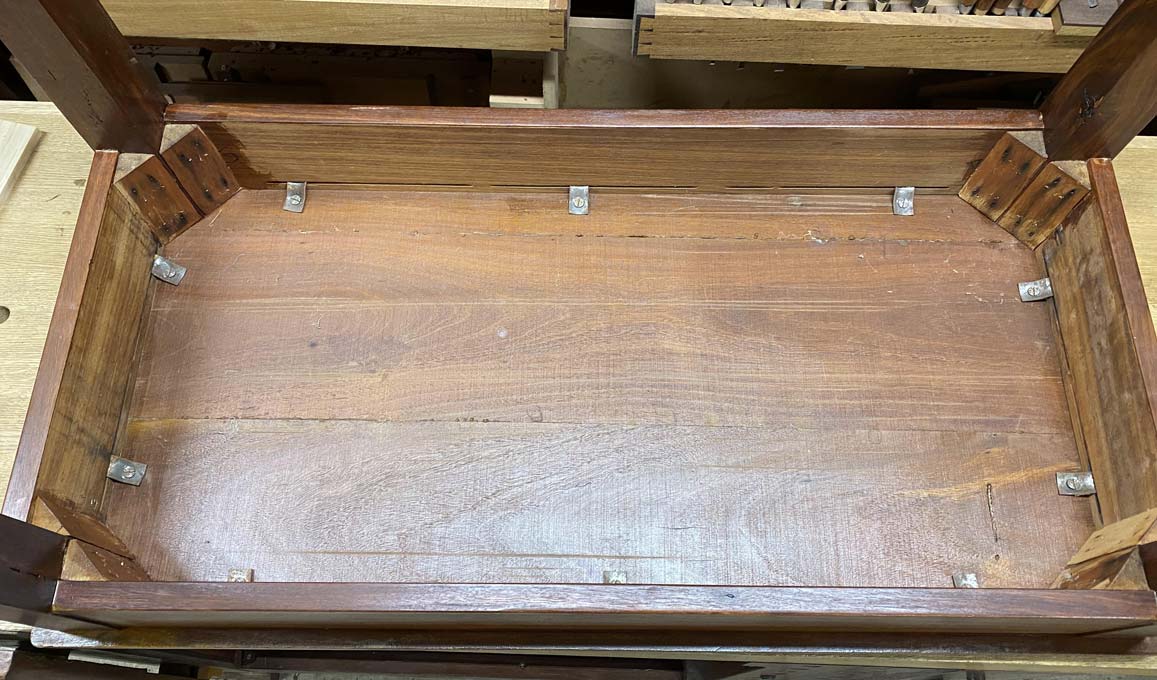
Some evil tablemaker had used a nail gun to attach the corner blocks. Pulling them out left holes in the legs.
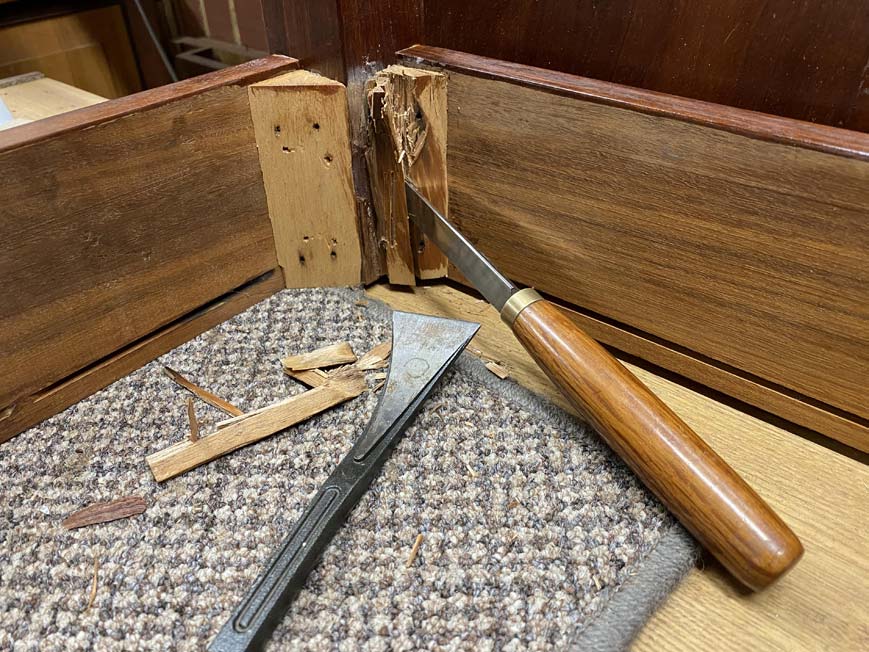
The legs were attached with dowels. I would never have guessed as the construction was very strong. Pulling them away caused some of the wood to tear along with it. No way to remove them other than saw the ends away.

Deconstructed ...
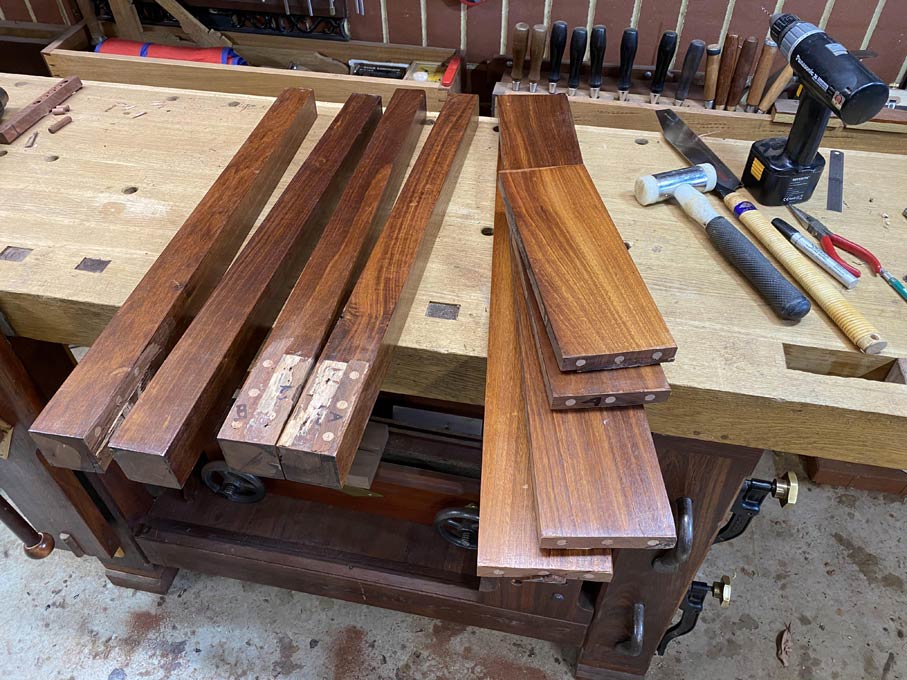
Let's begin again ..
I thought that I would do something different with this write-up. Turn it around and start with the finished piece. That's right ... the table rebuild is complete. This will provide a picture of the end result, and we can then look at how certain parts were built. This way around might create a better understanding of where the build was going, and how it got there.
In particular, the drawer. The drawer is a little beauty. I did scratch my head over the construction. No doubt it has been done before, but I could not find any pictures of another like it. I am sure there will be interest in the design. I am chuffed with the efficiency of it. More on this in the next article.
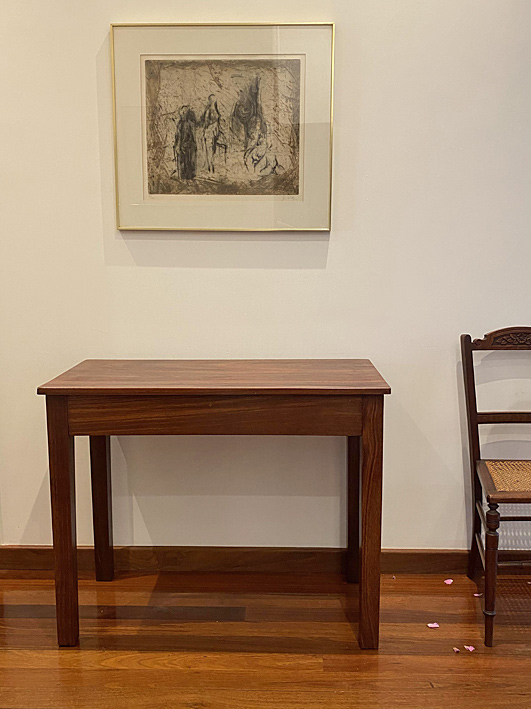
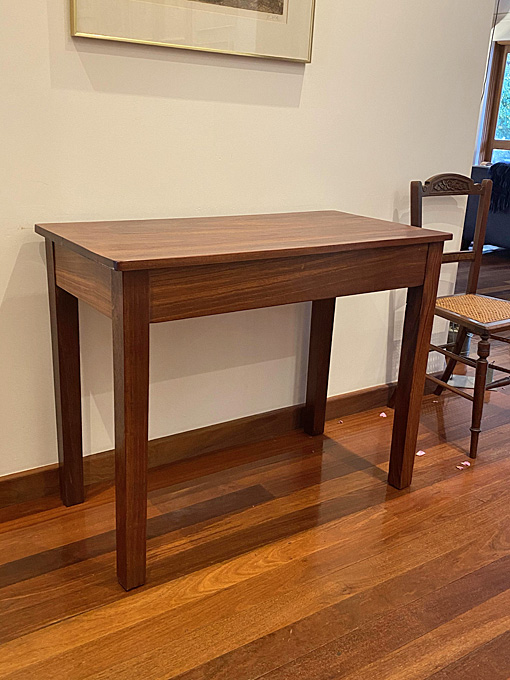
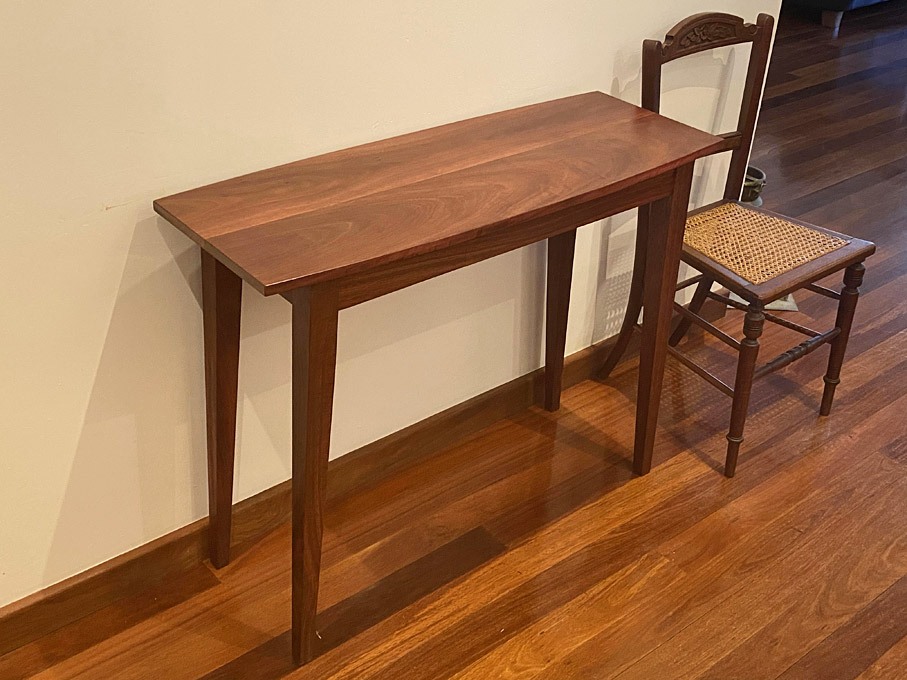
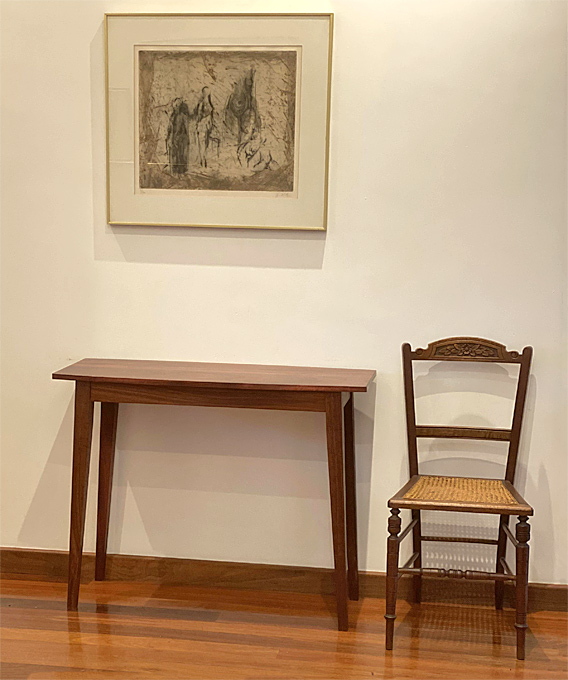
For now, here is the completed table.
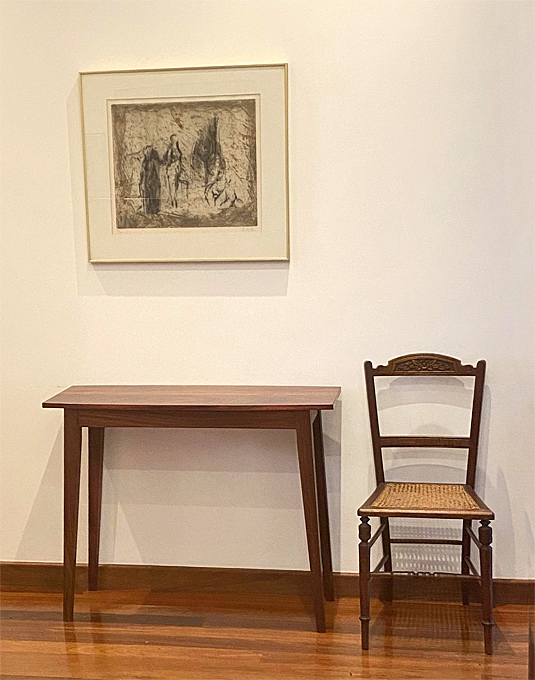
The legs have been brought inward, tapered, and a 3 degree splay added to the sides.
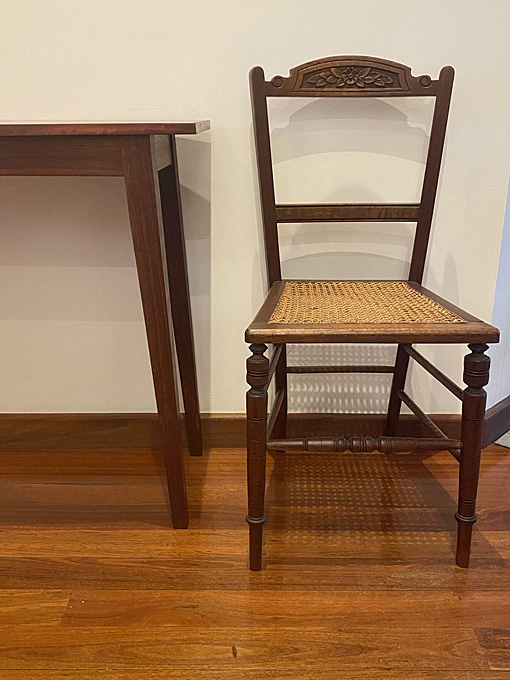
The top retained its width (I was threatened with death, or worse, if it was shortened) but was made shallower. A slight camber was added front-and-back to soften the outline ...
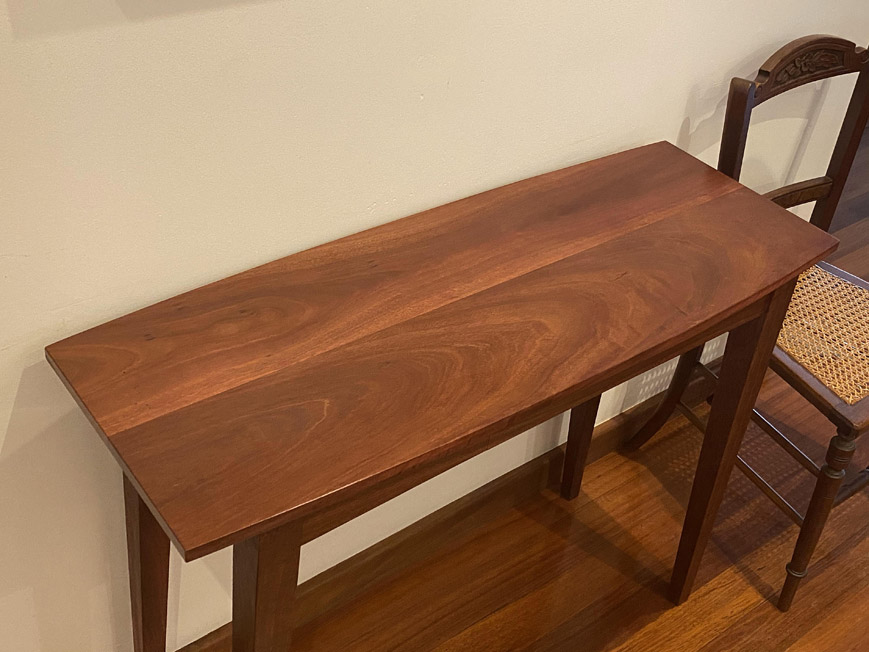
The apron was also made shallower. The original was 100mm (4") high. It is now 65mm (2 1/2") high.
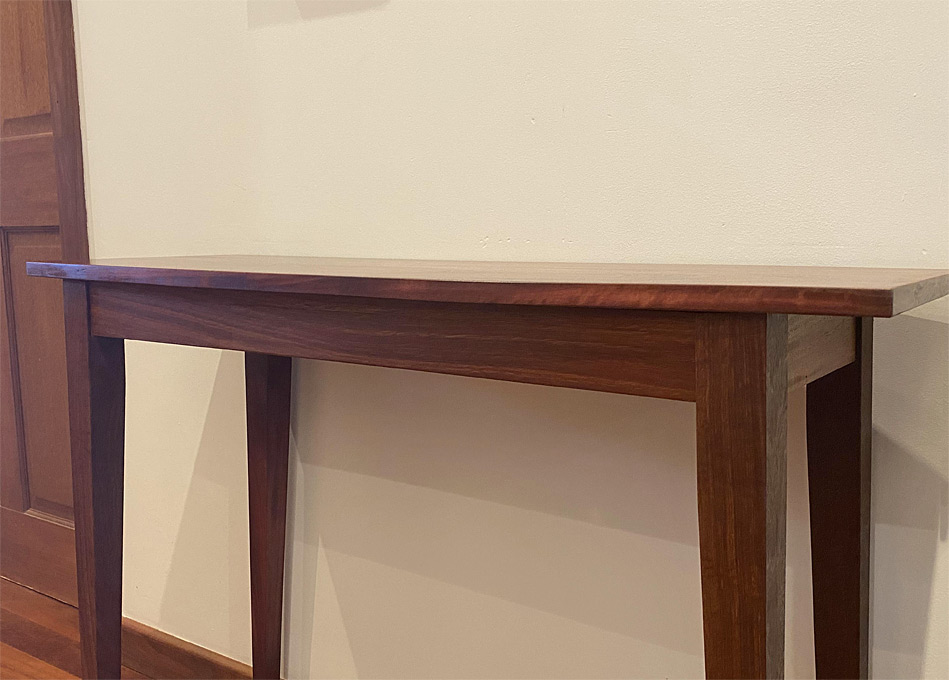
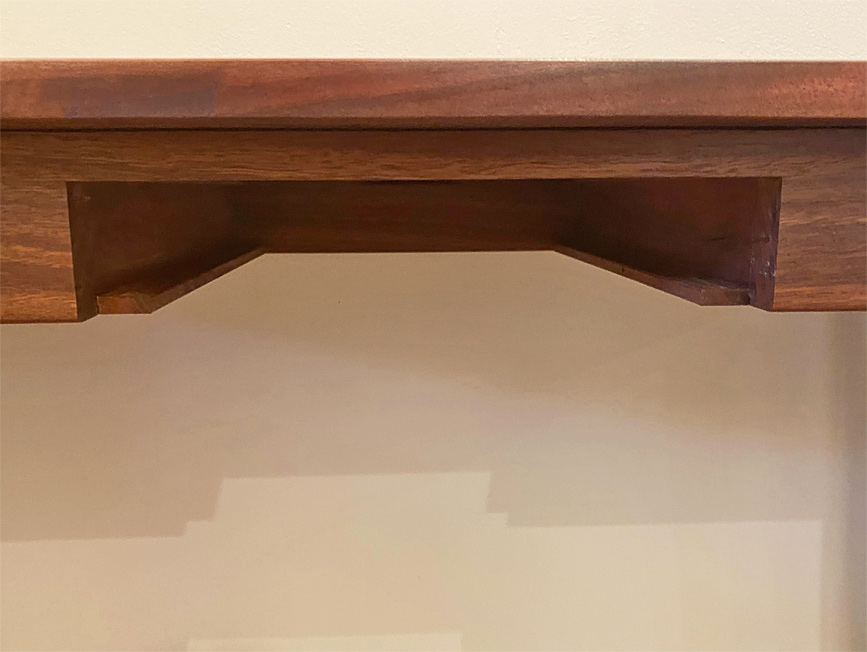
Oy .. where's the drawer gone?! I could have sworn it was there yesterday. Aah ... there it is ...")

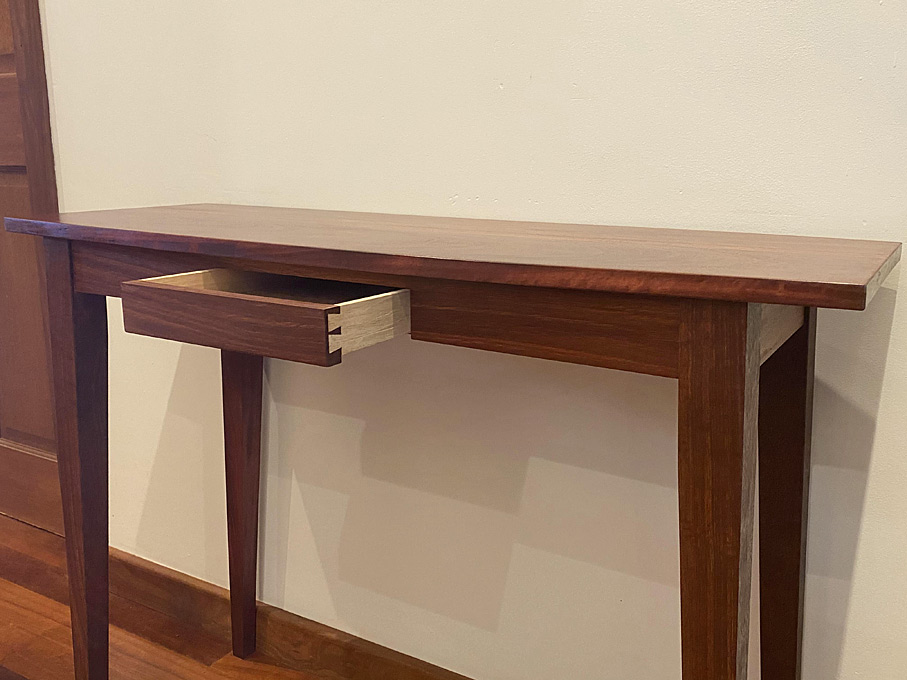
This is the drawer case ...
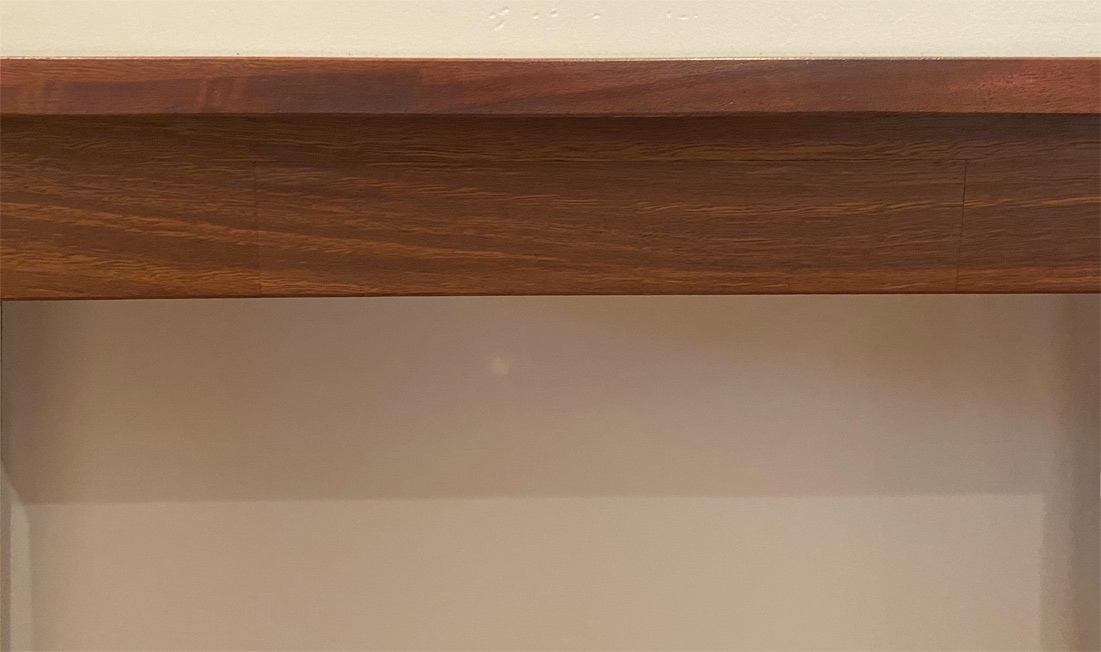
With drawer inserted - you need to get close up to see the joins ..
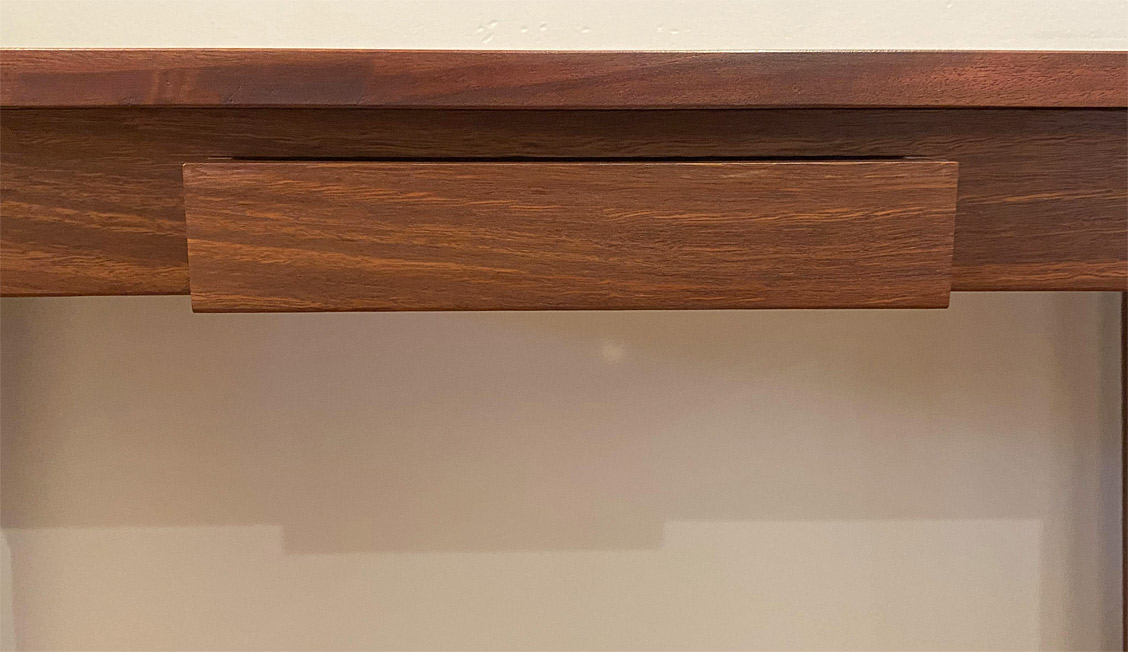
It opens with a pull under the drawer ..
The drawer is shallow, of course, it is just for house keys and the odd remote control. It is just 45mm (1 3/4") high on the outside and 26mm (1") deep inside. The full dimensions are 230mm (9") wide and 280mm (11") deep ...
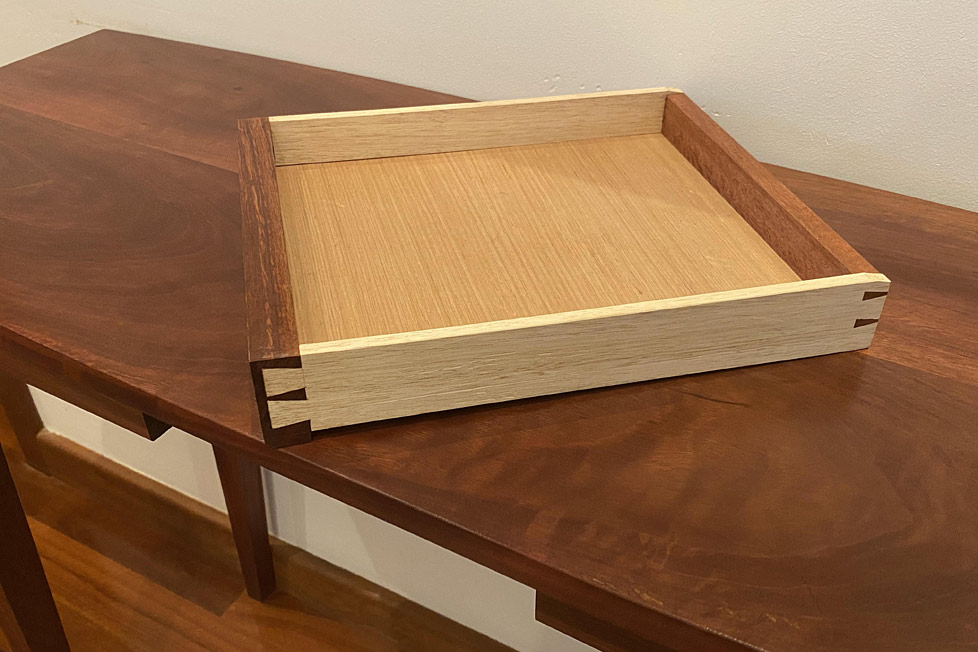
The sides are 7mm thick. The drawer front is 18mm (roughly 3/4").
To maximise the internal height, the drawer bottom was attached with a groove into the drawer sides rather than using slips. Slips would have used a precious extra 3mm (1/8"). So they 6mm (1/4") drawer bottom has a 3mm rebate, fitting a 3mm groove.
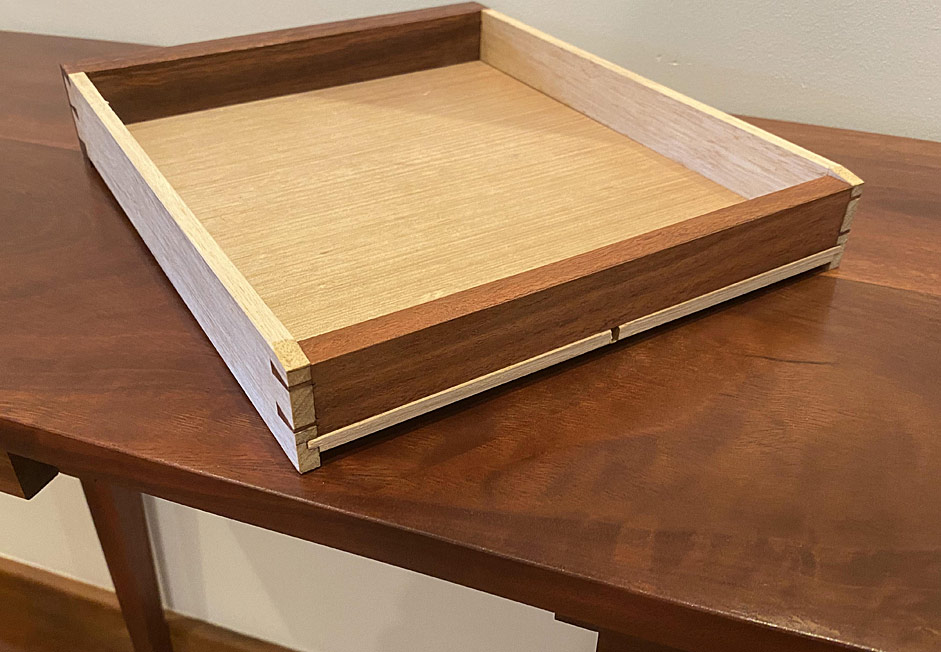
The sides and bottom are quartersawn Tasmanian Oak, which is very stable and tough. One screw at the rear, with an expansion slot, to hold it firmly. A nice, tight drawer ...
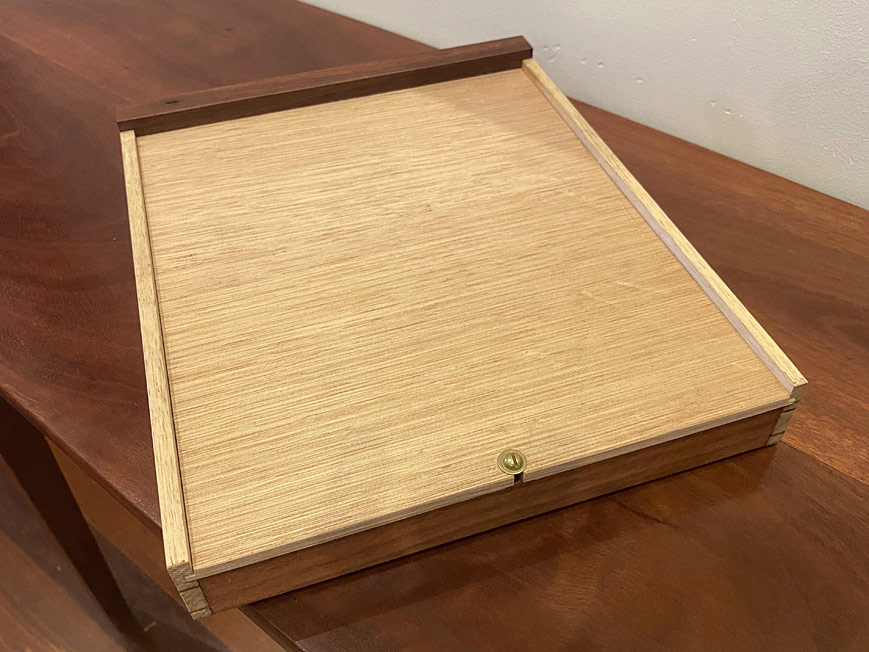
It sides in-and-out smoothly. I love that it disappears and is hidden.
More on the construction next time, but feel free to ask questions.
Regards from Perth
Derek
(Note that these photos were taken in my entrance hall, not Rita's).
It was really a boring ... okay, ugly table. I thought that the proportions were completely ugh, and the legs reminded me of detention in a classroom. The table had been a kerbside salvage by her late husband, a close friend of mine, and a very good woodworker in his own right. It had been used as a work table. Rita had just moved into a new home, and the table was used because the width of the top fitted an alcove in the entrance hall.
I said to Rita that I would re-build the table. "But I must have a drawer", Rita emphasised.
The wood was good Jarrah. The first step was to pull it apart. This was not so easy as simply unscrewing the clips for the top ...
Some evil tablemaker had used a nail gun to attach the corner blocks. Pulling them out left holes in the legs.
The legs were attached with dowels. I would never have guessed as the construction was very strong. Pulling them away caused some of the wood to tear along with it. No way to remove them other than saw the ends away.
Deconstructed ...
Let's begin again ..
I thought that I would do something different with this write-up. Turn it around and start with the finished piece. That's right ... the table rebuild is complete. This will provide a picture of the end result, and we can then look at how certain parts were built. This way around might create a better understanding of where the build was going, and how it got there.
In particular, the drawer. The drawer is a little beauty. I did scratch my head over the construction. No doubt it has been done before, but I could not find any pictures of another like it. I am sure there will be interest in the design. I am chuffed with the efficiency of it. More on this in the next article.
For now, here is the completed table.
The legs have been brought inward, tapered, and a 3 degree splay added to the sides.
The top retained its width (I was threatened with death, or worse, if it was shortened) but was made shallower. A slight camber was added front-and-back to soften the outline ...
The apron was also made shallower. The original was 100mm (4") high. It is now 65mm (2 1/2") high.
Oy .. where's the drawer gone?! I could have sworn it was there yesterday. Aah ... there it is ...
This is the drawer case ...
With drawer inserted - you need to get close up to see the joins ..
It opens with a pull under the drawer ..
The drawer is shallow, of course, it is just for house keys and the odd remote control. It is just 45mm (1 3/4") high on the outside and 26mm (1") deep inside. The full dimensions are 230mm (9") wide and 280mm (11") deep ...
The sides are 7mm thick. The drawer front is 18mm (roughly 3/4").
To maximise the internal height, the drawer bottom was attached with a groove into the drawer sides rather than using slips. Slips would have used a precious extra 3mm (1/8"). So they 6mm (1/4") drawer bottom has a 3mm rebate, fitting a 3mm groove.
The sides and bottom are quartersawn Tasmanian Oak, which is very stable and tough. One screw at the rear, with an expansion slot, to hold it firmly. A nice, tight drawer ...
It sides in-and-out smoothly. I love that it disappears and is hidden.
More on the construction next time, but feel free to ask questions.
Regards from Perth
Derek