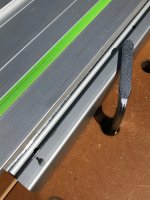
Sometimes you can find creative tasks for a track saw: Just used my TS-55 to cut micro-rabbets in some 80-20 extrusions I needed to modify. Saved the day for me and thought to share.
Backstory is I'm tangled up in one of those projects where every problem has a solution that creates another issue. I got a little pop up camper top about a year ago and it destroyed my gas mileage, wanted to install a wind fairing to help things. Decided to make something custom because reinventing the wheel is more fun than buying a Thule, right??
Original plan was to bolt some 80-20 to front box section of the topper using T-track bolts from inside to hold it to the frame and then more T-track hardware to mount the fairing to front of the extrusion. Well, the inside of the camper frame has a whole bunch of riveted hardware that made drilling that side a no go, so Riv-Nuts installed from front side became plan B.
Unfortunately the Riv-Nut flanges are too wide for my 80-20 slot and leave the extrusion contacting only the nut flanges with a 1mm gap between the topper frame and 80-20. Quick and dirty would have been to counter bore the 80-20 to clear the nut flanges, but then the bolts attaching extrusion are simply pulling on the Riv-Nuts with nothing but the sketchy expansion from setting the nut to keep things together. My experience is they work best when pinched between two parts being joined.
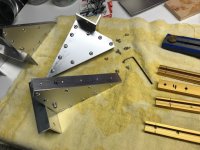
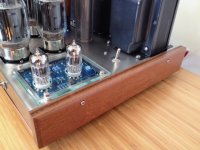
For a truly bomber mounting needed about .7 mm relief cut on each side of the 80-20 slot and came up with below:
View attachment 1
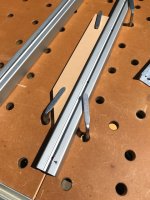
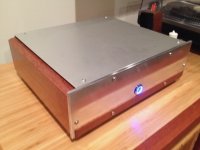
View attachment 2
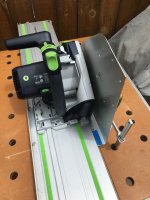
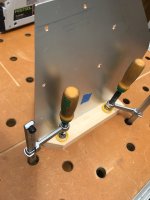
Set up on the MFT
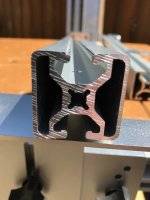
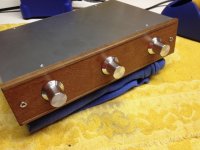
View attachment 3
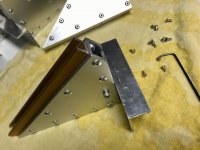
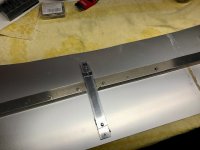
2mm wide x 0.7 mm deep "Micro-Rabbet" on each edge of the slot to clear the nut flanges
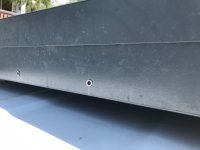
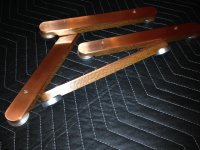
View attachment 4
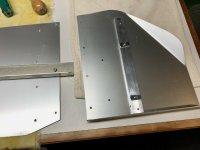
SS Riv-Nuts installed in frame. Added JB weld to holes because there's nothing worse that a spun out Riv-Nut with a bolt stuck in it
(whole other long story involving correcting for skating drill bit on pilot holes)
View attachment 5
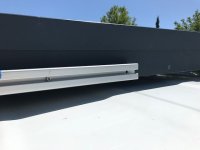
Dry fit of the extrusion, everything good!
Backstory is I'm tangled up in one of those projects where every problem has a solution that creates another issue. I got a little pop up camper top about a year ago and it destroyed my gas mileage, wanted to install a wind fairing to help things. Decided to make something custom because reinventing the wheel is more fun than buying a Thule, right??
Original plan was to bolt some 80-20 to front box section of the topper using T-track bolts from inside to hold it to the frame and then more T-track hardware to mount the fairing to front of the extrusion. Well, the inside of the camper frame has a whole bunch of riveted hardware that made drilling that side a no go, so Riv-Nuts installed from front side became plan B.
Unfortunately the Riv-Nut flanges are too wide for my 80-20 slot and leave the extrusion contacting only the nut flanges with a 1mm gap between the topper frame and 80-20. Quick and dirty would have been to counter bore the 80-20 to clear the nut flanges, but then the bolts attaching extrusion are simply pulling on the Riv-Nuts with nothing but the sketchy expansion from setting the nut to keep things together. My experience is they work best when pinched between two parts being joined.
For a truly bomber mounting needed about .7 mm relief cut on each side of the 80-20 slot and came up with below:
View attachment 1
View attachment 2
Set up on the MFT
View attachment 3
2mm wide x 0.7 mm deep "Micro-Rabbet" on each edge of the slot to clear the nut flanges
View attachment 4
SS Riv-Nuts installed in frame. Added JB weld to holes because there's nothing worse that a spun out Riv-Nut with a bolt stuck in it
(whole other long story involving correcting for skating drill bit on pilot holes)
View attachment 5
Dry fit of the extrusion, everything good!