ear3
Member
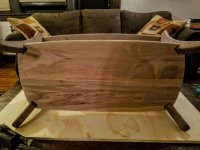
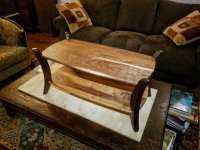
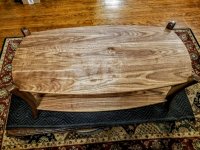
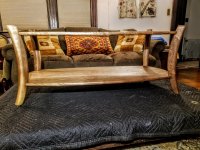
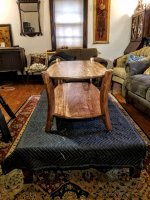
Shortly after I first joined the FOG, I remember seeing an image of a small table design that I really liked, which had curved legs capturing two shelves/surfaces. I didn't bookmark it at the time, and I subsequently had no luck tracking down the image, even after posting a help find thread in 2015:
http://festoolownersgroup.com/membe...member-project-post-about-bubinga-side-table/
So I've had this design kicking around my head for quite a few years.
The second driver of the present project was to try something in the mid-century modern vein. It's a style I don't particularly like, but it's been back in vogue now for a number of years, and since I have fielded a few inquiries for commissions of mid-century modern pieces in the past couple of years (but which I ultimately passed on), I figured I would do well to experiment with the aesthetic to expand my repertoire.
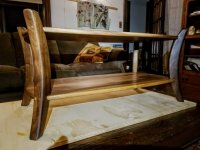
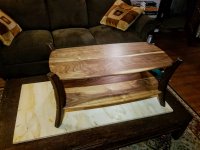
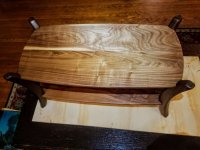
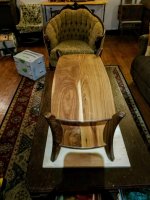
So I decided to tweak the original, inspiring design by building it in walnut and making the shelves/surfaces more curvy, and so better approximate the back to the future Jetsons look that is the hallmark of mid-century modern.
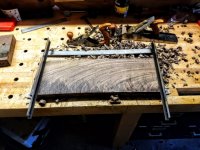
I sketched the two elements of the design in Fusion 360 so I could produce the templates with my Shaper Origin:
[attachimg=1]
[attachimg=2]
The key was having the top and bottom mortises in the legs fixed to the same longitudinal construction line, such that two equally dimensioned shelves would ensure the straightness/squareness of the whole assembly. Using a template for the two shelves -- as opposed to producing the shape by hand -- was also a way of ensuring that their dimensions matched exactly.
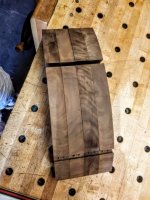
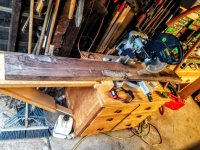
I thought I got lucky at the lumber yard in finding only a 6ft long piece of 8/4 walnut, which was more than enough for the legs, and so did not have to overspend on excess wood:
[attachimg=3]
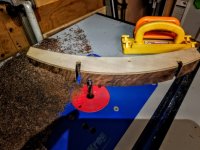
Some additional twisting and bowing appeared after cutting the individual pieces though:
[attachimg=4]
Which, on top of the depressions on one side meant that after jointing and planing it I was down to only about 1.65" thickness.
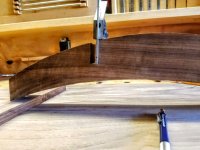
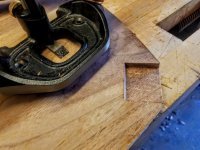
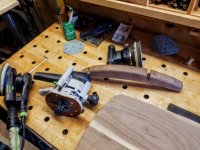
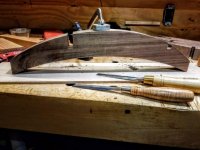
I realized too late when routing out the legs with the template:
[attachimg=5]
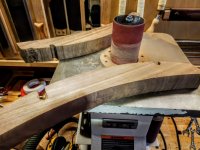
that my flush-trim spiral bit was dull, which caused the bit to catch on certain parts of the grain and create some nasty tear out on a few of the legs that I had to work down further with the spindle sander:
[attachimg=6]
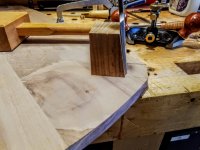
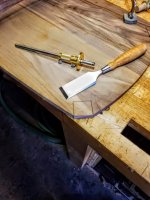
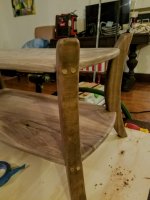
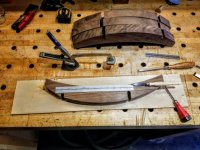
I squared the mortises by hand, taking advantage in the layout of the fact that they ran along the same axis in the leg:
[attachimg=7] [attachimg=8]
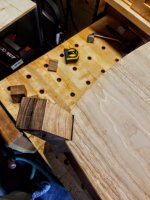
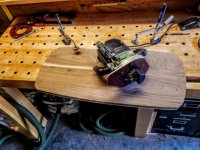
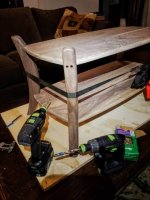
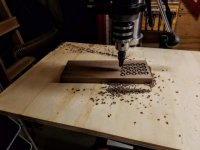
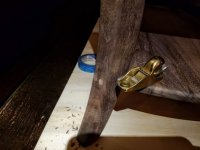
After I had already completed the shelves I also drill pressed the access holes where the screws would go to hold the whole assembly:
[attachimg=9]
Shelves and assembly follow in the next post
http://festoolownersgroup.com/membe...member-project-post-about-bubinga-side-table/
So I've had this design kicking around my head for quite a few years.
The second driver of the present project was to try something in the mid-century modern vein. It's a style I don't particularly like, but it's been back in vogue now for a number of years, and since I have fielded a few inquiries for commissions of mid-century modern pieces in the past couple of years (but which I ultimately passed on), I figured I would do well to experiment with the aesthetic to expand my repertoire.
So I decided to tweak the original, inspiring design by building it in walnut and making the shelves/surfaces more curvy, and so better approximate the back to the future Jetsons look that is the hallmark of mid-century modern.
I sketched the two elements of the design in Fusion 360 so I could produce the templates with my Shaper Origin:
[attachimg=1]
[attachimg=2]
The key was having the top and bottom mortises in the legs fixed to the same longitudinal construction line, such that two equally dimensioned shelves would ensure the straightness/squareness of the whole assembly. Using a template for the two shelves -- as opposed to producing the shape by hand -- was also a way of ensuring that their dimensions matched exactly.
I thought I got lucky at the lumber yard in finding only a 6ft long piece of 8/4 walnut, which was more than enough for the legs, and so did not have to overspend on excess wood:
[attachimg=3]
Some additional twisting and bowing appeared after cutting the individual pieces though:
[attachimg=4]
Which, on top of the depressions on one side meant that after jointing and planing it I was down to only about 1.65" thickness.
I realized too late when routing out the legs with the template:
[attachimg=5]
that my flush-trim spiral bit was dull, which caused the bit to catch on certain parts of the grain and create some nasty tear out on a few of the legs that I had to work down further with the spindle sander:
[attachimg=6]
I squared the mortises by hand, taking advantage in the layout of the fact that they ran along the same axis in the leg:
[attachimg=7] [attachimg=8]
After I had already completed the shelves I also drill pressed the access holes where the screws would go to hold the whole assembly:
[attachimg=9]
Shelves and assembly follow in the next post
Attachments
-
 Coffee Table, 18in. tall v3.jpg13.1 KB · Views: 942
 -
 20190805_114229.jpg202.7 KB · Views: 904
 -
 20190801_191018.jpg34.9 KB · Views: 896
 -
 20190802_112721.jpg211.7 KB · Views: 898
 -
 20190801_180718.jpg192.2 KB · Views: 892
 -
 20190731_195156.jpg196.7 KB · Views: 921
 -
 20190731_170921.jpg210.3 KB · Views: 922
 -
 20190731_164827.jpg254.1 KB · Views: 902
 -
 Coffee Table Top v1.jpg24.5 KB · Views: 912