4nthony
Member
- Joined
- Feb 23, 2021
- Messages
- 772
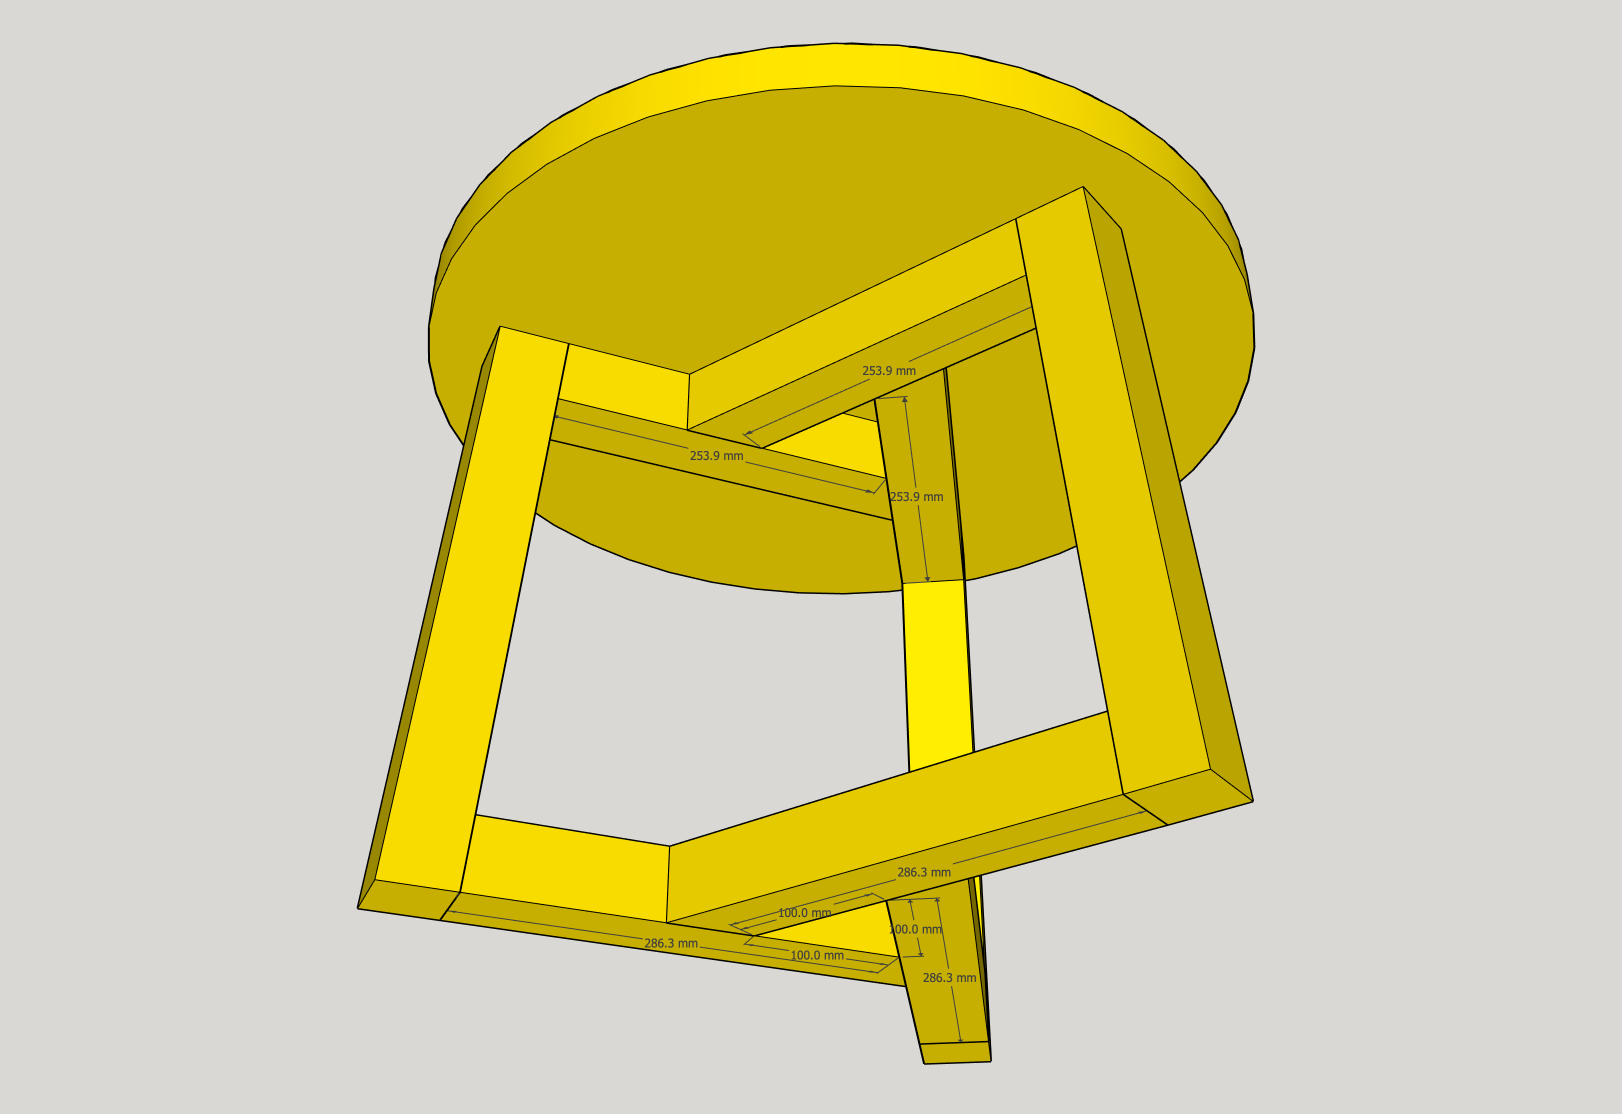
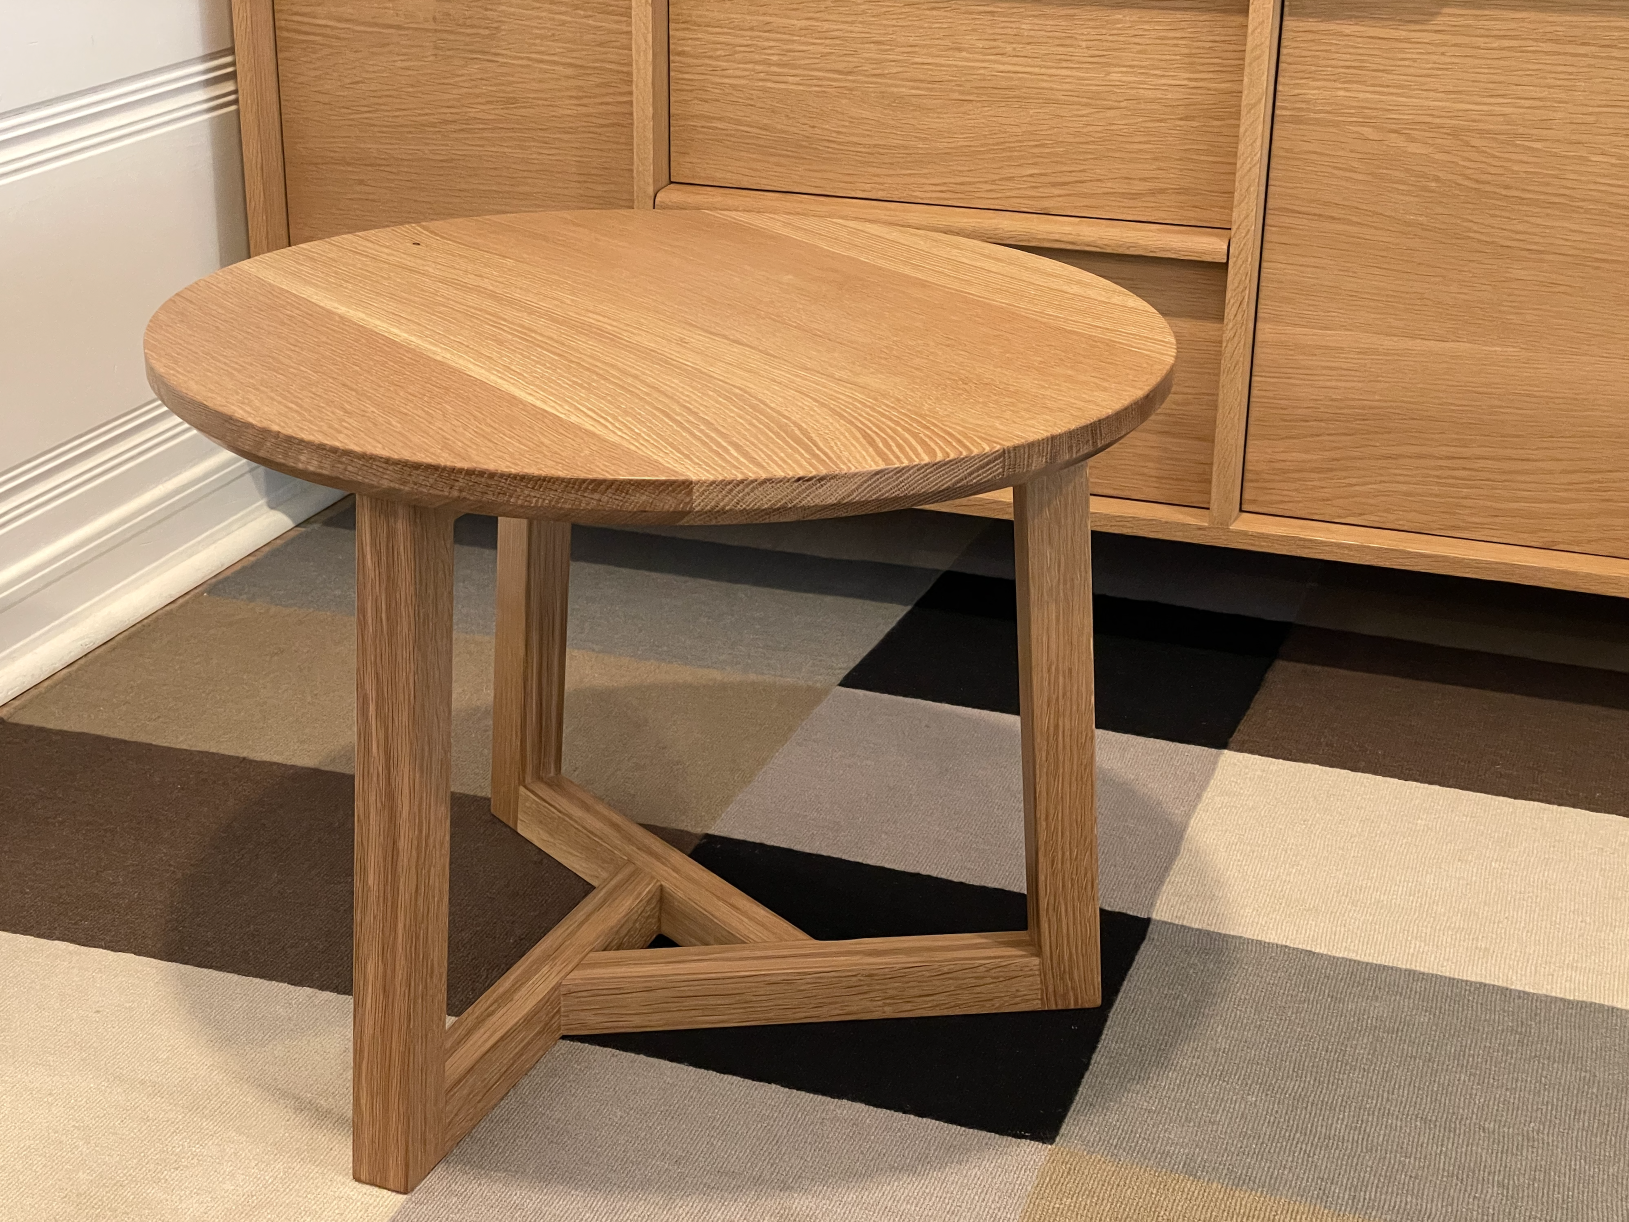
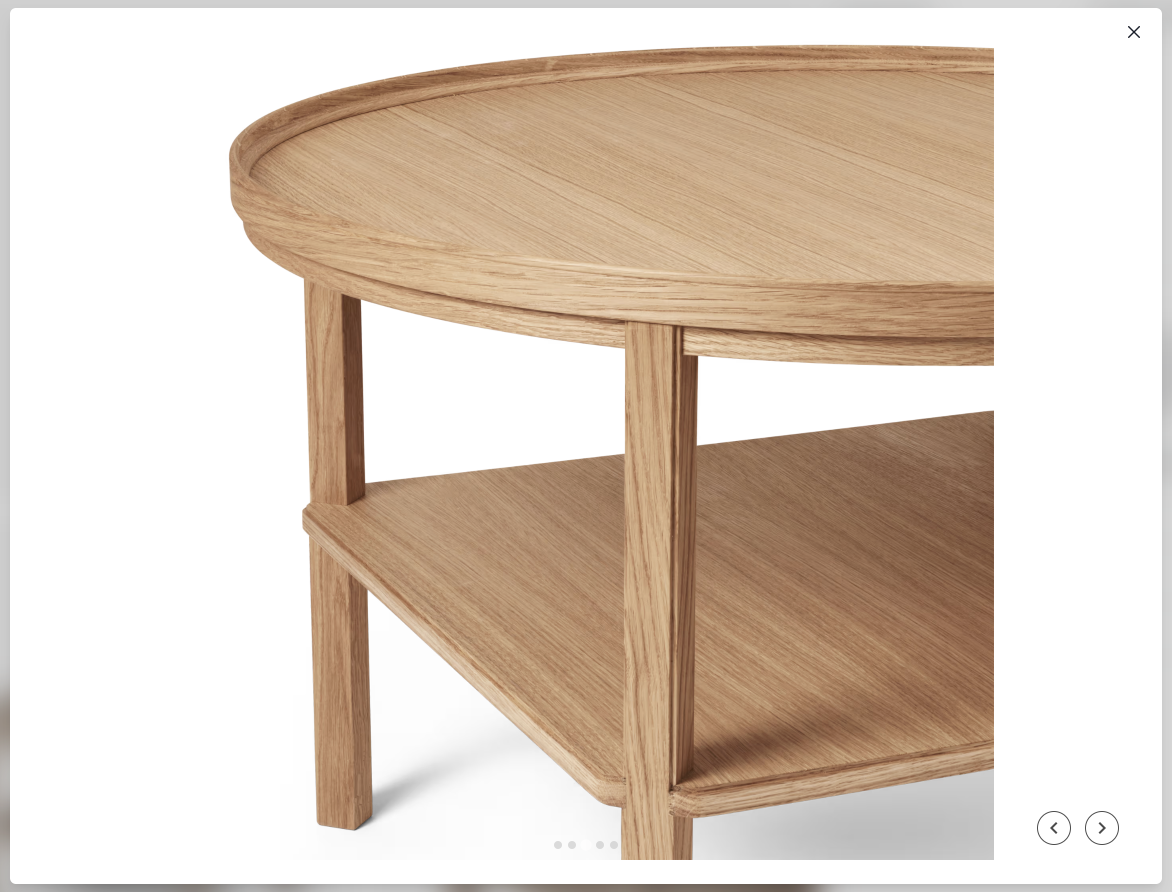
I recently completed this small coffee table. The diameter of the tabletop is 600mm (~24") and the height is 448mm (~17-3/4"). This is not my design. It is based on a table from Squarerule Furniture (video embedded below).
Overall, this was a fairly easy build. Clamping during the glue up was a little tricky, but only because I didn't prepare as well as I should have. I used offcuts with double-sided tape to square up my clamping surfaces but the tape would slide under clamping pressure. I was able to back off the pressure after getting the joint tight and it was fine, but was a bit stressful. For future glue ups, I'll make some better jigs for easier angle clamping.
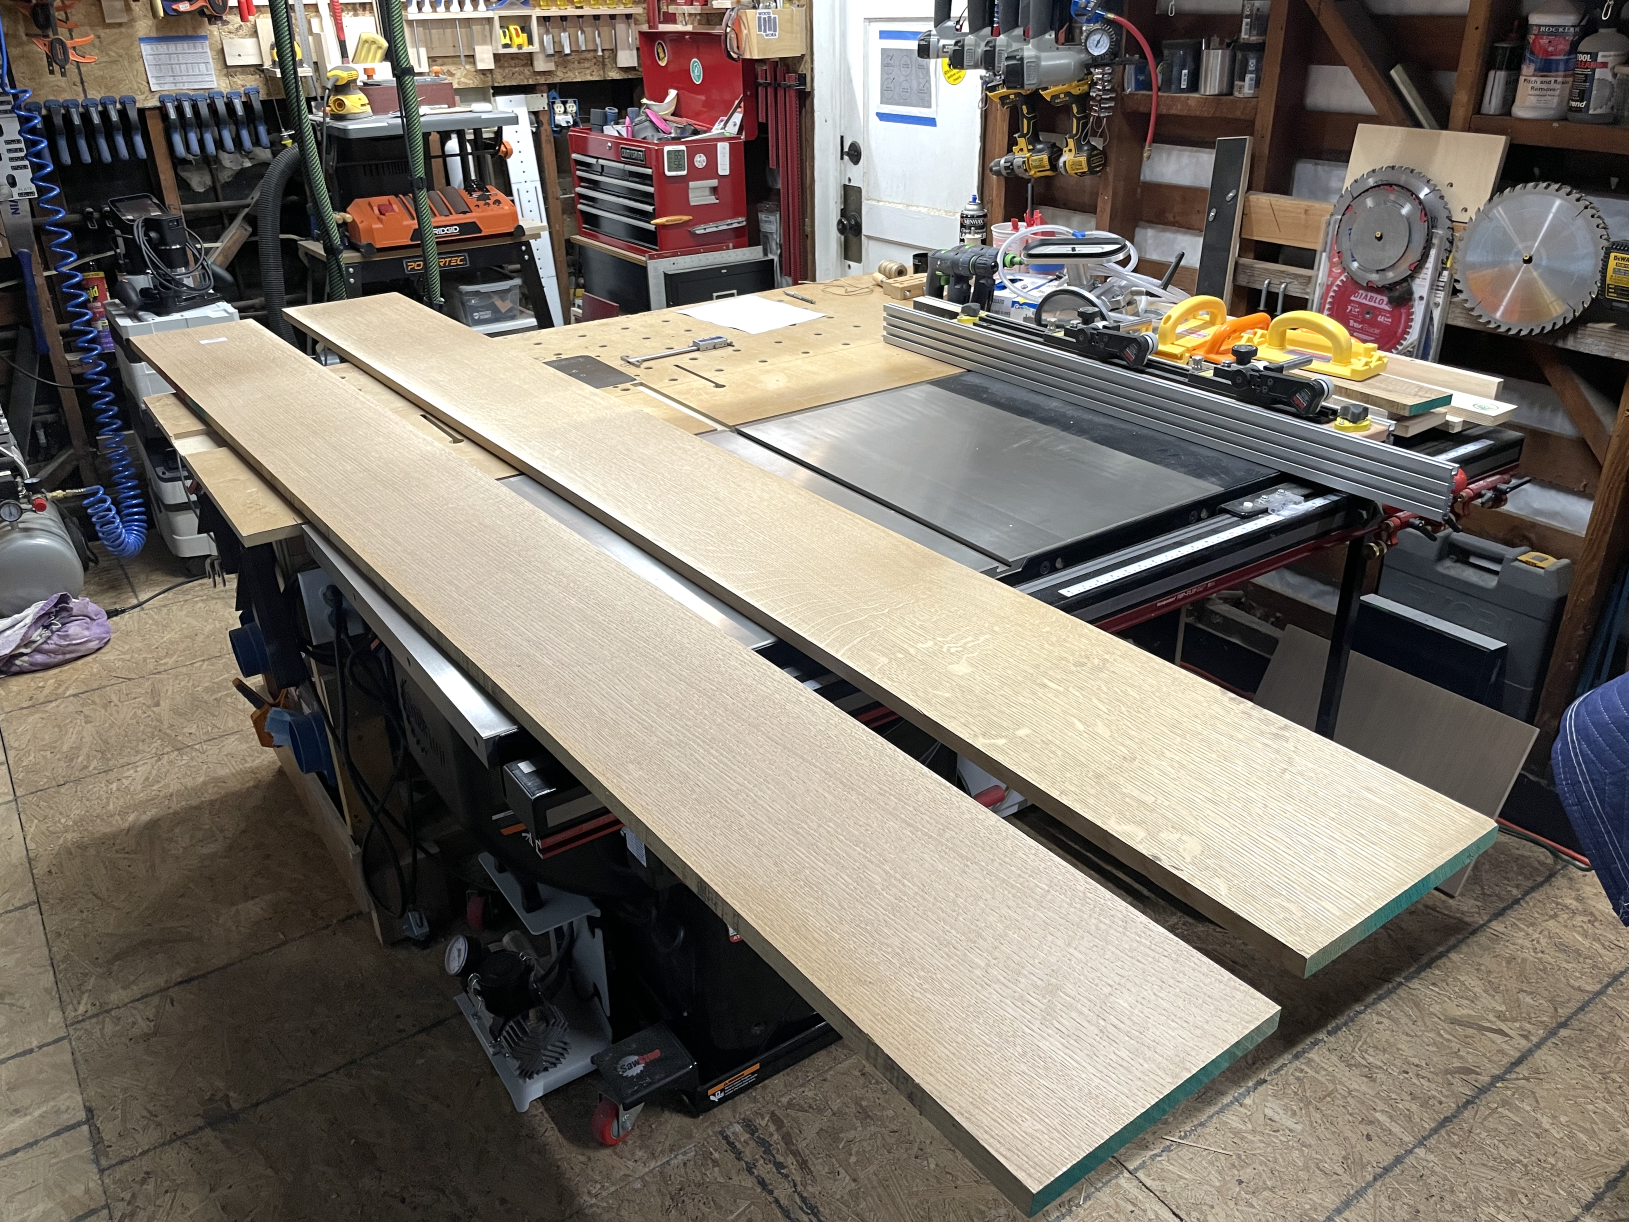
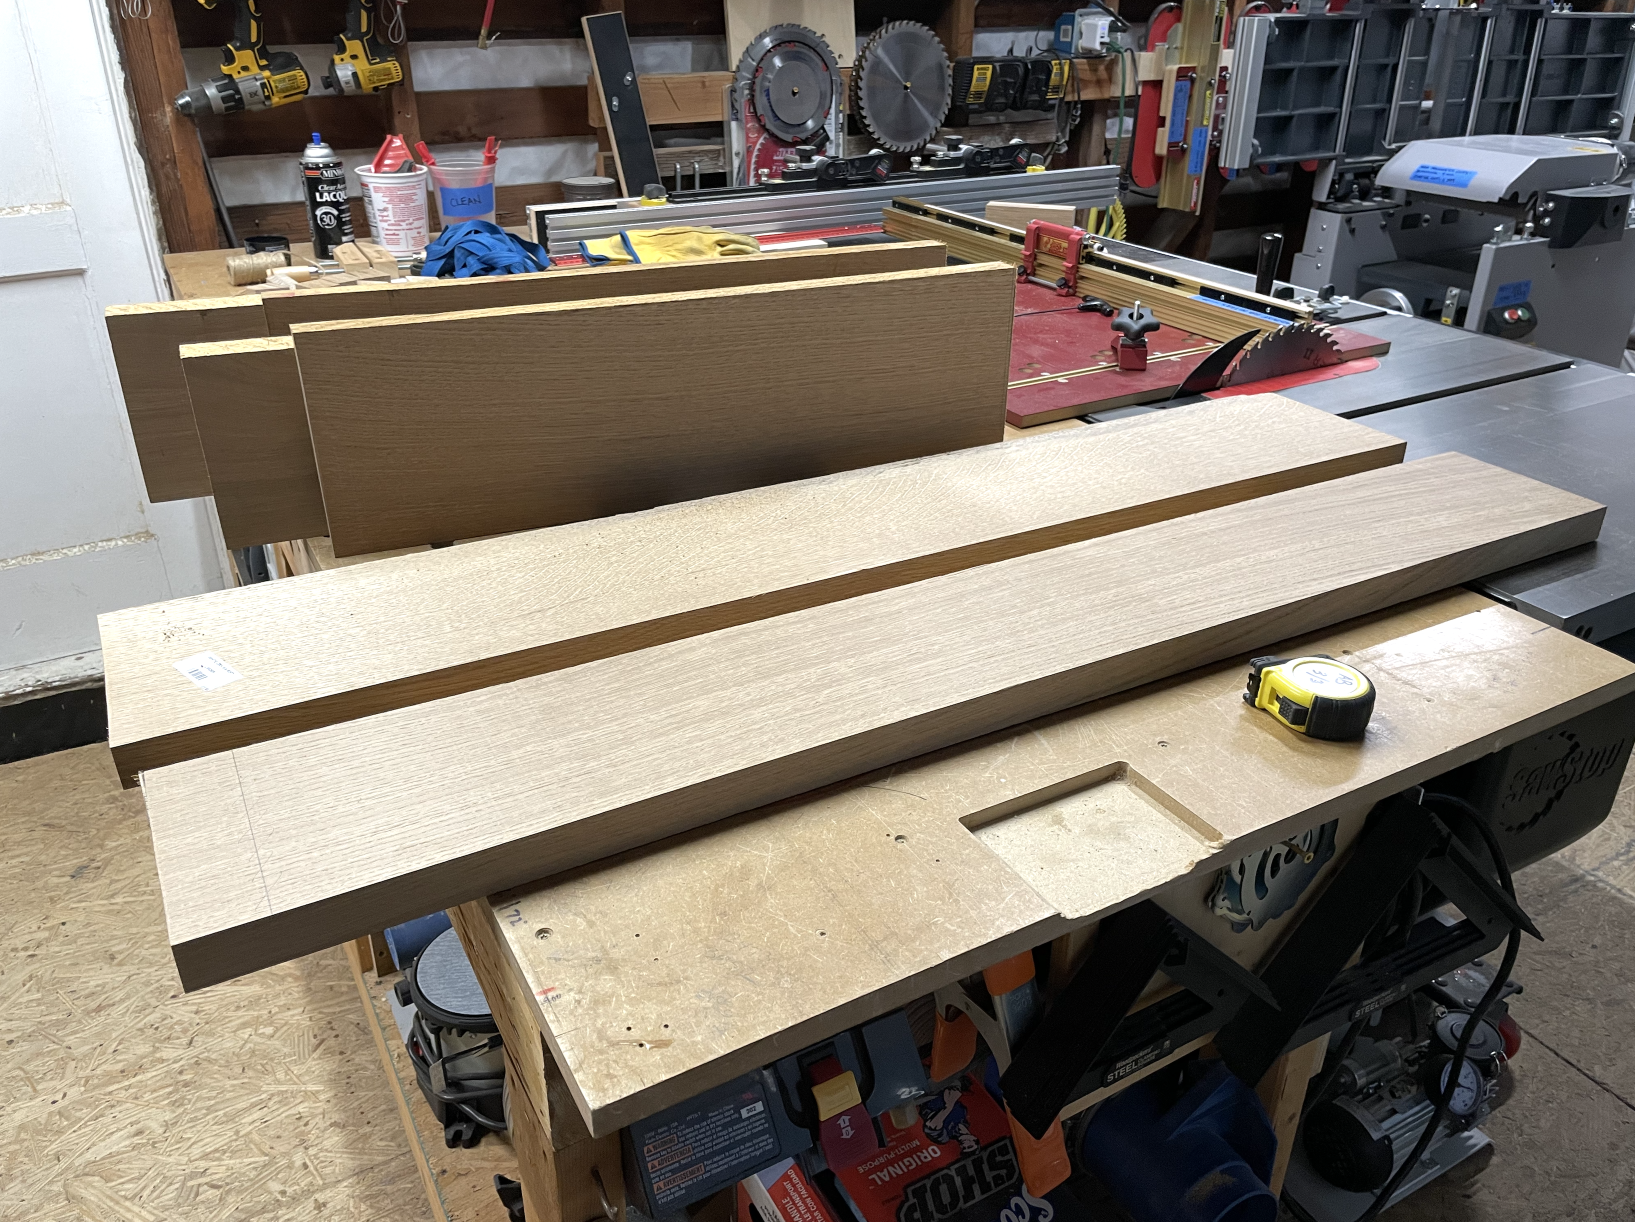
I started out with some quartersawn 4/4 white oak
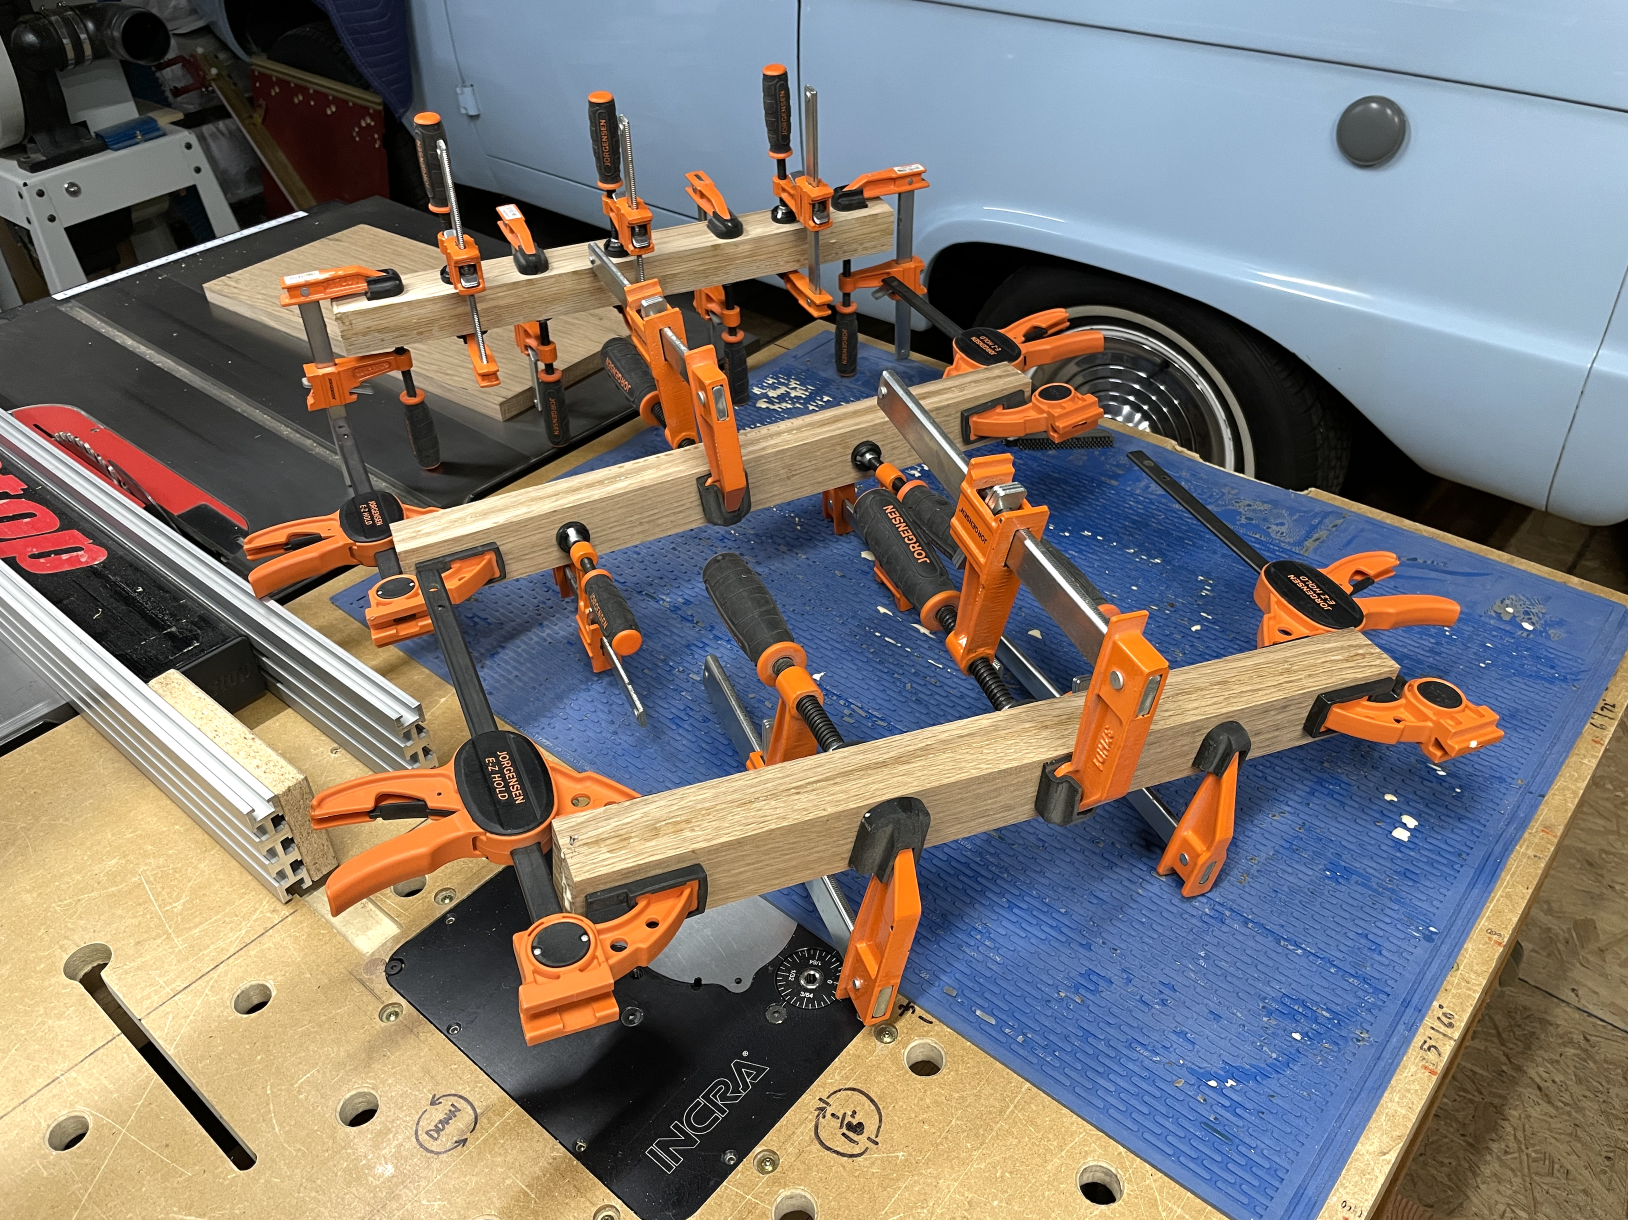
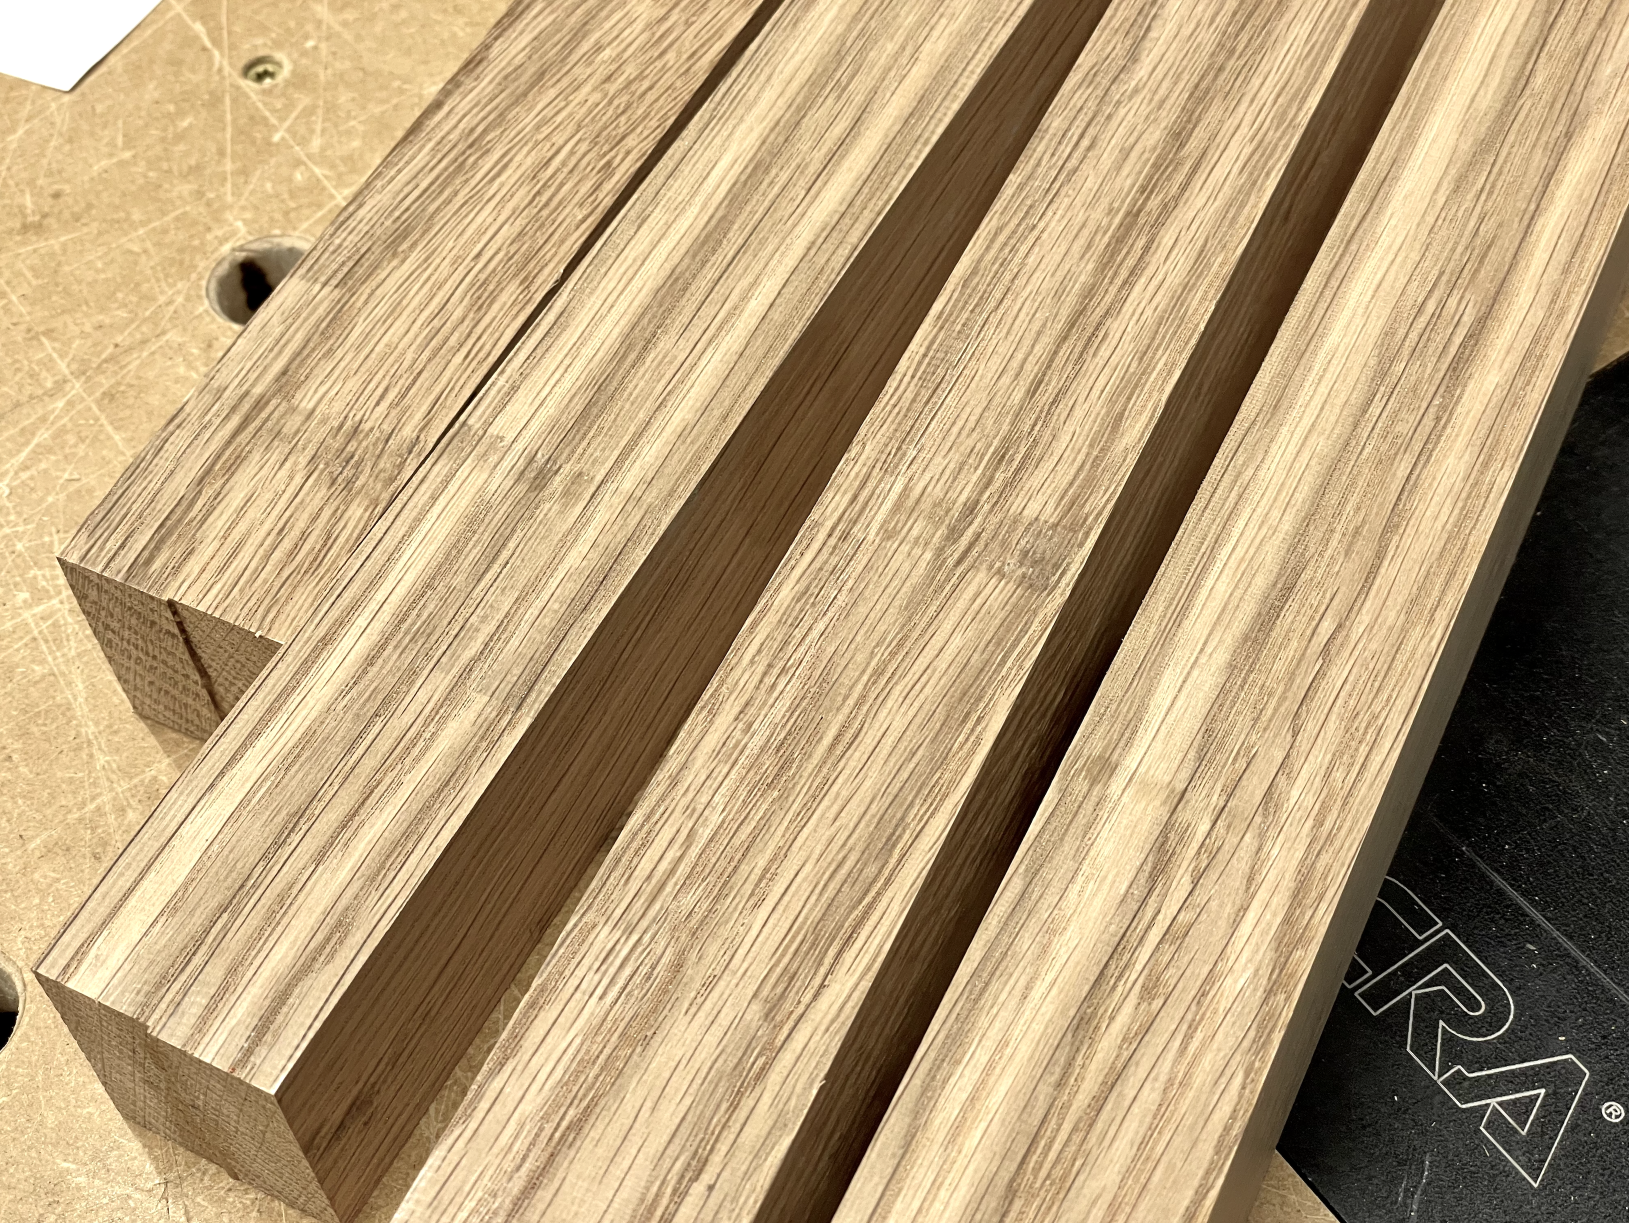
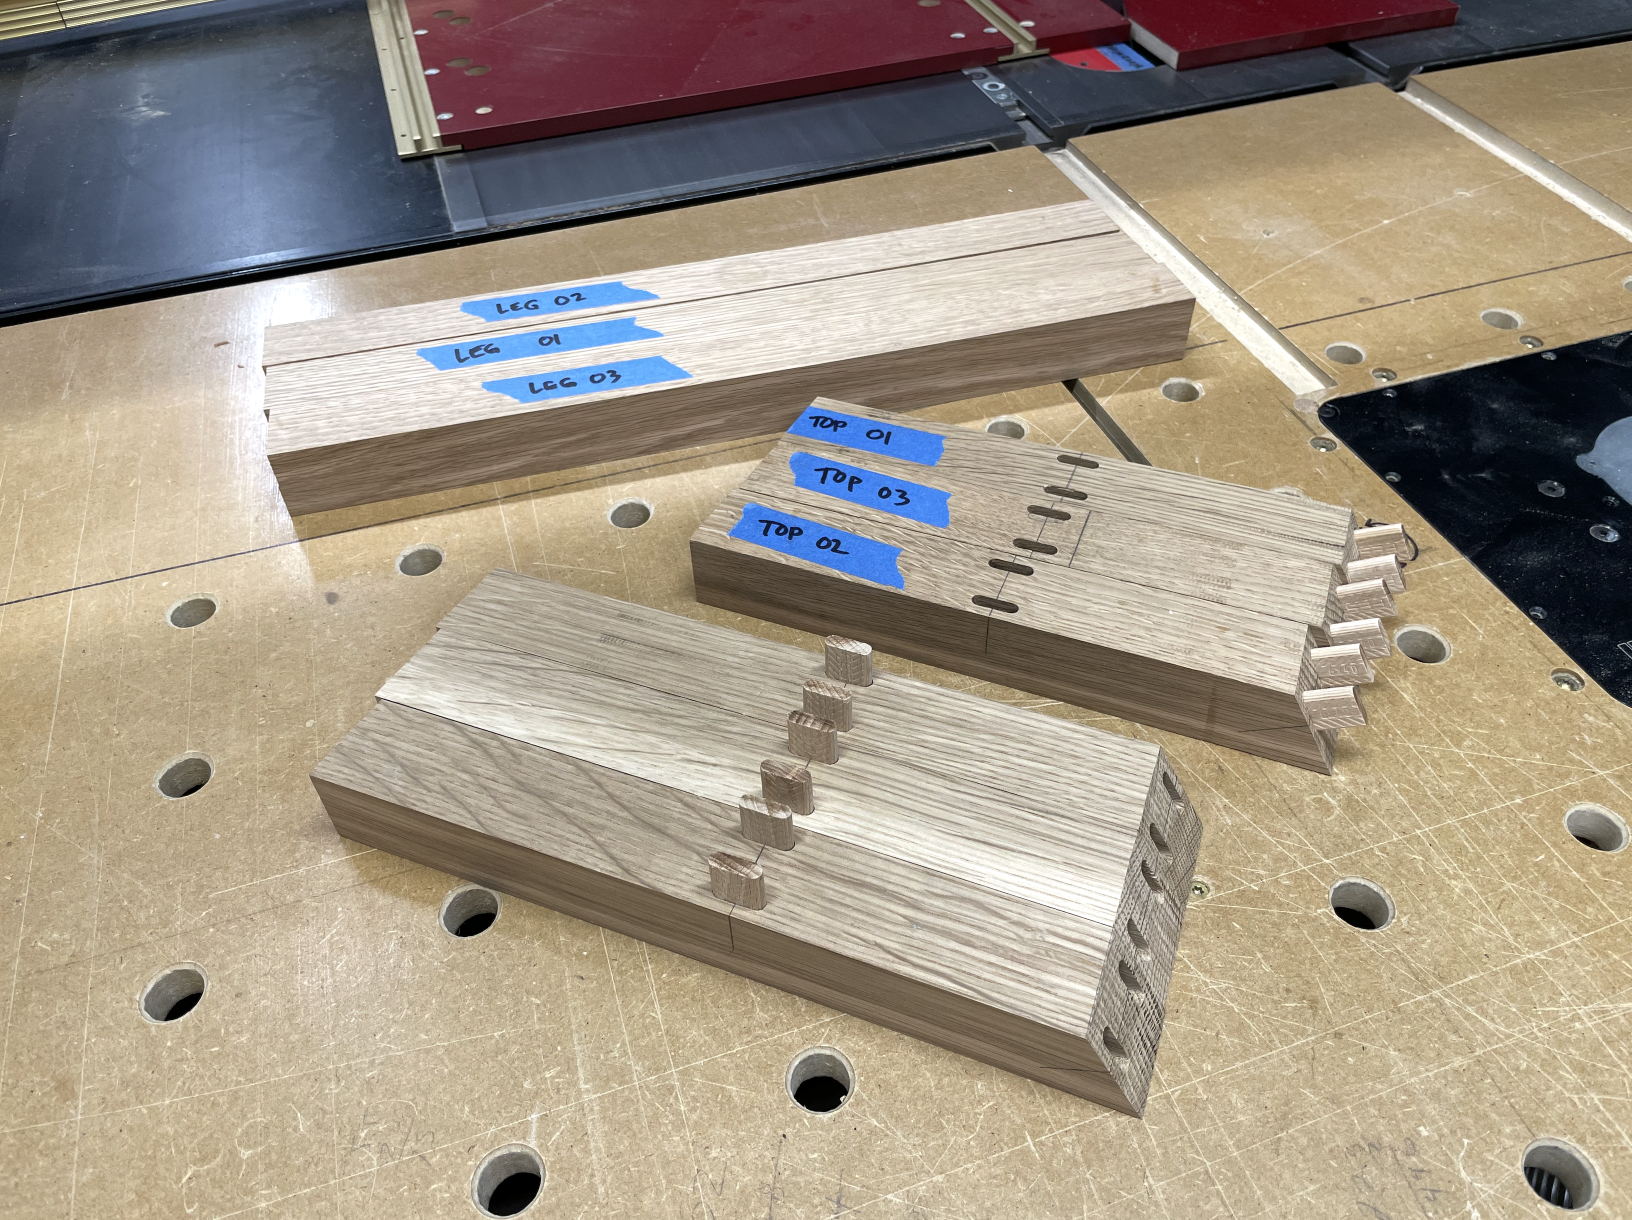
Cut to size and laminated to get some ~8/4 legs and stretchers.
My boards were going through the planer then getting stuck. The rollers were were putting marks in the stock. My initial thought was to clean the rollers but it turns out my planer table just needed to be waxed. A generous coat of Glidecote resolved the issue and later boards planed easily.
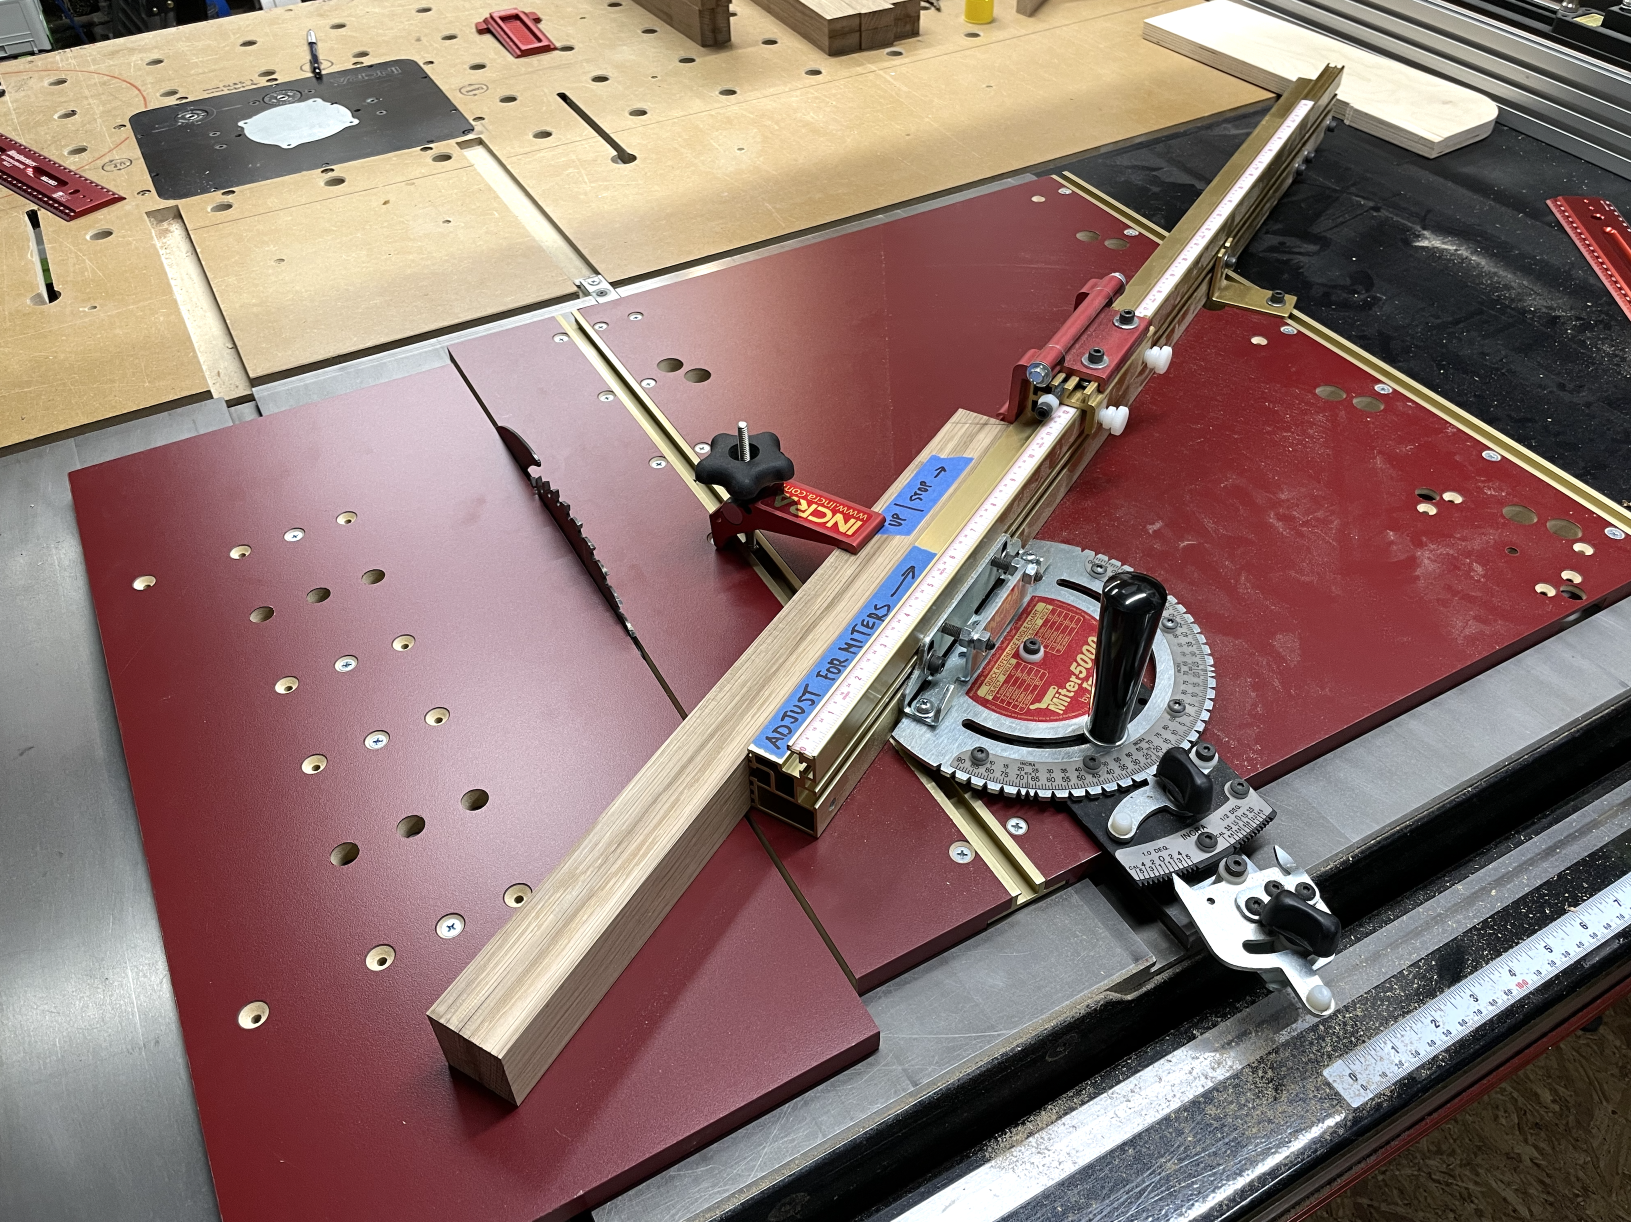
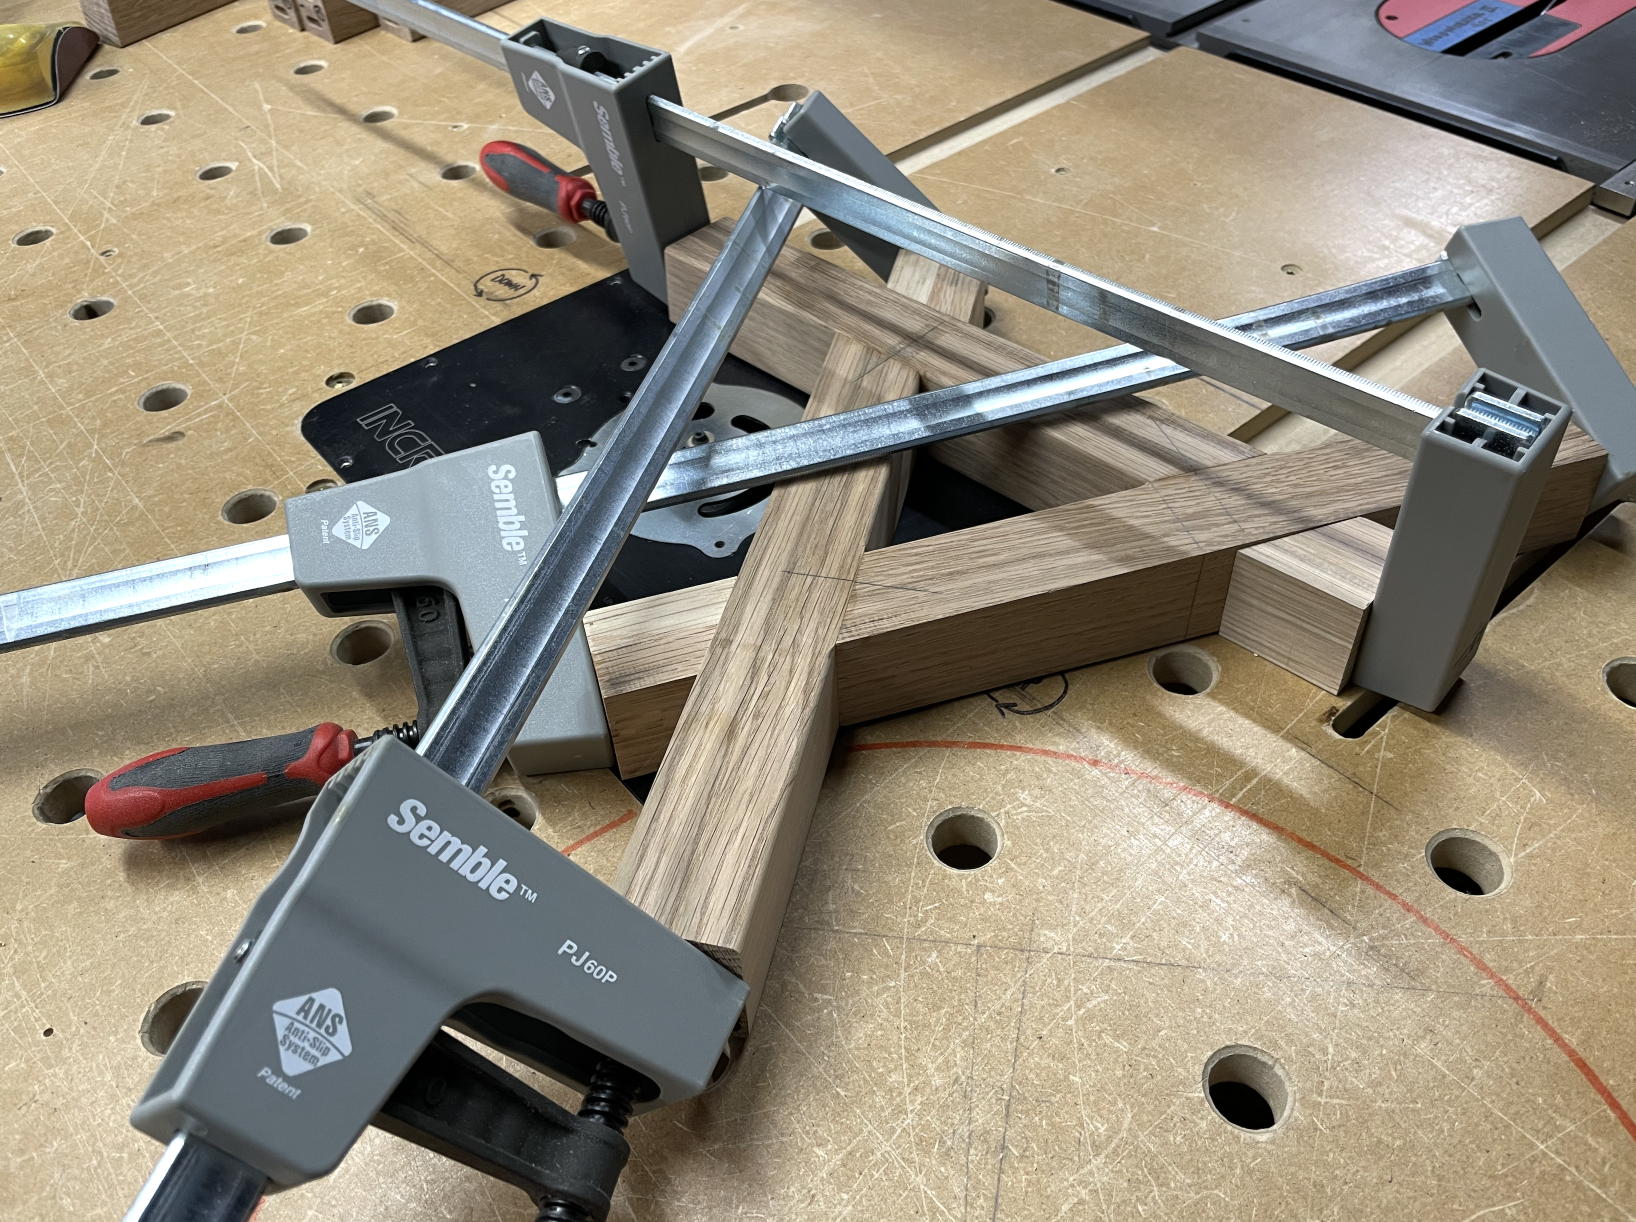
I love me some blue tape and leave notes on just about everything. The first time I cut miters on the sled, I paid the INCRA tax and tripped the SawStop brake. Cutting 30° for the stretcher assembly.
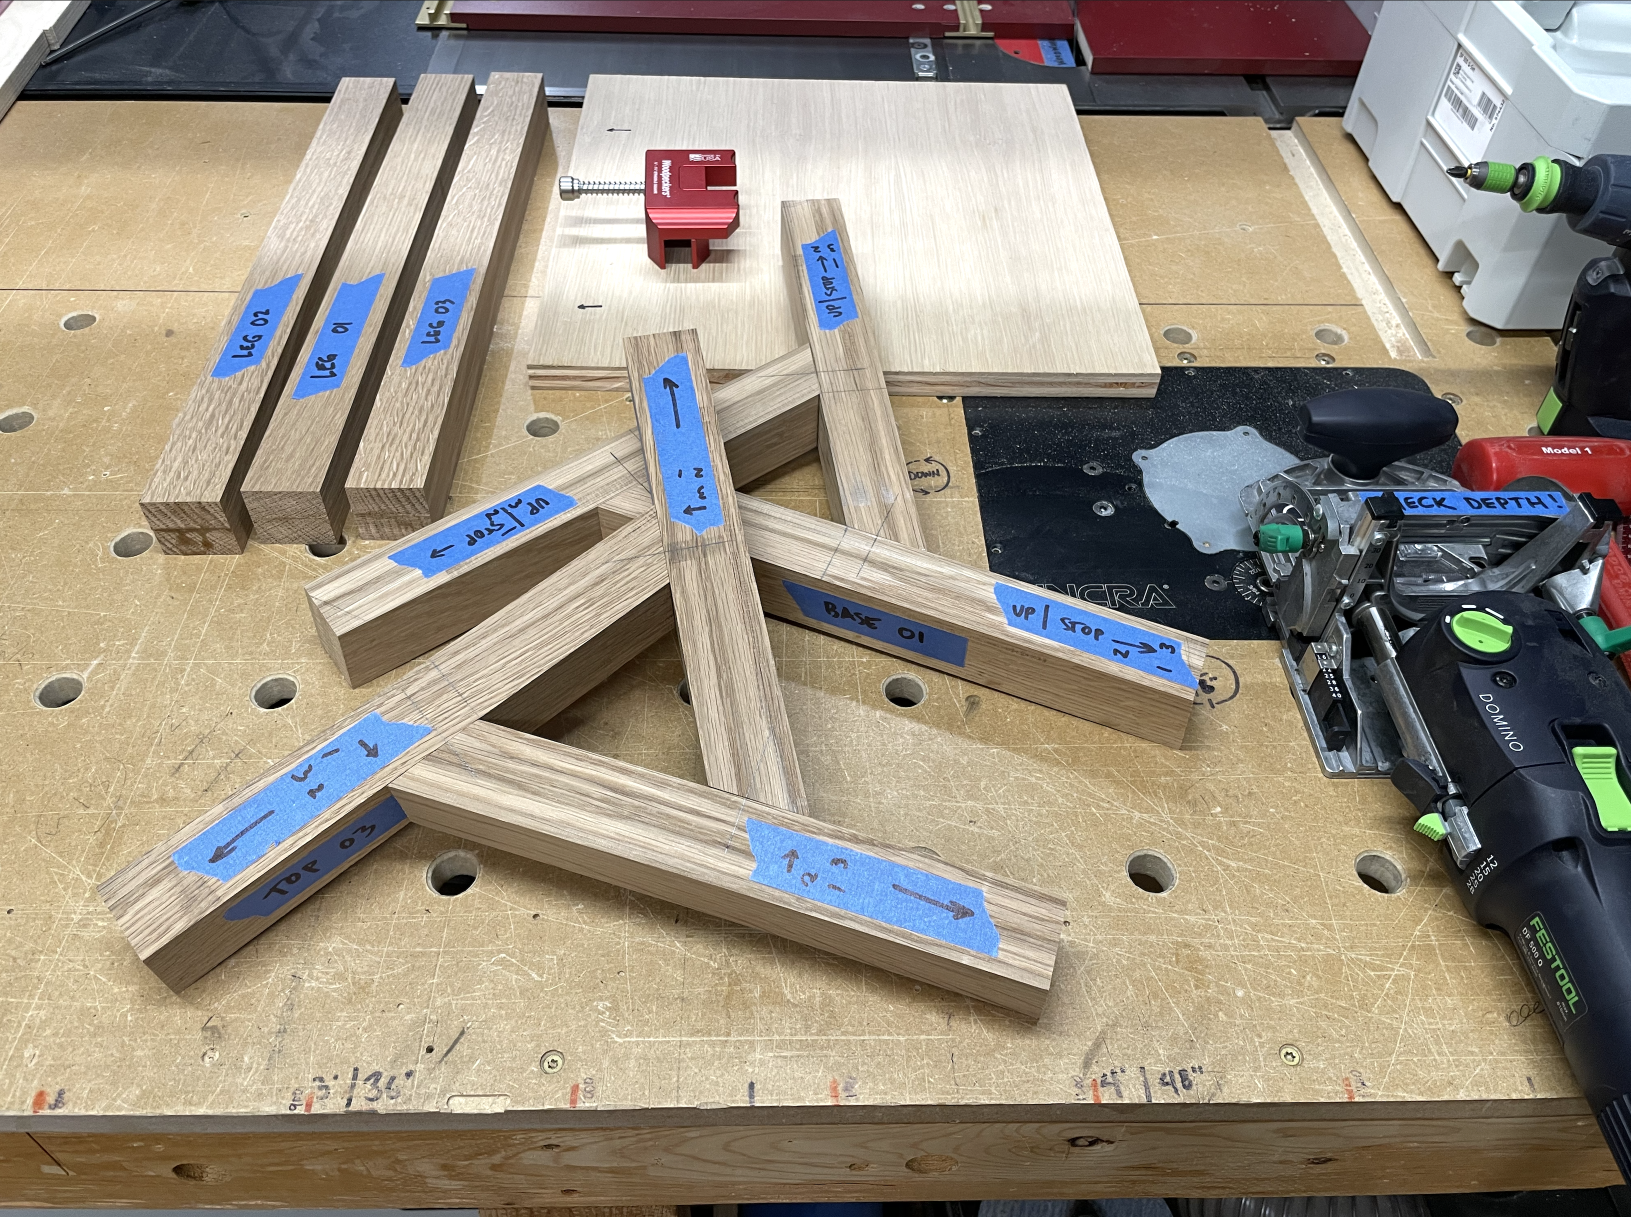
I used a pair of 6x40 Dominos at each joint. A 5° angle was cut on the stretchers to angle the legs.
Dry fit complete.
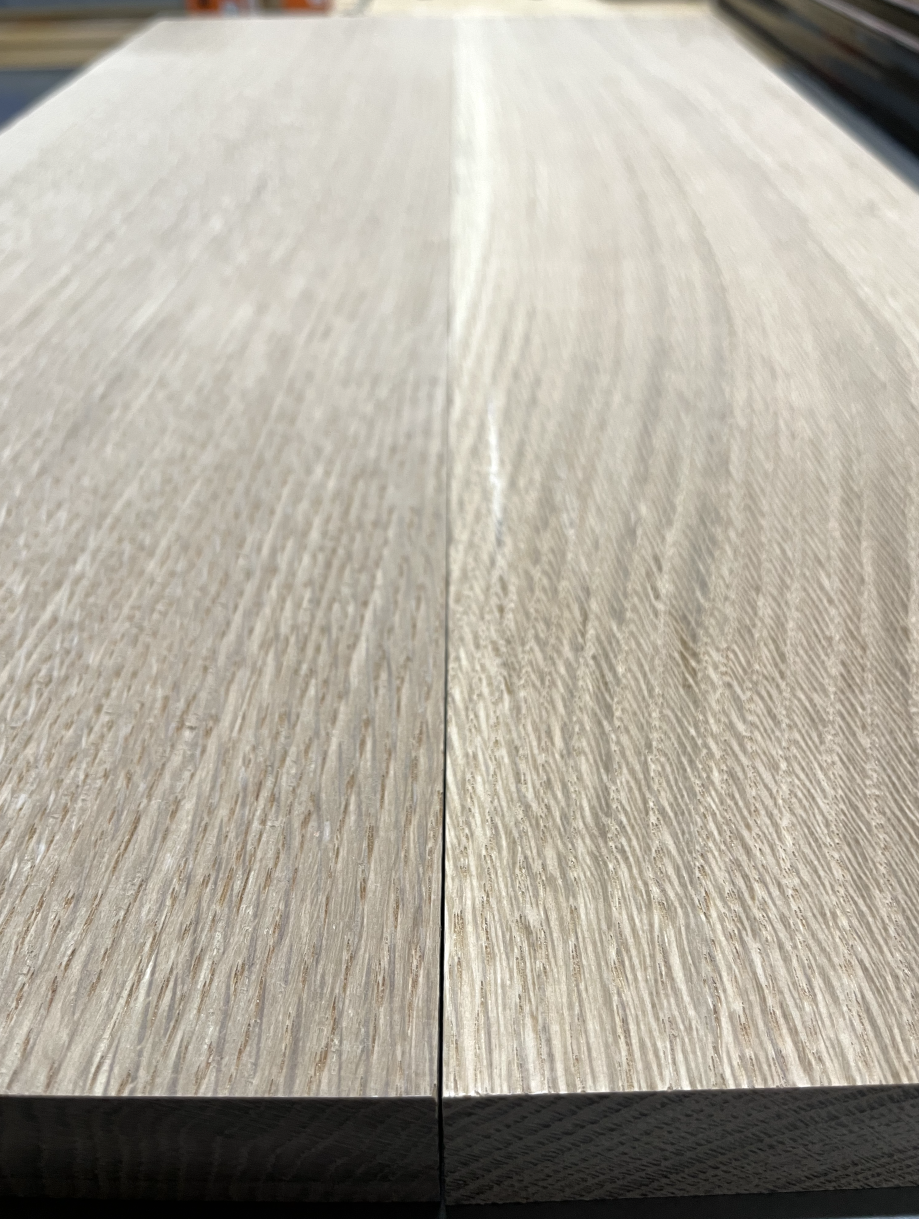
Next up was the table top. More quartersawn white oak, this time in 6/4.
I noticed some snipe when edge jointing. I needed to realign my outfeed table with my blades.
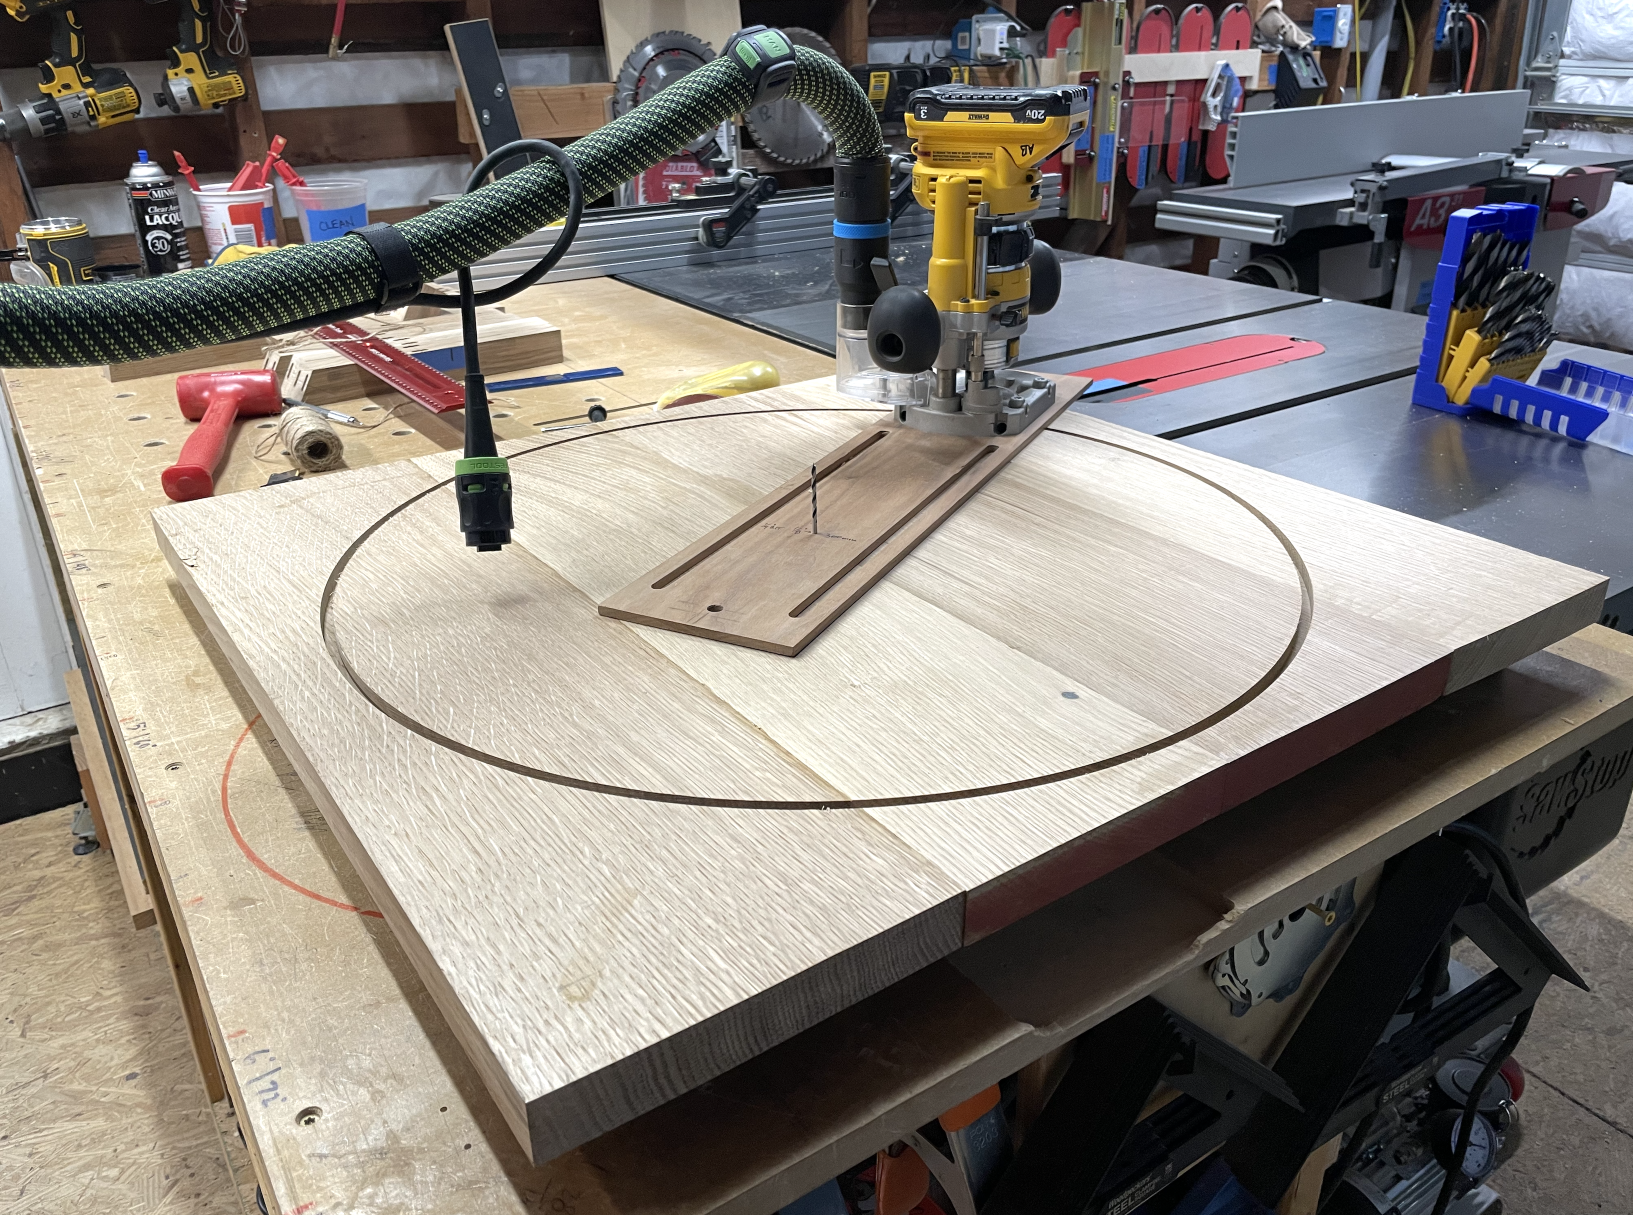
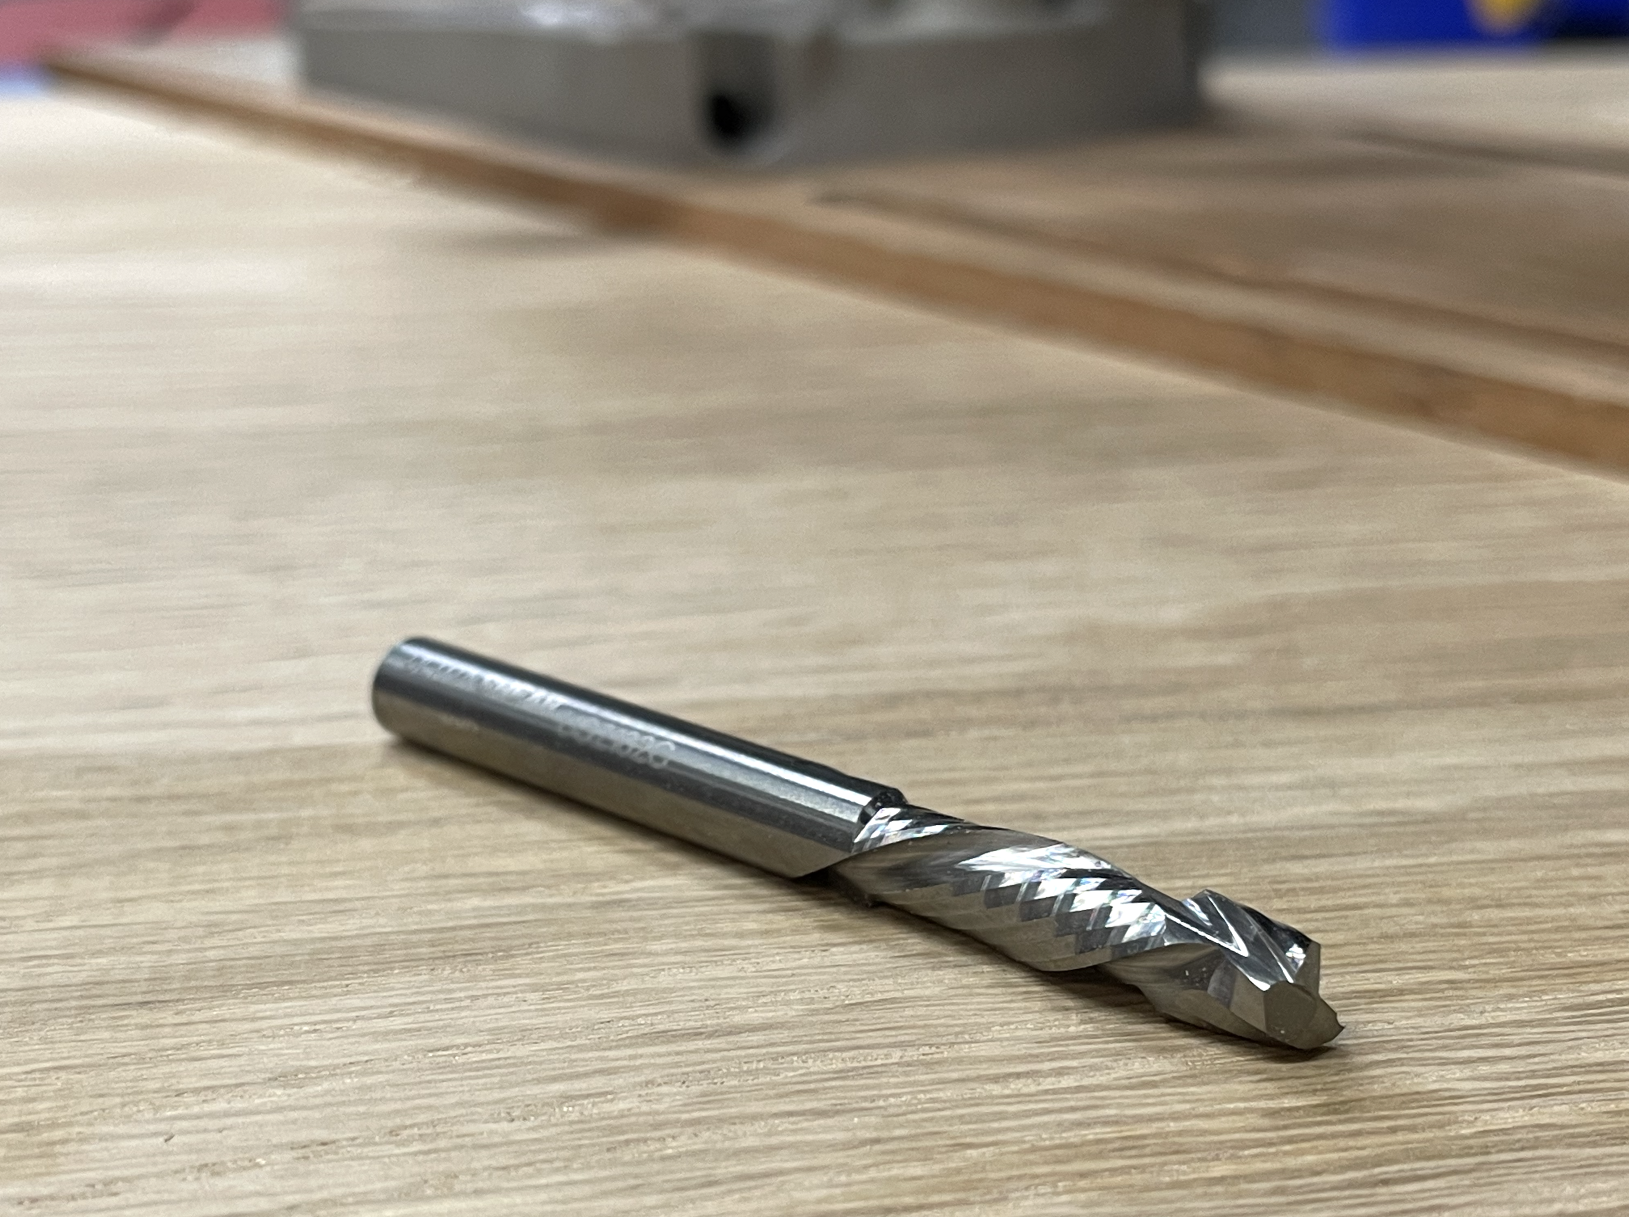
Very happy with this Ultra-Shear bit from Woodpeckers.
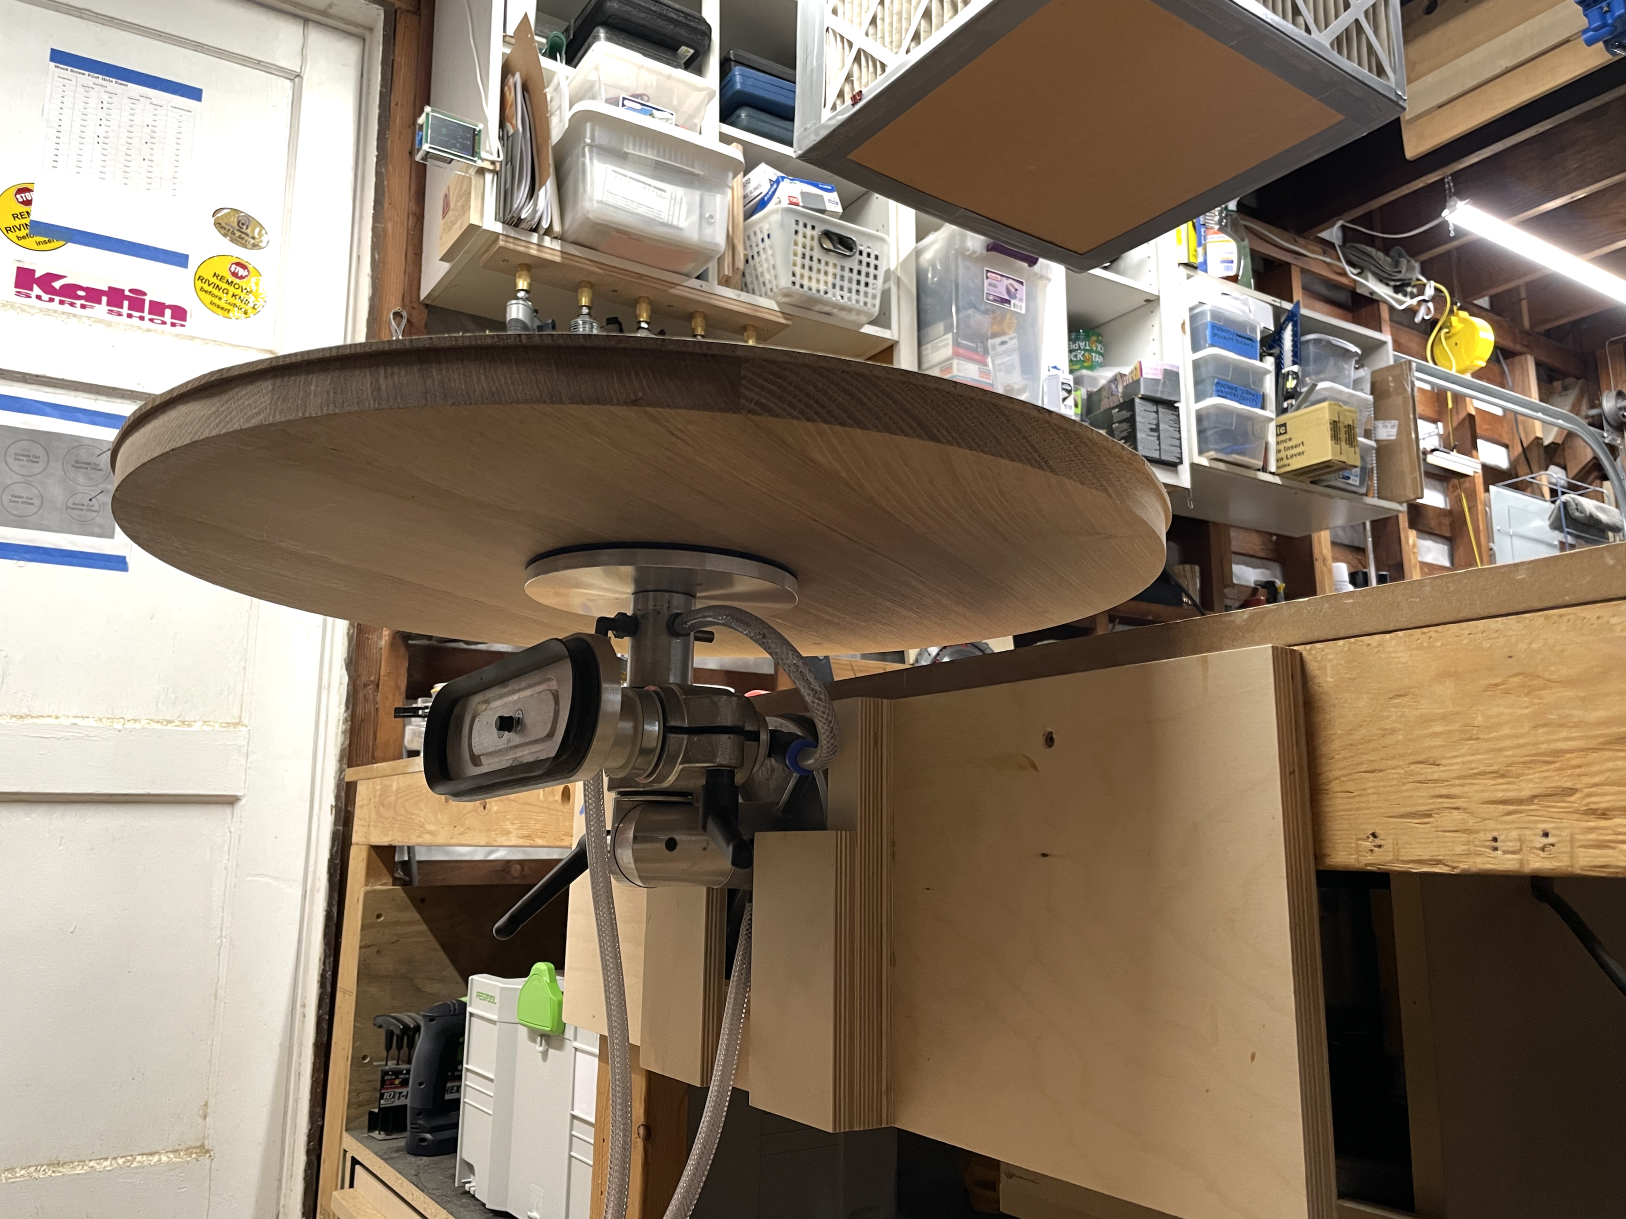
I didn't cut all the way through with the router and opted to use the bandsaw to free the table from the panel.
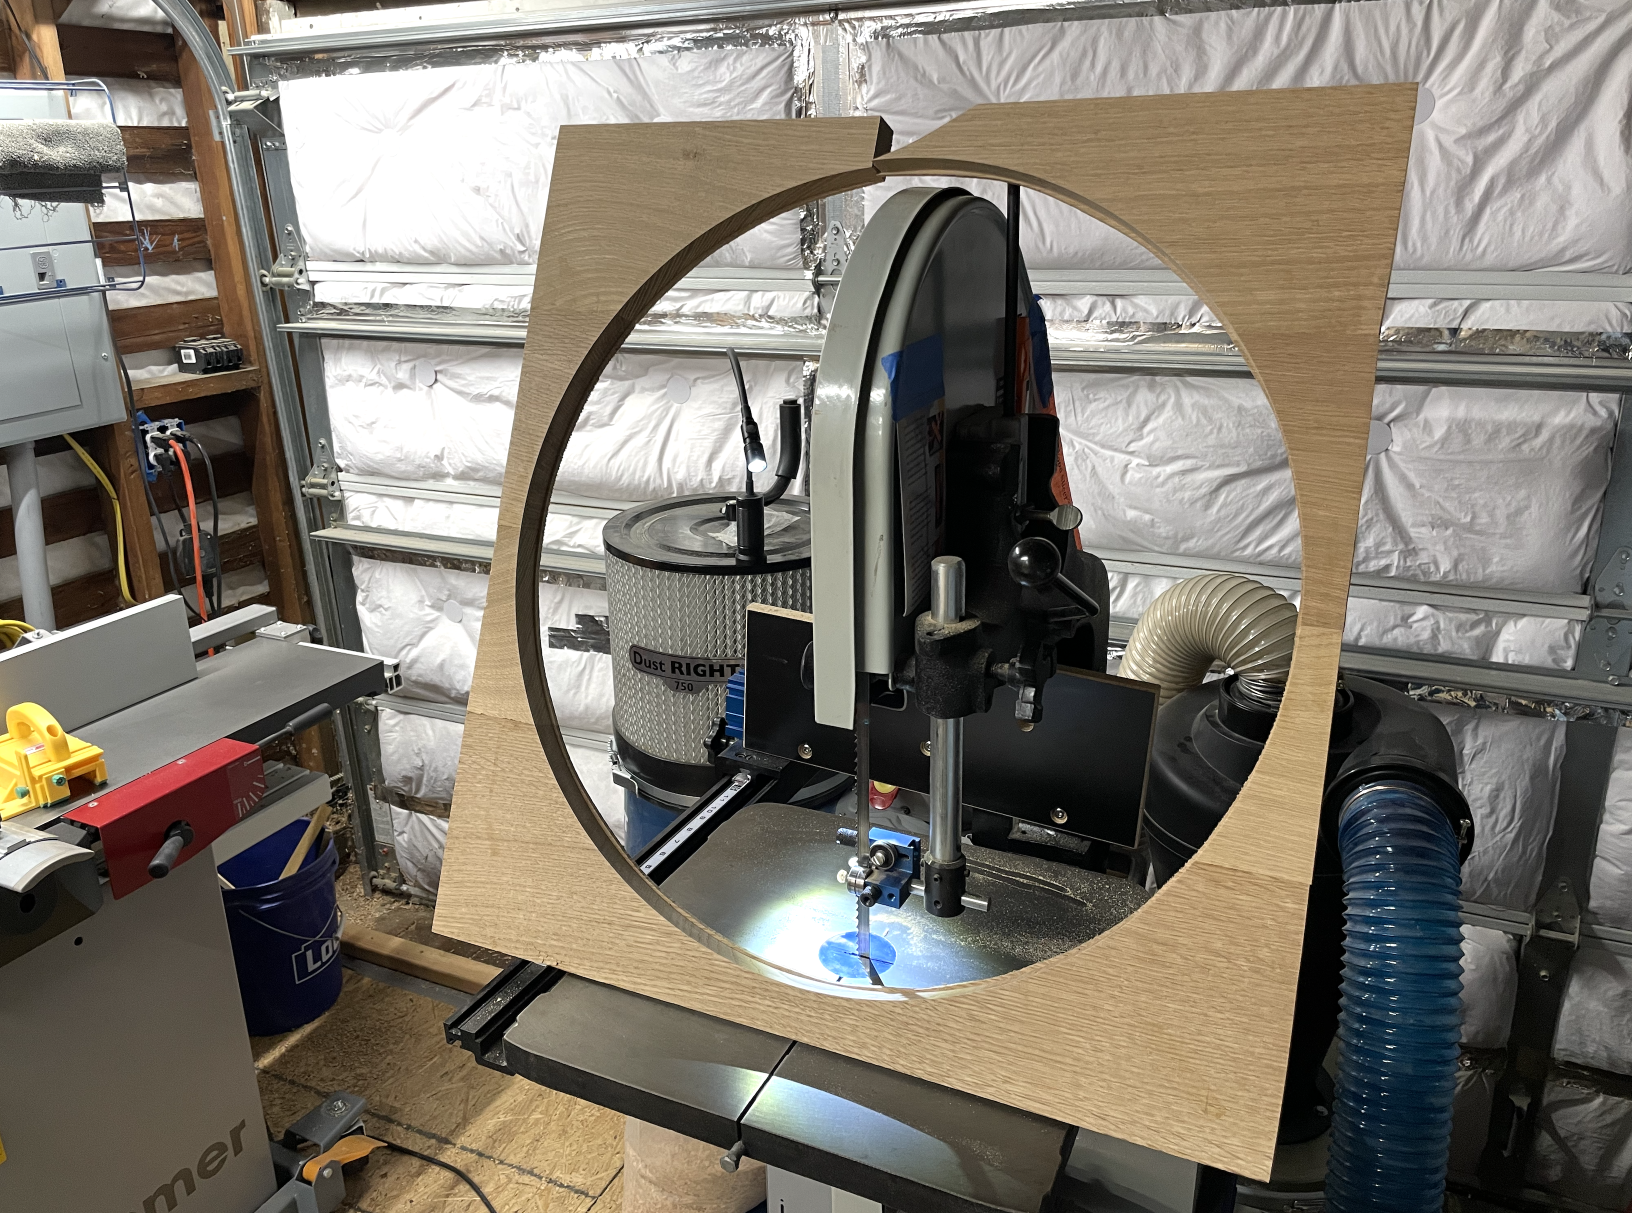
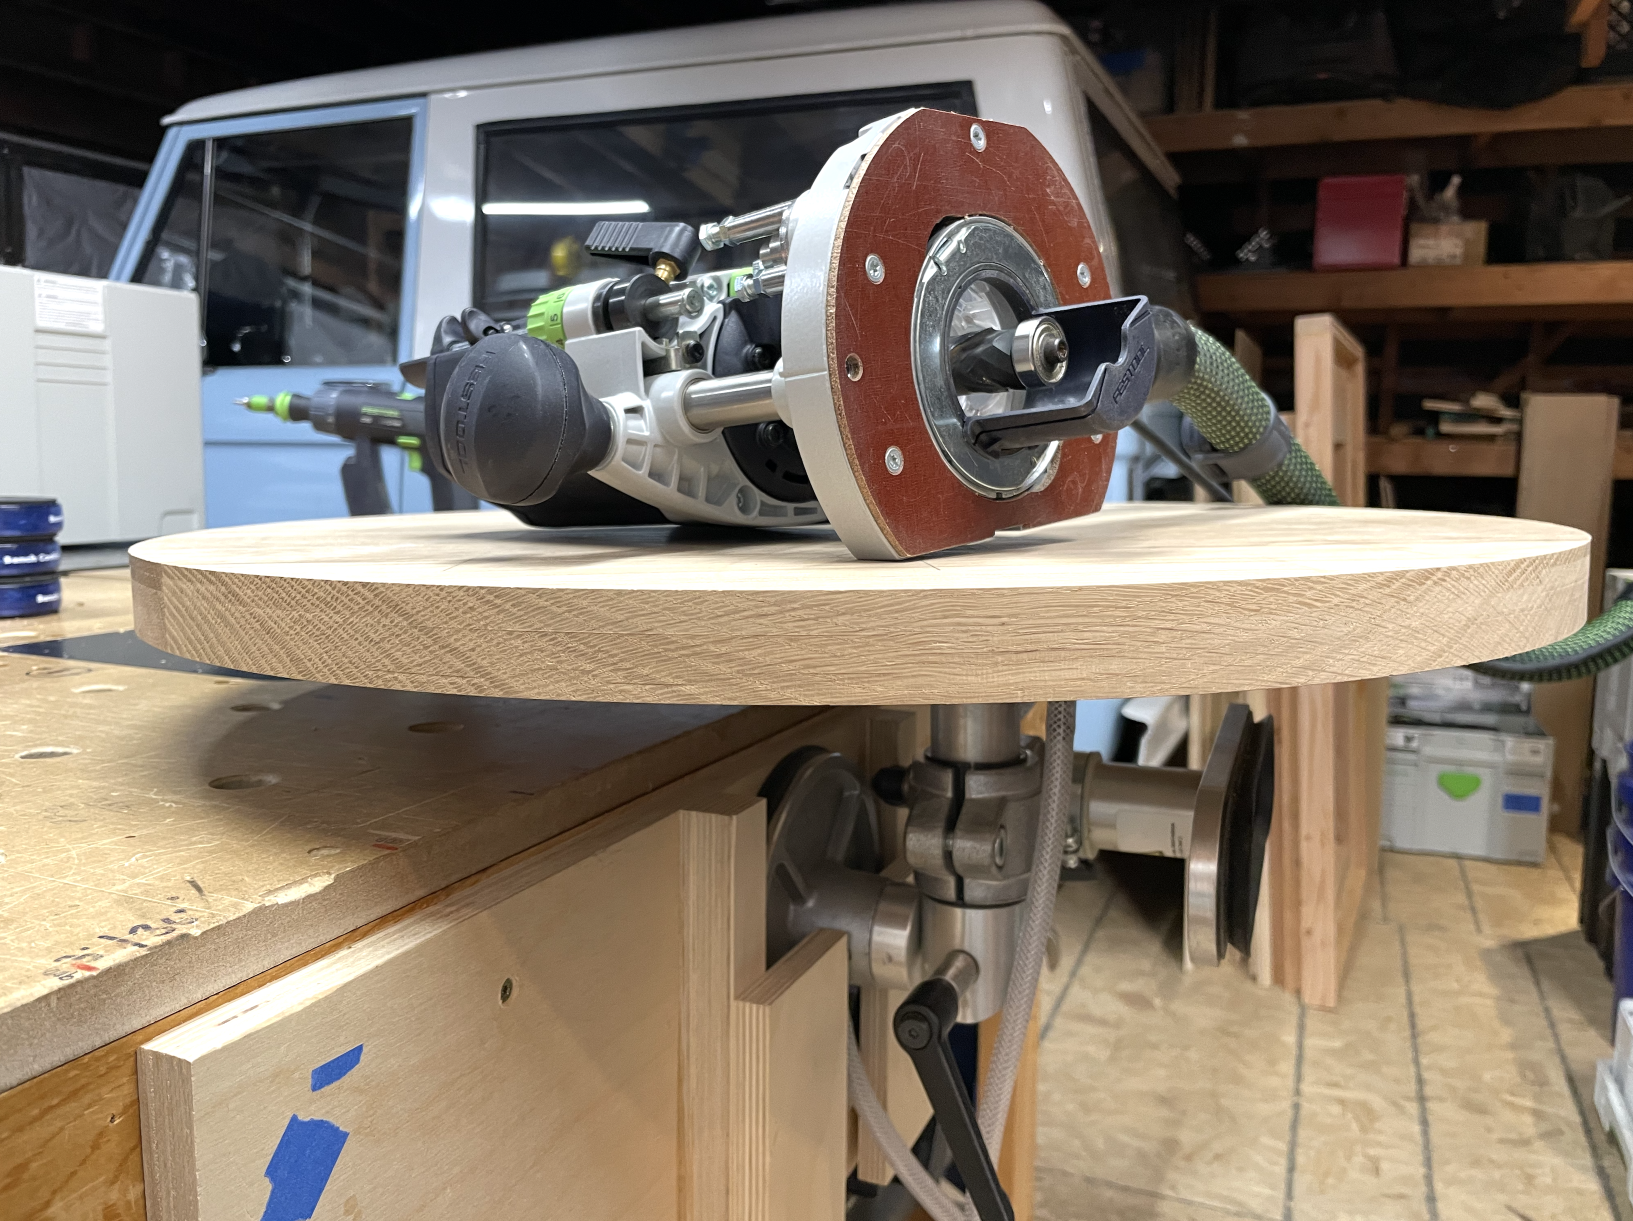
My blade wandered dangerously close to the circle.
Who doesn't love the chip catcher?
Chamfer on the underside...

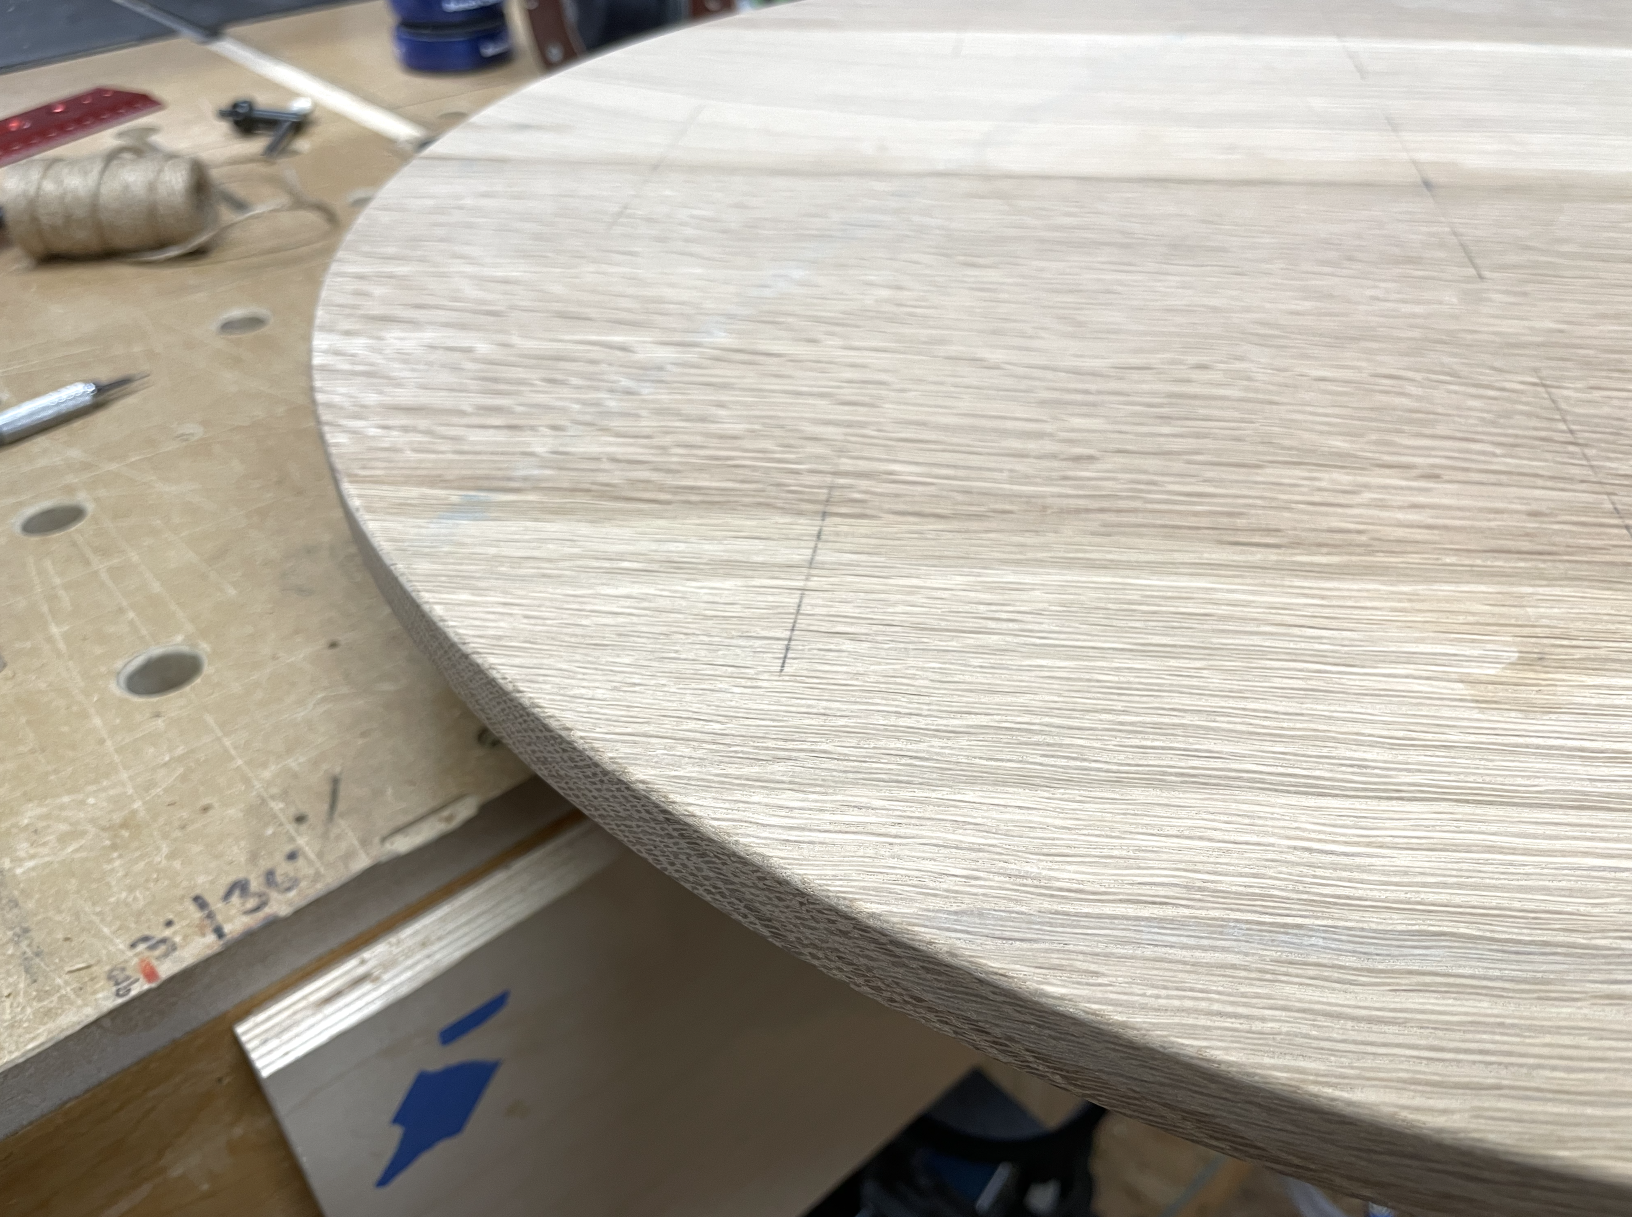
...and a 1/8" roundover on the top
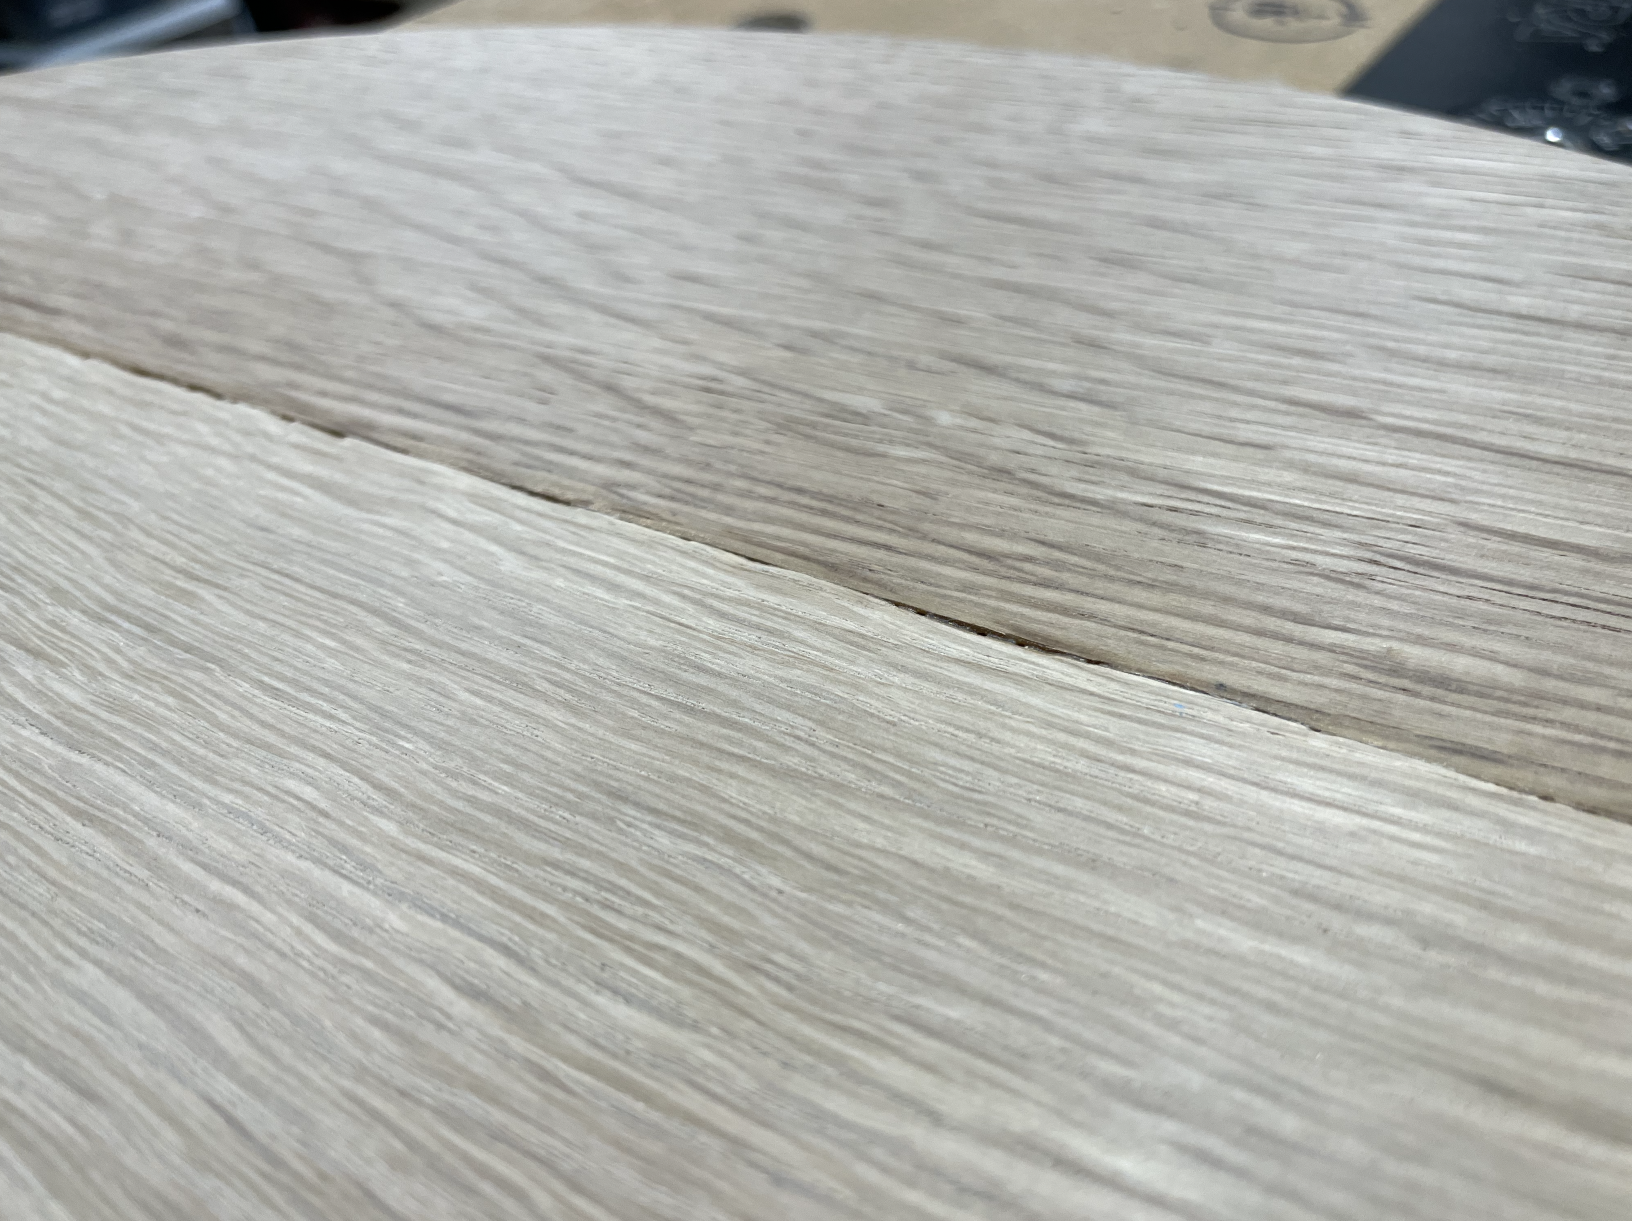
I used a 24 tooth ripping blade on the panel boards and experienced quite a bit of tearout on the underside. I ended up using a combination of sawdust and glue, along with some black CA glue to fill these.
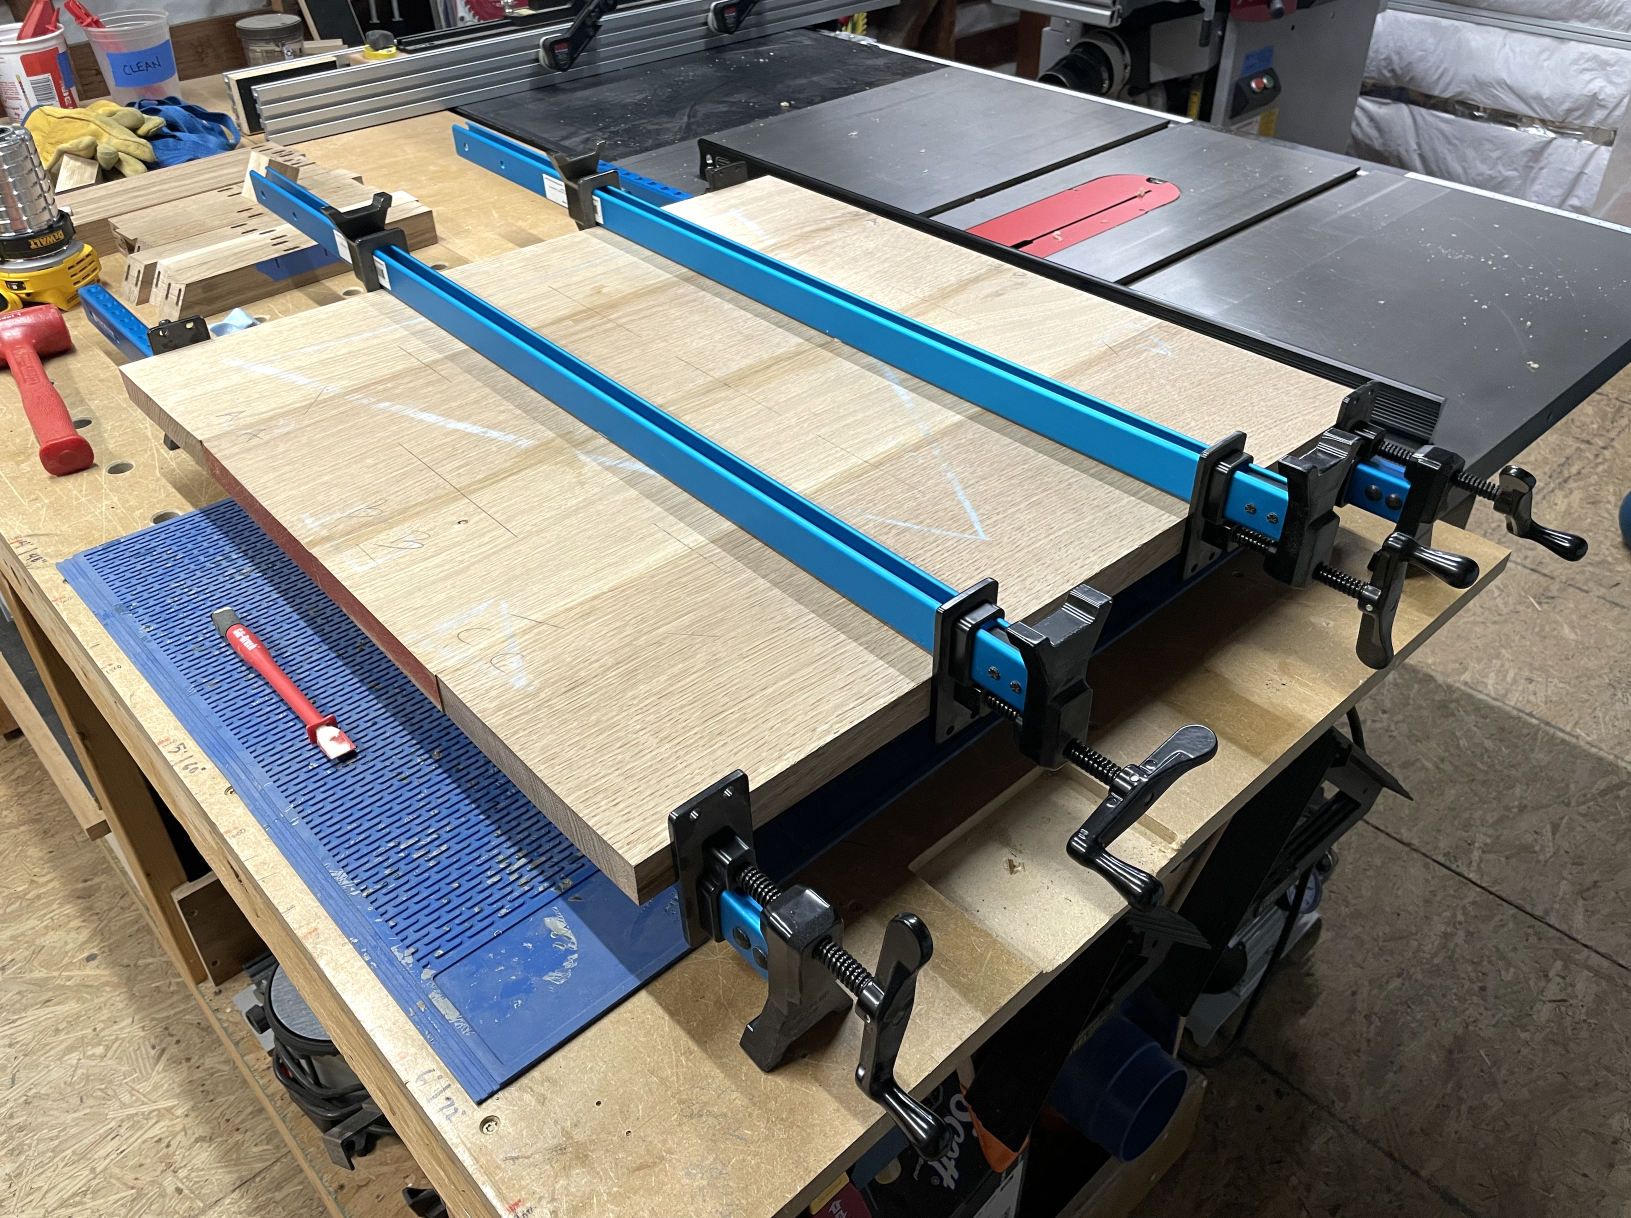
Clamping blocks for the stretcher glue up.
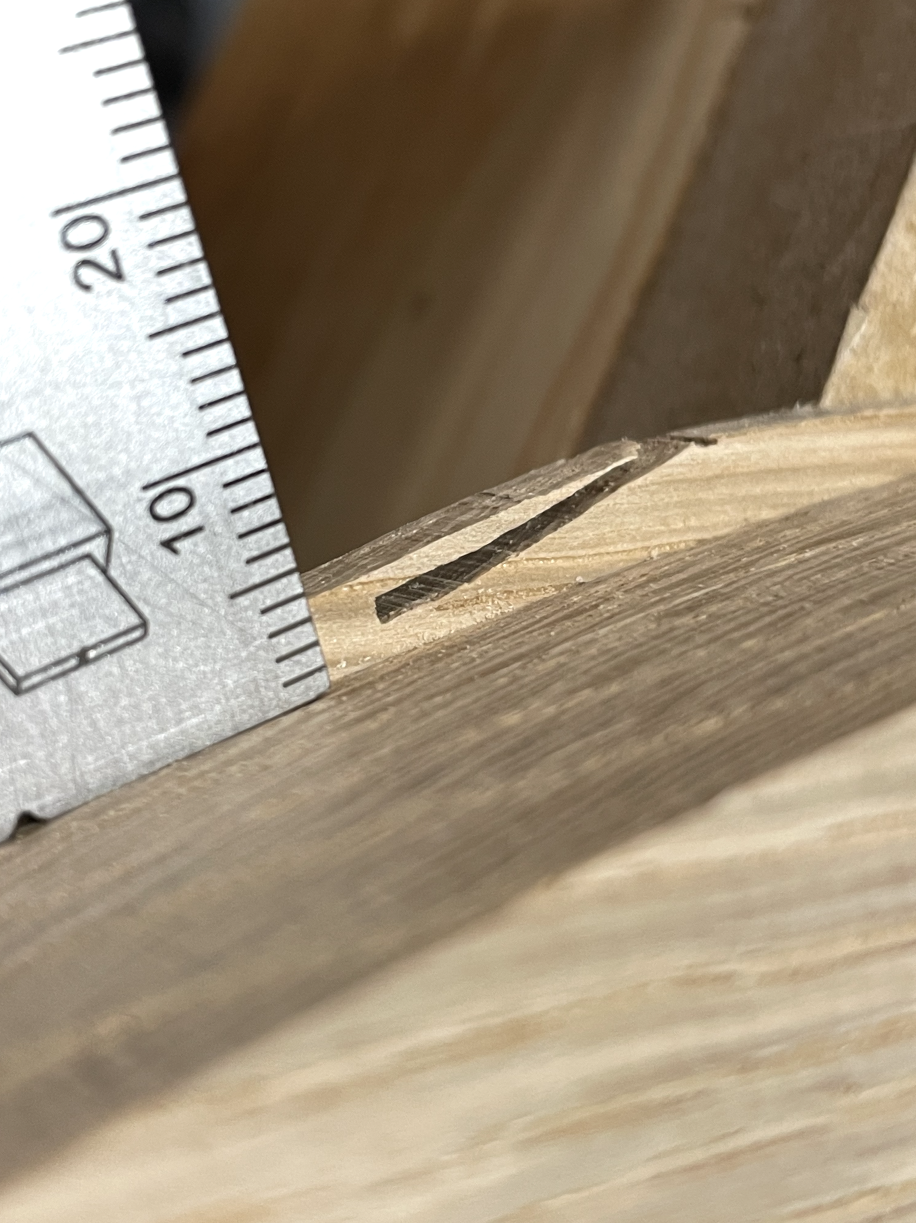
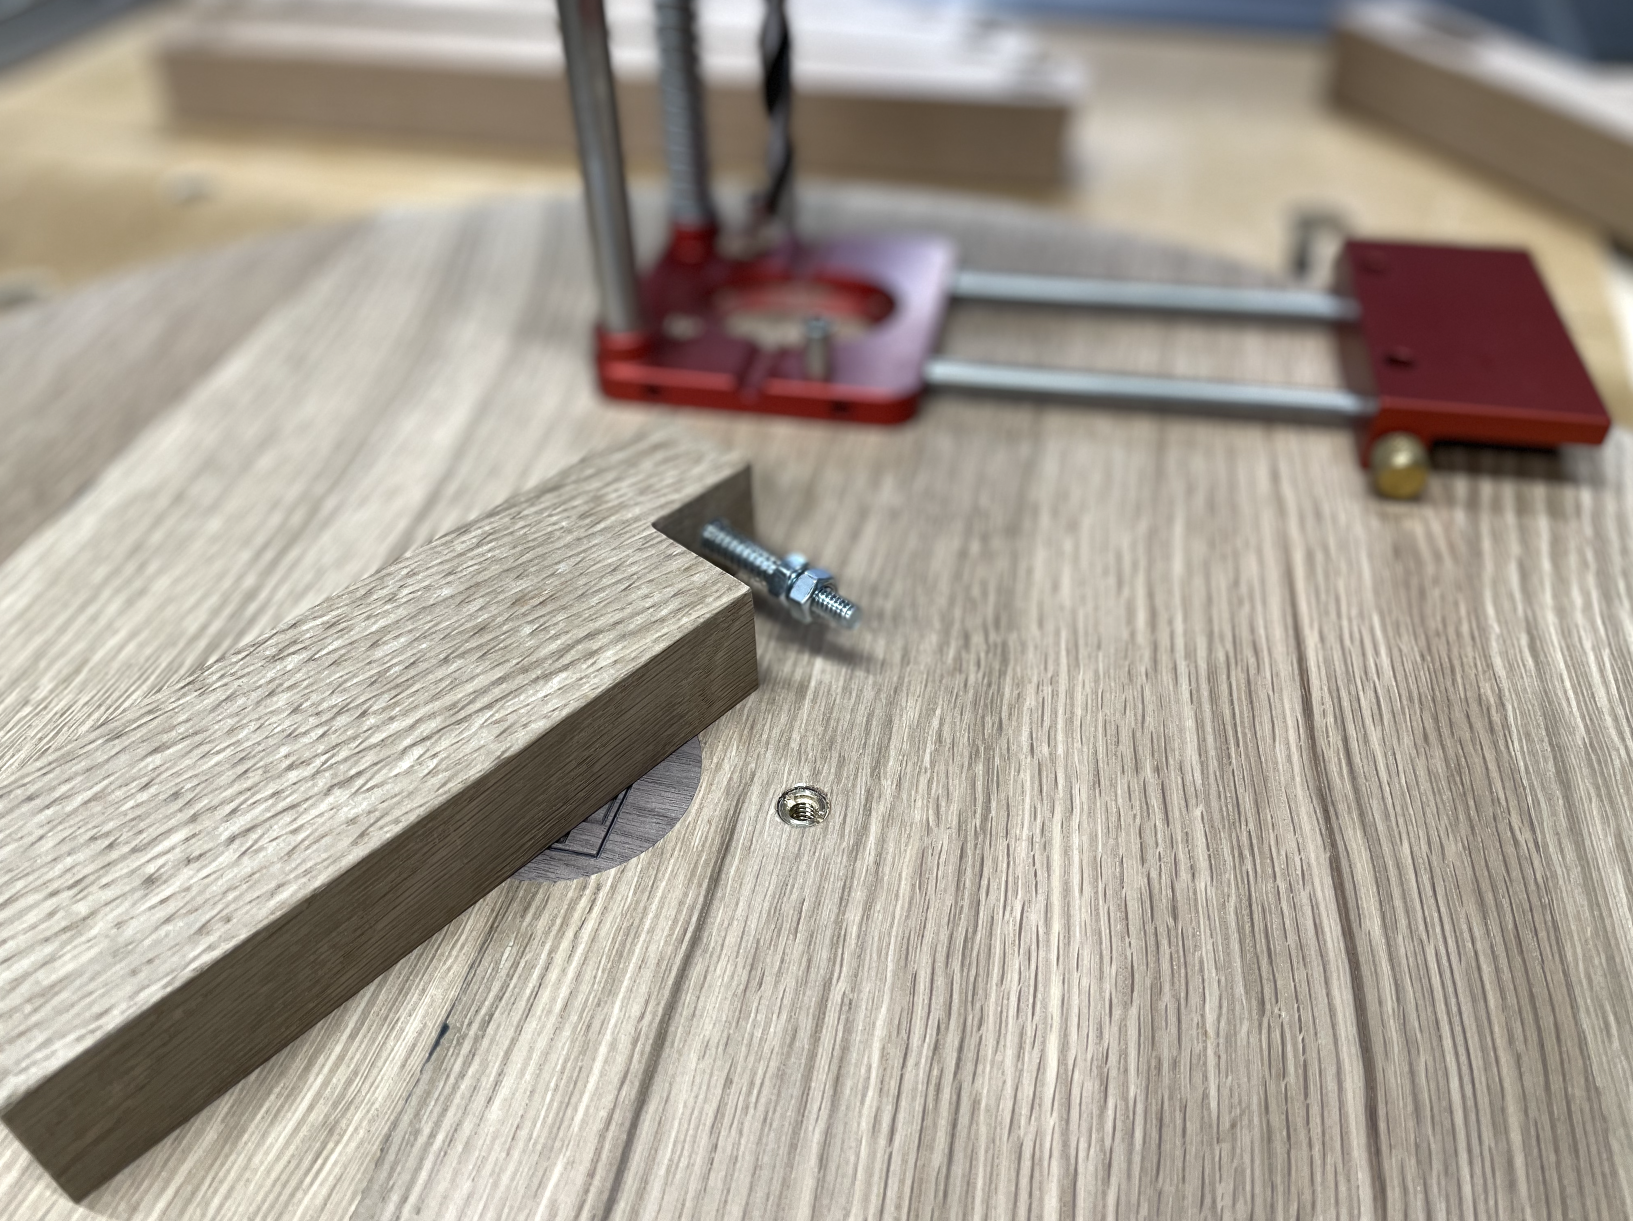
Based on feedback on a previous thread, I opted for the following pattern of tight and elongated holes to attach the table top. My initial plan was to use 6 holes, but for such a small table, I went with 4, though I probably would've been fine with 3. The black on the left seam is where the tear-out was filled.

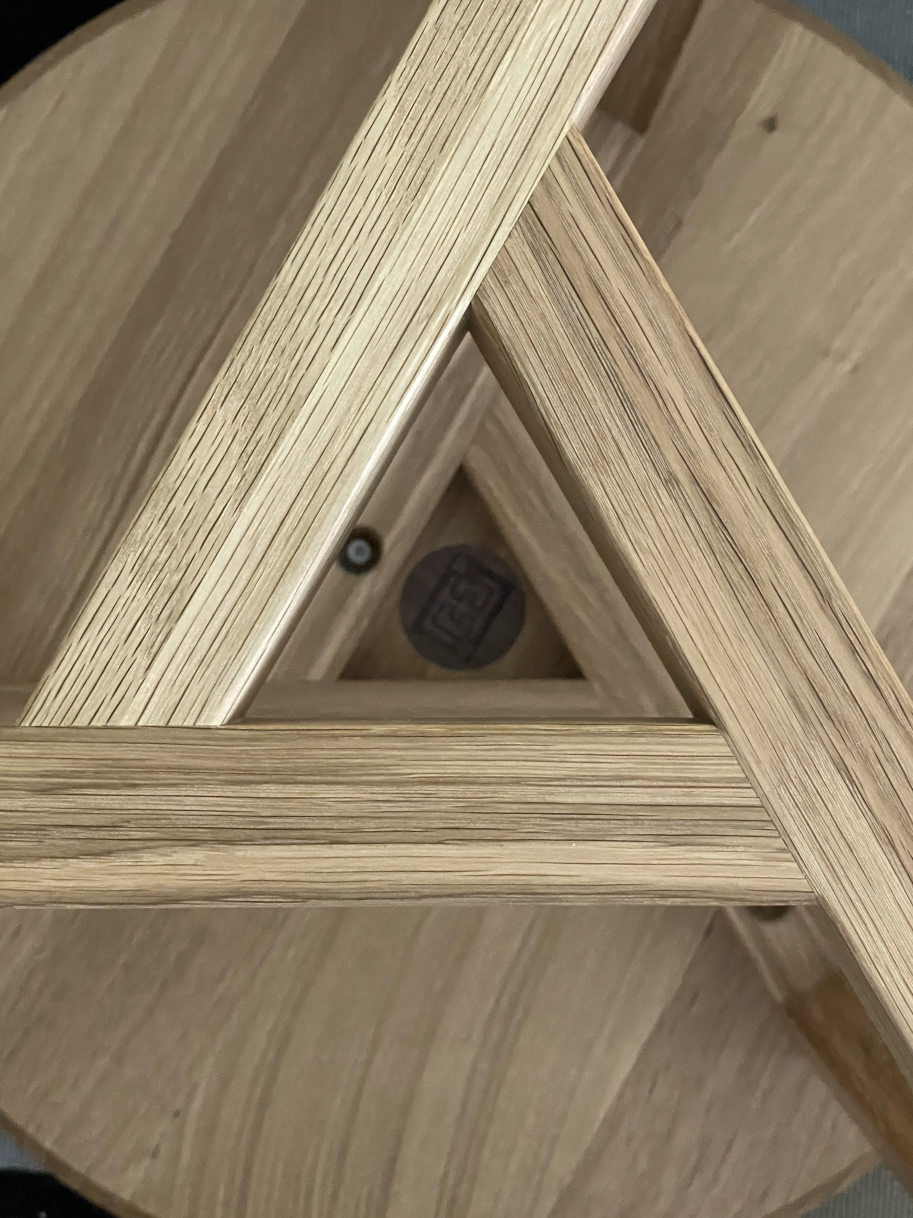
I made this jig for installing the threaded inserts, then did a facepalm when realizing I could've just use the drilling guide to accomplish the same thing. You can see a small walnut medallion peeking out from under the jig. That is there to cover the hole used by the circle jig.
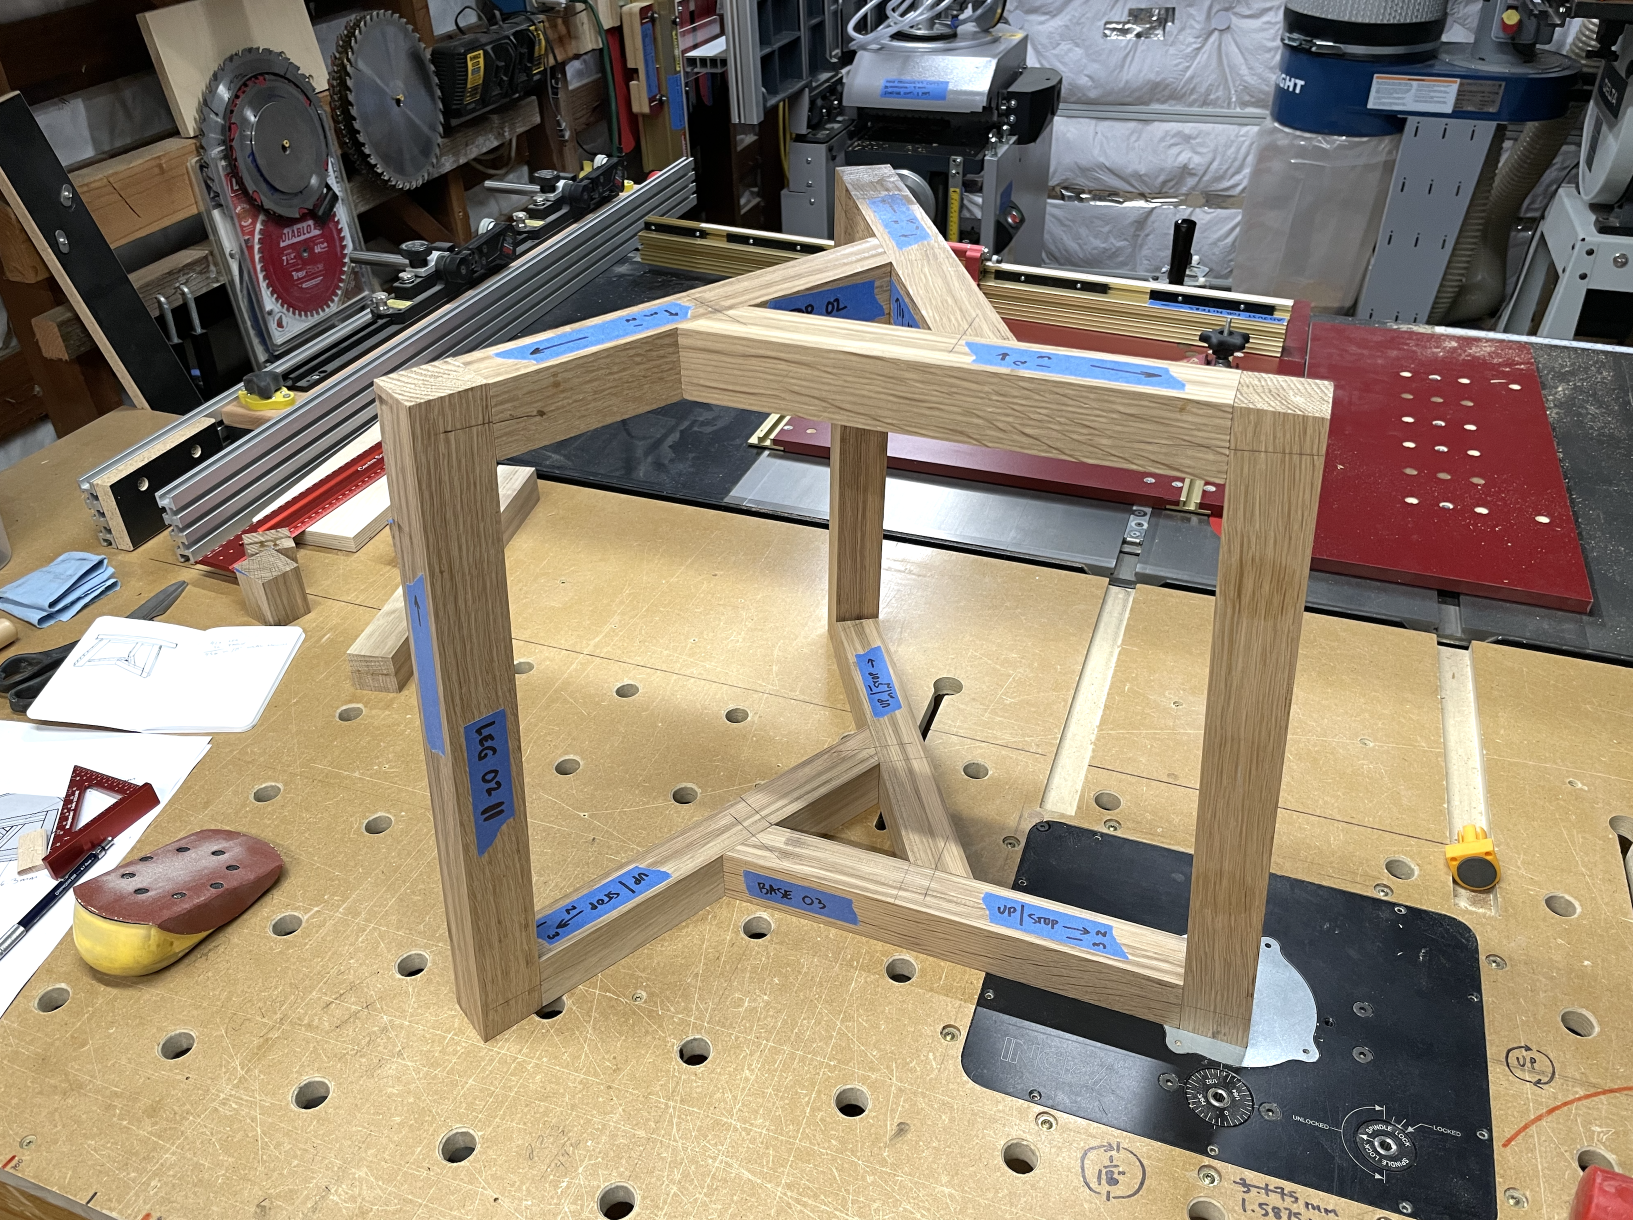
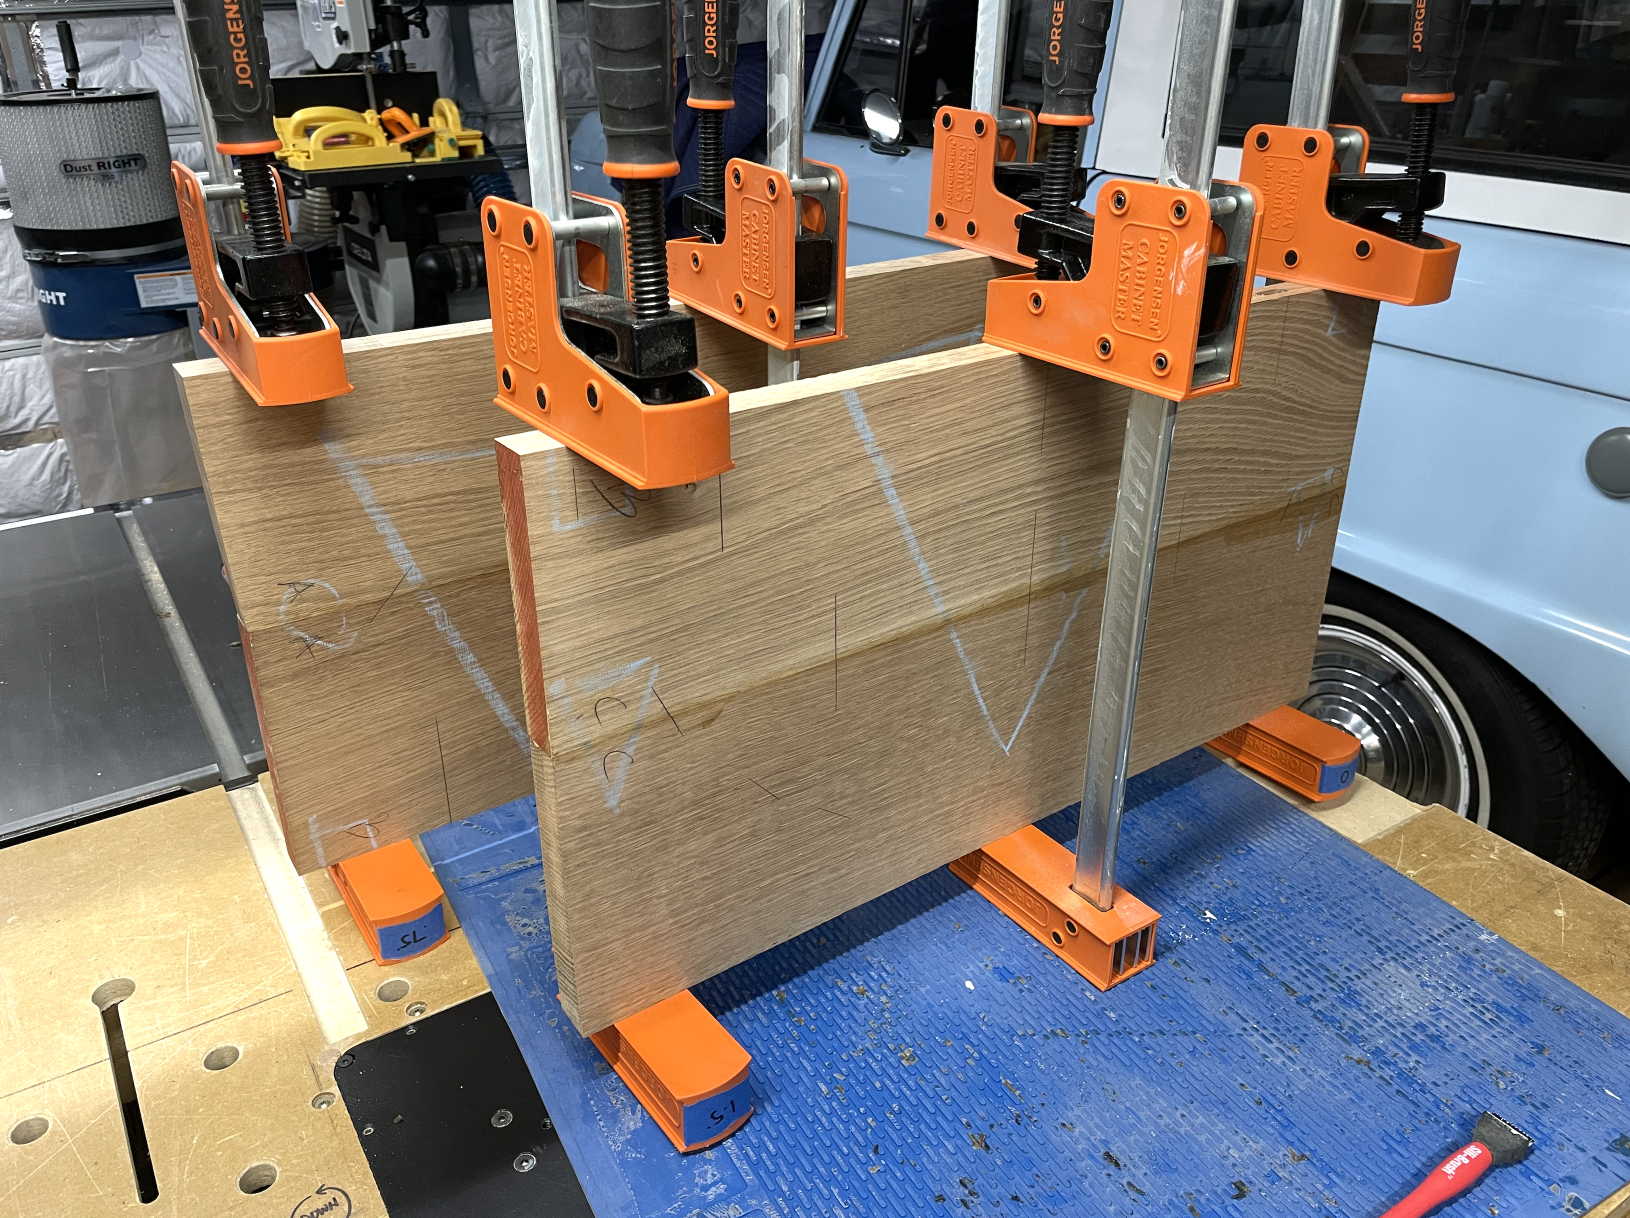
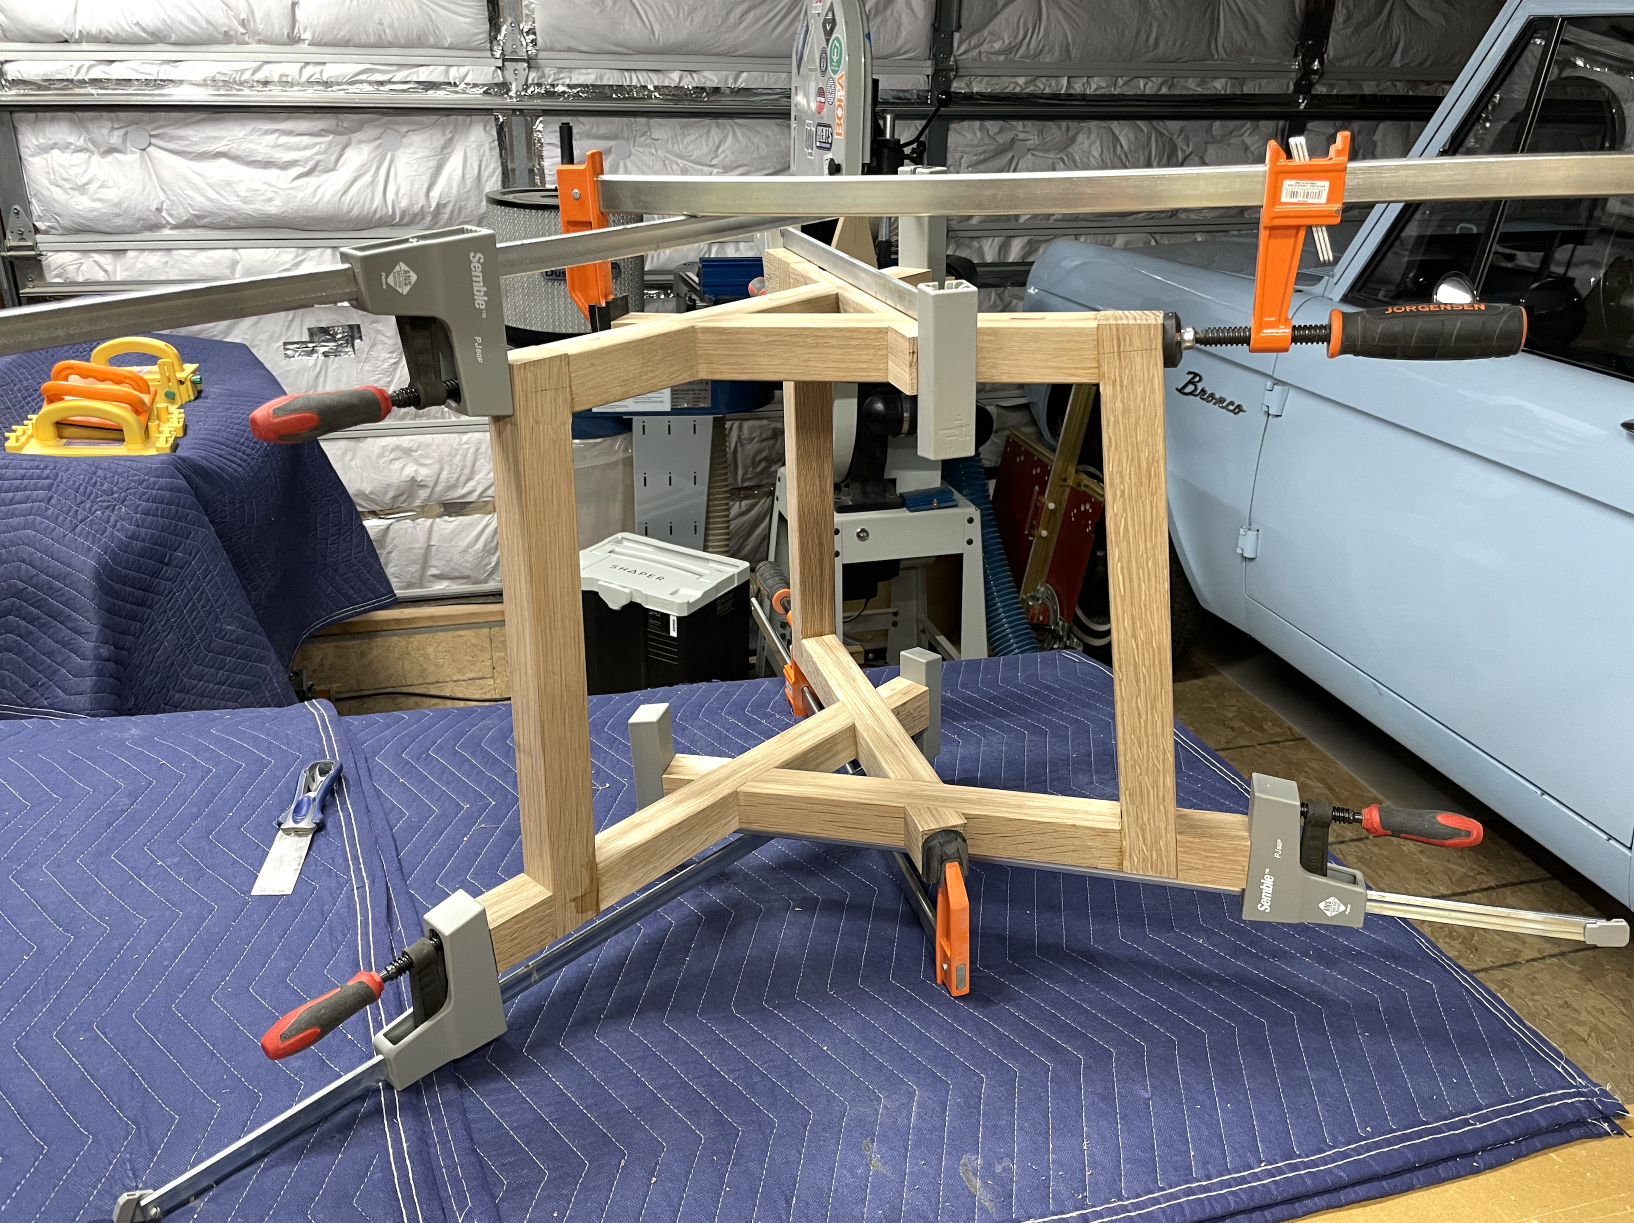
Full leg assembly glue up.
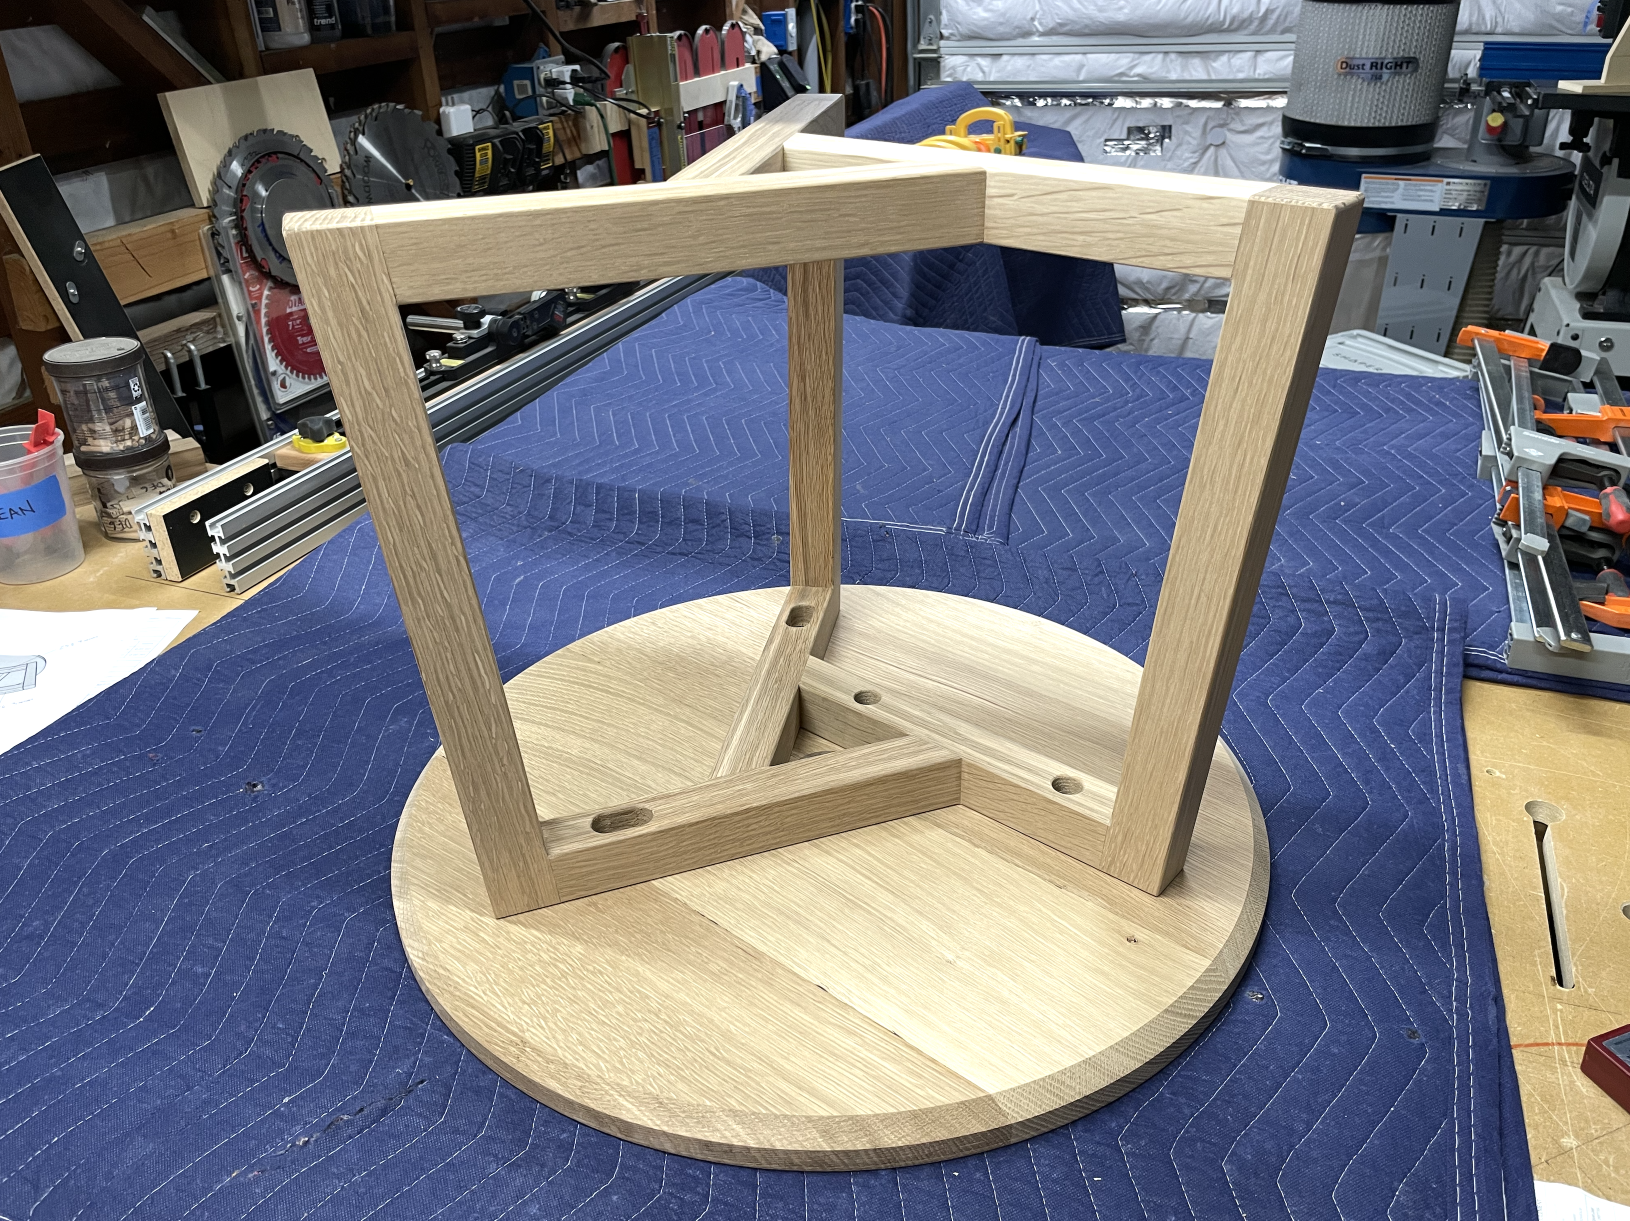
Assembly before sanding and finish.
Finished with my preferred hardwax oil, Osmo Raw Matte. Overhead lighting casts an orange-ish tint, but in natural light, it looks really nice.
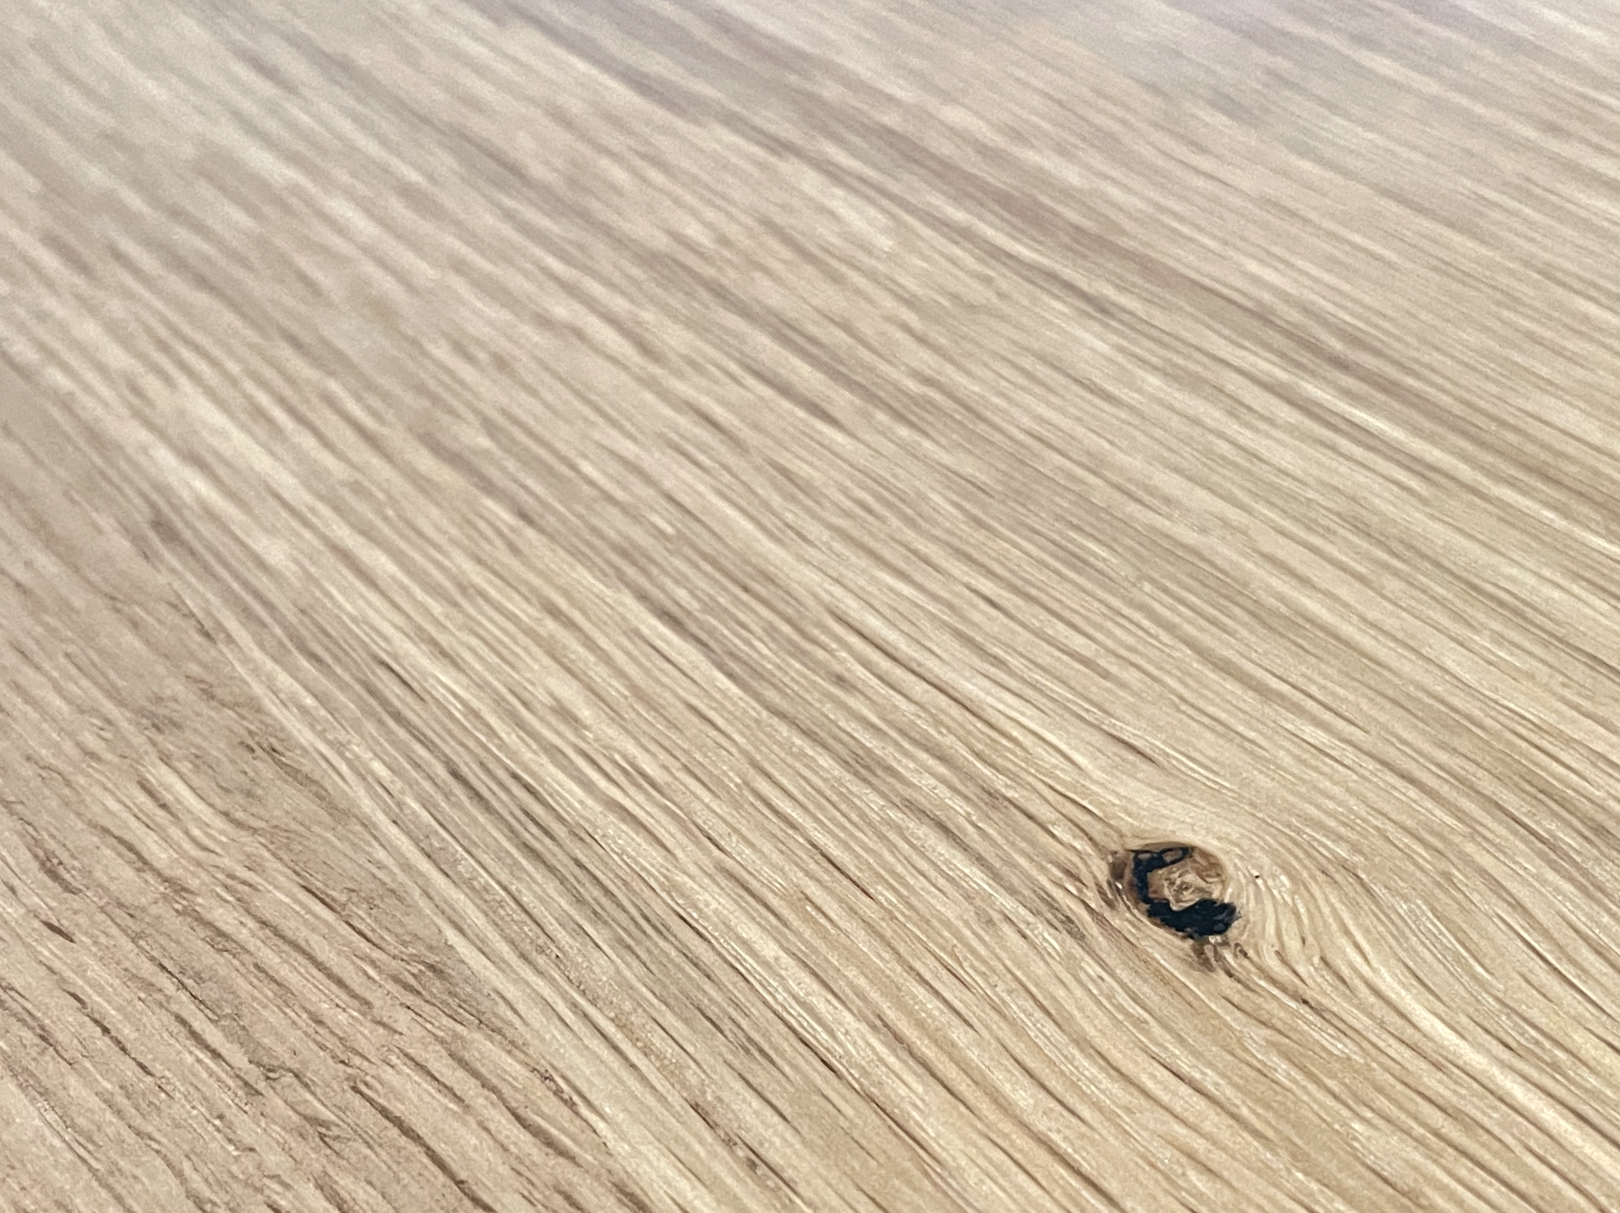
I had a small knot on the topside of the table that was filled with black CA glue but in hindsight, I should've made a better effort to avoid this knot as it sticks out on an otherwise blemish-free top.
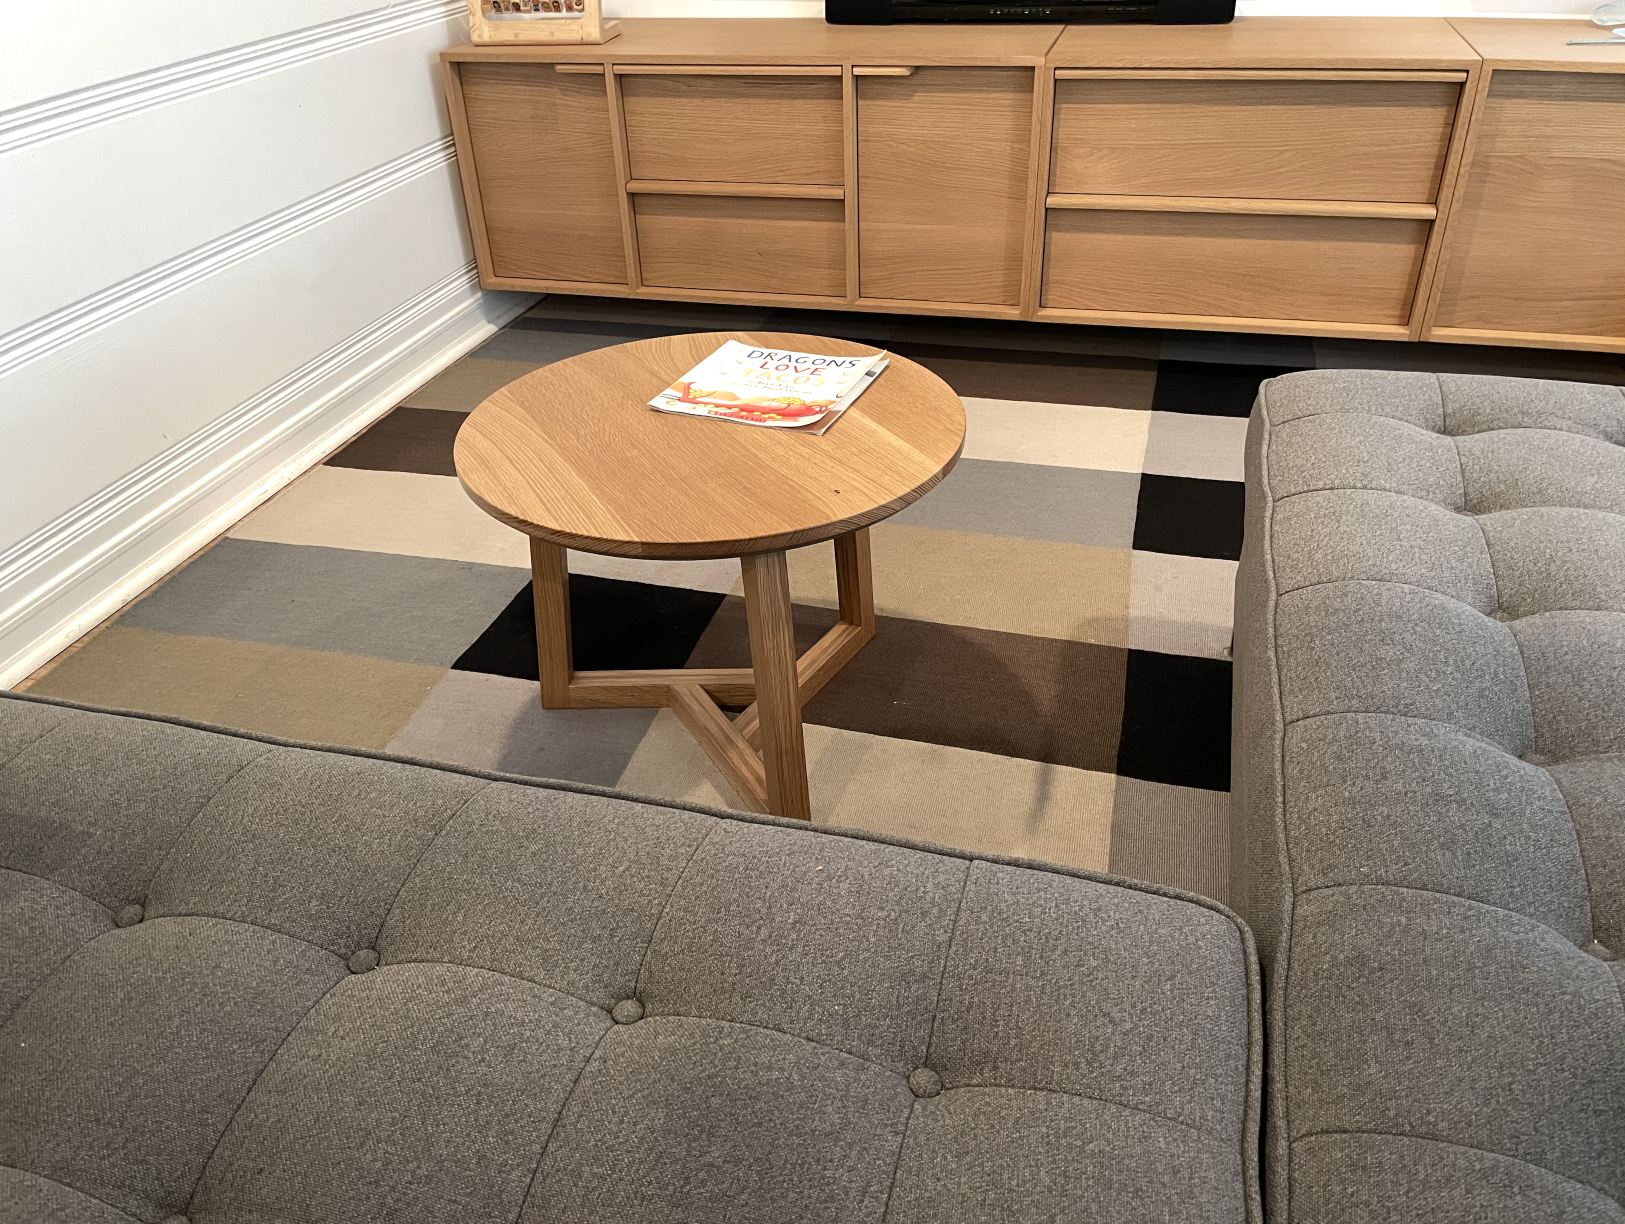
Dragons Love Tacos [cool]
The medallion centered on the underside of the table. The logo on the medallion is an abstract L+L, which is a nod to an architecture and design blog I worked on with a friend for several years in the mid-2000s.
If I were to do this again, I might add a small lip around the table top. I like the design of this Kaare Klint tabletop
Thanks for reading!
Cheers,
Anthony
Overall, this was a fairly easy build. Clamping during the glue up was a little tricky, but only because I didn't prepare as well as I should have. I used offcuts with double-sided tape to square up my clamping surfaces but the tape would slide under clamping pressure. I was able to back off the pressure after getting the joint tight and it was fine, but was a bit stressful. For future glue ups, I'll make some better jigs for easier angle clamping.
I started out with some quartersawn 4/4 white oak
Cut to size and laminated to get some ~8/4 legs and stretchers.
My boards were going through the planer then getting stuck. The rollers were were putting marks in the stock. My initial thought was to clean the rollers but it turns out my planer table just needed to be waxed. A generous coat of Glidecote resolved the issue and later boards planed easily.
I love me some blue tape and leave notes on just about everything. The first time I cut miters on the sled, I paid the INCRA tax and tripped the SawStop brake. Cutting 30° for the stretcher assembly.
I used a pair of 6x40 Dominos at each joint. A 5° angle was cut on the stretchers to angle the legs.
Dry fit complete.
Next up was the table top. More quartersawn white oak, this time in 6/4.
I noticed some snipe when edge jointing. I needed to realign my outfeed table with my blades.
Very happy with this Ultra-Shear bit from Woodpeckers.
I didn't cut all the way through with the router and opted to use the bandsaw to free the table from the panel.
My blade wandered dangerously close to the circle.
Who doesn't love the chip catcher?
Chamfer on the underside...
...and a 1/8" roundover on the top
I used a 24 tooth ripping blade on the panel boards and experienced quite a bit of tearout on the underside. I ended up using a combination of sawdust and glue, along with some black CA glue to fill these.
Clamping blocks for the stretcher glue up.
Based on feedback on a previous thread, I opted for the following pattern of tight and elongated holes to attach the table top. My initial plan was to use 6 holes, but for such a small table, I went with 4, though I probably would've been fine with 3. The black on the left seam is where the tear-out was filled.
I made this jig for installing the threaded inserts, then did a facepalm when realizing I could've just use the drilling guide to accomplish the same thing. You can see a small walnut medallion peeking out from under the jig. That is there to cover the hole used by the circle jig.
Full leg assembly glue up.
Assembly before sanding and finish.
Finished with my preferred hardwax oil, Osmo Raw Matte. Overhead lighting casts an orange-ish tint, but in natural light, it looks really nice.
I had a small knot on the topside of the table that was filled with black CA glue but in hindsight, I should've made a better effort to avoid this knot as it sticks out on an otherwise blemish-free top.
Dragons Love Tacos [cool]
The medallion centered on the underside of the table. The logo on the medallion is an abstract L+L, which is a nod to an architecture and design blog I worked on with a friend for several years in the mid-2000s.
If I were to do this again, I might add a small lip around the table top. I like the design of this Kaare Klint tabletop
Thanks for reading!
Cheers,
Anthony