A pantry cabinet

tjbnwi

Member
Joined
May 12, 2008
Messages
7,189
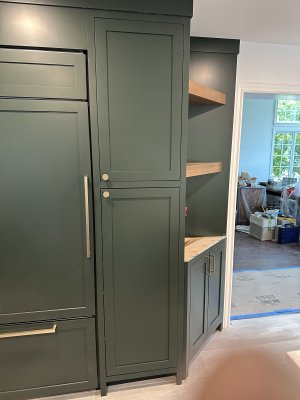
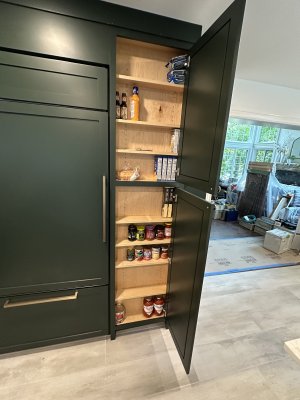
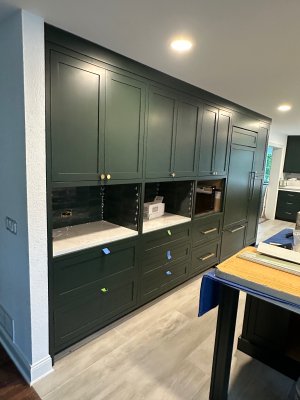
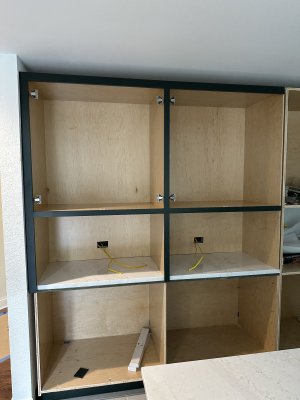
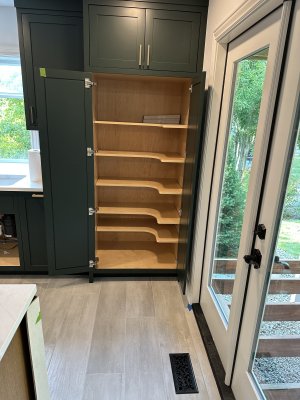
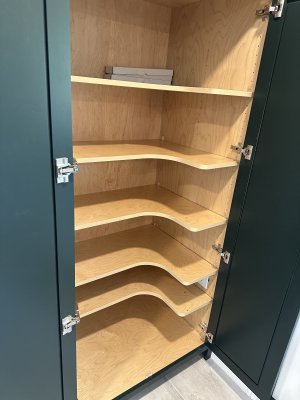
My oldest daughter always complains about “loosing” stuff to the back of the pantry cabinet. She’s in the process of having her kitchen remodeled, I’m doing the cabinets. This is what we came up with to address the “lost” items.
The shelves were cut on the CNC, the edge banding was done with the Conturo. The hinges on the left door are Blum Zero Protrusion, I went with the lock in style shelf pins incase of imbalance.
IMG_2028.jpeg

IMG_2029.jpeg

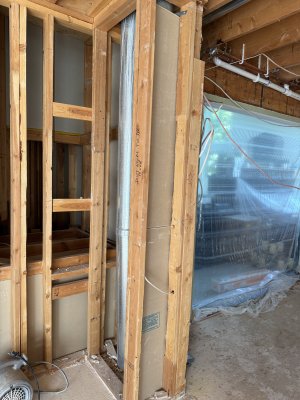
She has a chimney and duct work that would interrupt the refrigerator wall, everyone expected just a panel to cover the sheet metal.

Well…with the refrigerator/freezer being a Sub Zero Classic the casework has to be 26-1/2” deep minimum (we go 27-1/4”). This allowed me to fit in a small item storage cabinet.

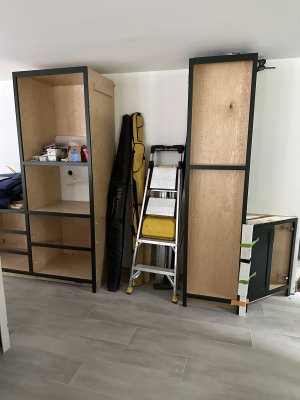
Original state.
IMG_1023.jpeg

IMG_2030.jpeg

IMG_2031.jpeg

Tom
 
The saga continues…..

She wanted the refrigerator wall on plane. With what she wanted a step in the cabinet would be normal. I don’t have a great process picture. You can see in this picture just a base cabinet to the right. Well that would be silly of you to think that’s what we’ll end up with….

IMG_1947.jpeg

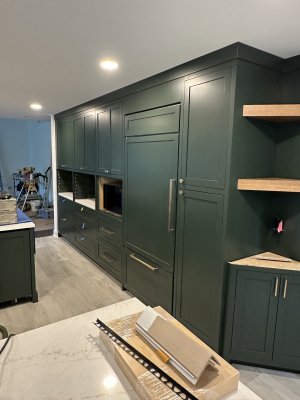
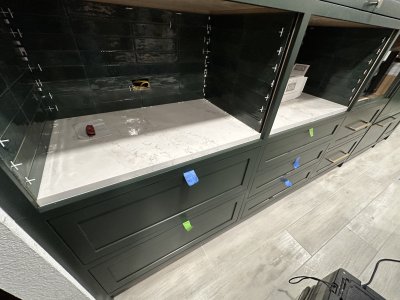
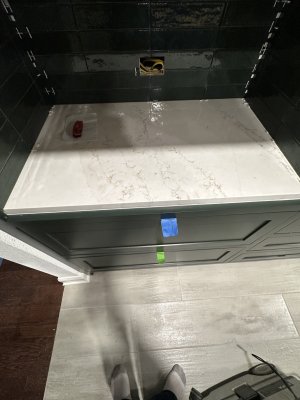
Pictures of the “wall” to this stage. You see quartz countertop “in” the cabinet. The face frame was assembled at the shop with 2 horizontal joints and 2 vertical joints not glued. Ashely finished the face frame, we assembled the cabinet completely. The partitions in the what you see as open areas had to be held up 3cm to accommodate the top. Once we were happy with fit it was disassembled and the face frame separated at the unglued joints. I reassembled the right tall section and the base area (the major part of the face frame). This allowed the counter top to be fitted. I removed the face frame the morning the counters were going in. I did measure from the face frame tall stile to the wall and trimmed the wall stile to fit the wall. The face frame had to come off because the right upper section tucks behind the tall stile. Fortunately the counter installers offered to help place the left section on the top, if they would not have offered I would have waited until the next morning for the “shop” to get here.

The open areas that are now tiled will have flip up pocket doors. No manufacture makes a hardware with a top mount configuration. Now that my daughter decided to tile the area I have to fabricate brackets to make the hardware top mount.

IMG_2032.jpeg

IMG_2034.jpeg

The microwave will be a built in when the trim kit comes in.

Tom
 
Stuff like this drives me nuts. My missus had me build high and deep cupboards as she wanted so much storage space to store all her "much needed items"!

She's now spent the last 2 weeks cleaning it all out and re-arranging everything, complaining the whole time the cupboards are too big and she can't see or have easy access to everything!

Of course they were built to her requirements but it's still my fault! ;-)
I think we solved that problem on this one. No place for anything to get lost. The base cabinets are drawers or rollouts, except for one that she knows what is going there, it’s only 16” deep.

Tom
 
I'm sure I'm missing something or not seeing the obvious....
What are the two openings, towards the left side? They appear to have the same tile as the back wall and maybe a quartz or marble bottom?
BTW, I really like the shallow pantry. If you lose something in the back of that, bless it and let it go.
Maybe this picture will help, or I suck at explaining things….

The two openings on the left are part of the cabinet, the “back wall” is the back of the cabinet. The deck is quartz. The plan is to use these areas as charging stations for the various devices they have.

The left section of cabinet after it was placed on the quartz. The quartz is a single piece left to right. You can see the face frame for the rest of the cabinet is removed. The spaces will get lift up/push back doors. Until it was tiled I did not know the spaces were to be tiled. The tile is really screwing with the hardware install.

IMG_1983.jpeg

The quartz top was held back 7/8” from the front of the face frame to accommodate bumpers.

IMG_2036.jpeg

IMG_2035.jpeg

Hope this cleared things up.

Tom
 
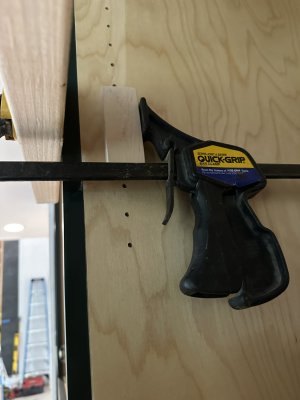
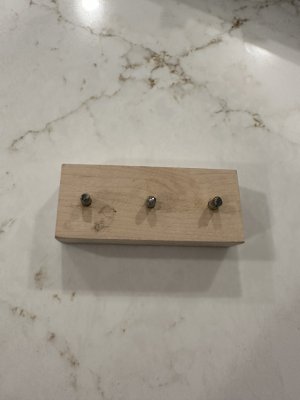
If you ever need to clamp a face frame in place, block with 5mm drill rod spaced to fit the shelf pin holes.

IMG_1984.jpeg

IMG_2037.jpeg

Tom
 
@tjbnwi you're right. It was not readily apparent that it was a single slab. That sure seems like a lot of space for charging stations though? I could get 4 of the Makita double chargers in each side.

Lift up push back doors might be quite a challenge with that tile on the sides :oops:
I don't remember the name of those? I remember doing that on some cabinets for the AirForce base, years ago, but similar to pocket doors the width to depth ratio is extremely important. 99% of the ones I have done ignored this, and the doors don't go in deep enough. The two times where someone took this into account, it was worse. The wanted bi-fold pocket doors, with an applied face frame to appear to be more like a frame/panel door. It was a nightmare. The total thickness was right at the absolute max. I made it work....in the shop. The install guys could not get them to fit right. I ended up having to go out on site and fix it The other was a smaller TV unit, not as bad.
Blum has several versions of lift up. They have the lift hinge/stay (Aventos HK) and the lift parallel (Aventos HF) and even up and over (Aventos HS)
Either way, they all mount to the sides.

It looks good though, that rich/dark is very in right now.
 
I’m using the Sugatsune hardware for this part of the project. With the tile the pushback will be 3/8” short of where I want it to be, oh well.

If this doesn’t work I may adapt HKT’s to a side mount slide.

They crazy in my head gets crazier every day.

Tom
 
Back
Top