bobtskutter
Member
Hello FOG, this is my first build log. I'm not very good at remembering to take pictures so there might be a few steps missing, but you're all much better than me so I'm sure you can figure things out ") It's also my second time at trying to post this because all the photos were too big.
It's also my second time at trying to post this because all the photos were too big.
My son wants a table for this model railway. So I've started to build an 8x4' table. The table needs to fit up the stairs of a typical british house (small and narrow) and be "knock down" style so it can be stored in his room. The table top will eventually be made of four 2x4' torsion boxes which rest on 2 tressels - I've not started the table top yet.
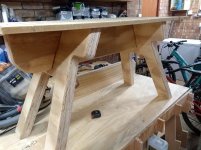
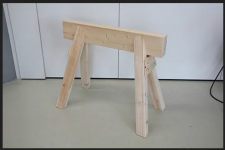
I wanted the tressels to look a bit like this (which is actually from a Festool blog build).
View attachment 1
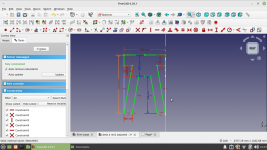
I roughed out the design in FreeCAD (I use linux as my daily PC) to get the dimensions.
View attachment 2View attachment 3
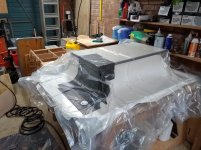
I decided to make the tressels out of thick plywood, I bought 3 sheets of 18mm Shuttering Plywood normally used for concrete forming from my local builders yard. I also ordered a sheet of 12mm plywood for template making, that all came to £150!
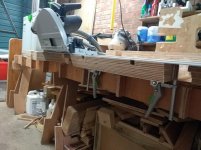
Here's the material in my garage on my 8x4' cutting table with heavy objects on it to keep it flat. I've been running the dehumidifier in the garage to keep the moisture under control, so weighing the sheets down seemed like a good idea.
View attachment 4
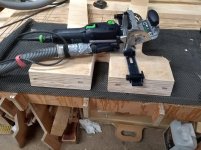
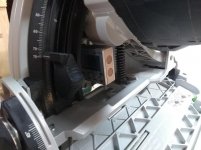
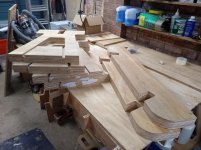
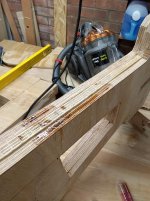
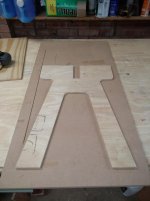
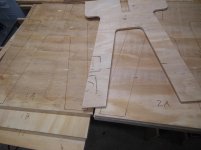
I made the template for the tressel legs from the CAD sketches then marked out all the sheets to cut 12 patterns for gluing into four legs. I remembered to rotate one of the sheets to cut the plywood at 90degrees so that the individual plywood layers were still at 90degrees to each other at the glue surfaces. I left some extra material at the bottom of the legs to give me something to support the guide rail on when I cut the bevel at the foot of the leg. (Is it called a foot?) The blank sections were cut out using a Carvex.
View attachment 5View attachment 6View attachment 7
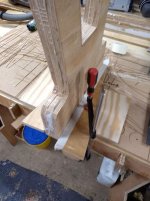
I glued all the sheets together using Everbuild 502 glue and a vacuum bag press. The bag is a king size matress bag bought from the internet for about £30, my trusty Dyson vacuum sucked all the air out. After 24hrs I had four tressel legs, and lots of cleaning up to do!
View attachment 8View attachment 9View attachment 10
One of the freshly glued up sections had a large void in it, so I filled it with Epoxy - that's what you're supposed to do isn't it? The epoxy is the cheap stuff from Lidl and worked really well.
View attachment 11
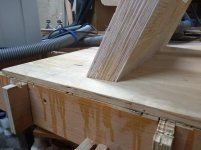
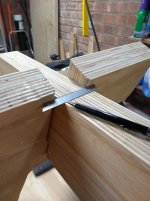
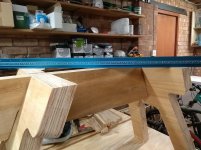
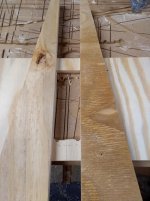
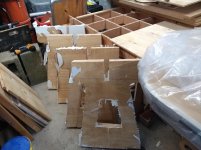
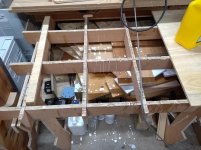
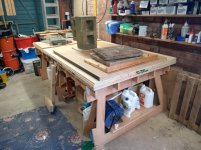
Once I knew the "template then glue then vacuum press" process worked I started work on the central spine. I used the already made leg pieces to help me mark out a template for slotting the roughy 54mm plywood sheets together. Then used a pattern router bit to cut the template. I forgot to take a photo of the fininshed "spine template" so had to take it after I'd started another project.
View attachment 12View attachment 13View attachment 14View attachment 15
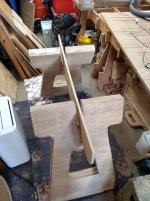
It fits!
View attachment 16
More to follow
regards
bob
It's also my second time at trying to post this because all the photos were too big.My son wants a table for this model railway. So I've started to build an 8x4' table. The table needs to fit up the stairs of a typical british house (small and narrow) and be "knock down" style so it can be stored in his room. The table top will eventually be made of four 2x4' torsion boxes which rest on 2 tressels - I've not started the table top yet.
I wanted the tressels to look a bit like this (which is actually from a Festool blog build).
View attachment 1
I roughed out the design in FreeCAD (I use linux as my daily PC) to get the dimensions.
View attachment 2View attachment 3
I decided to make the tressels out of thick plywood, I bought 3 sheets of 18mm Shuttering Plywood normally used for concrete forming from my local builders yard. I also ordered a sheet of 12mm plywood for template making, that all came to £150!
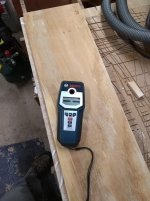
Here's the material in my garage on my 8x4' cutting table with heavy objects on it to keep it flat. I've been running the dehumidifier in the garage to keep the moisture under control, so weighing the sheets down seemed like a good idea.
View attachment 4
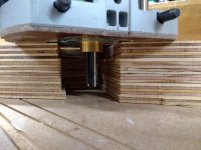
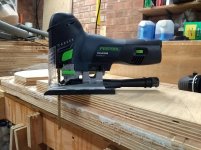
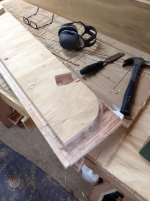
I made the template for the tressel legs from the CAD sketches then marked out all the sheets to cut 12 patterns for gluing into four legs. I remembered to rotate one of the sheets to cut the plywood at 90degrees so that the individual plywood layers were still at 90degrees to each other at the glue surfaces. I left some extra material at the bottom of the legs to give me something to support the guide rail on when I cut the bevel at the foot of the leg. (Is it called a foot?) The blank sections were cut out using a Carvex.
View attachment 5View attachment 6View attachment 7
I glued all the sheets together using Everbuild 502 glue and a vacuum bag press. The bag is a king size matress bag bought from the internet for about £30, my trusty Dyson vacuum sucked all the air out. After 24hrs I had four tressel legs, and lots of cleaning up to do!
View attachment 8View attachment 9View attachment 10
One of the freshly glued up sections had a large void in it, so I filled it with Epoxy - that's what you're supposed to do isn't it? The epoxy is the cheap stuff from Lidl and worked really well.
View attachment 11
Once I knew the "template then glue then vacuum press" process worked I started work on the central spine. I used the already made leg pieces to help me mark out a template for slotting the roughy 54mm plywood sheets together. Then used a pattern router bit to cut the template. I forgot to take a photo of the fininshed "spine template" so had to take it after I'd started another project.
View attachment 12View attachment 13View attachment 14View attachment 15
It fits!
View attachment 16
More to follow
regards
bob
Attachments
-
 Screenshot_2023-07-10_20-39-21.png359.5 KB · Views: 380
 -
 16.jpg413.3 KB · Views: 69
 -
 15.jpg130.4 KB · Views: 44
 -
 14.jpg377.3 KB · Views: 45
 -
 13.jpg386.8 KB · Views: 38
 -
 12.jpg388 KB · Views: 42
 -
 11.jpg426.9 KB · Views: 53
 -
 10.jpg389.7 KB · Views: 43
 -
 9.jpg427.2 KB · Views: 56
 -
 8.jpg432.9 KB · Views: 45
 -
 2.png285 KB · Views: 50
 -
 3.png340.4 KB · Views: 34
 -
 4.jpg418.8 KB · Views: 96
 -
 5.jpg342.2 KB · Views: 45
 -
 6.jpg350.6 KB · Views: 36
 -
 7.jpg403.3 KB · Views: 53