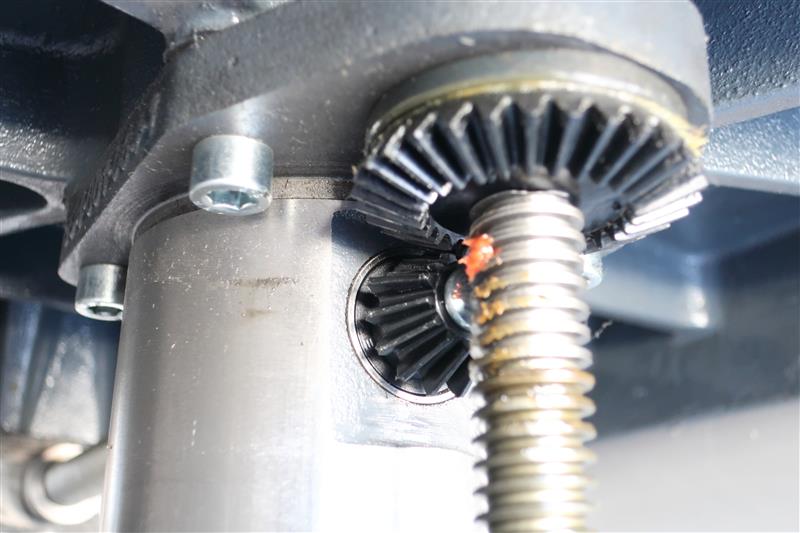
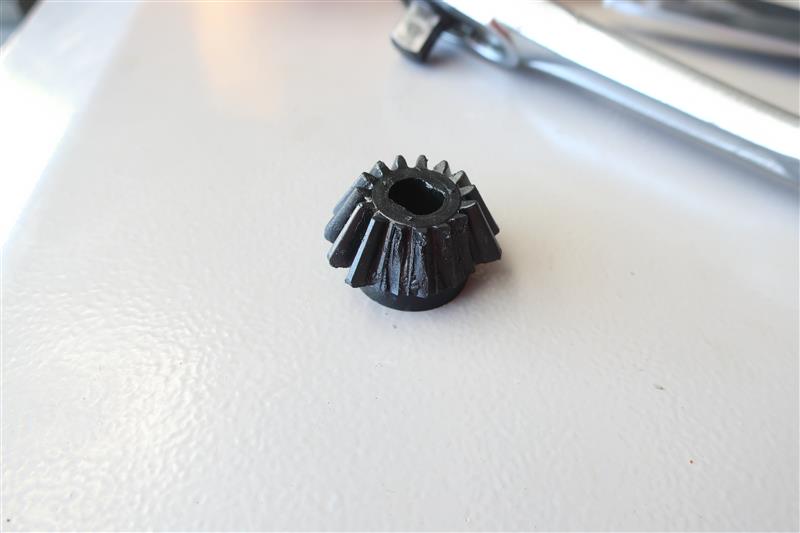
So through a compound process of poor choices and bad luck, I managed to strip several teeth off of the gear set that raises and lowers the planer bed on my A3-41.
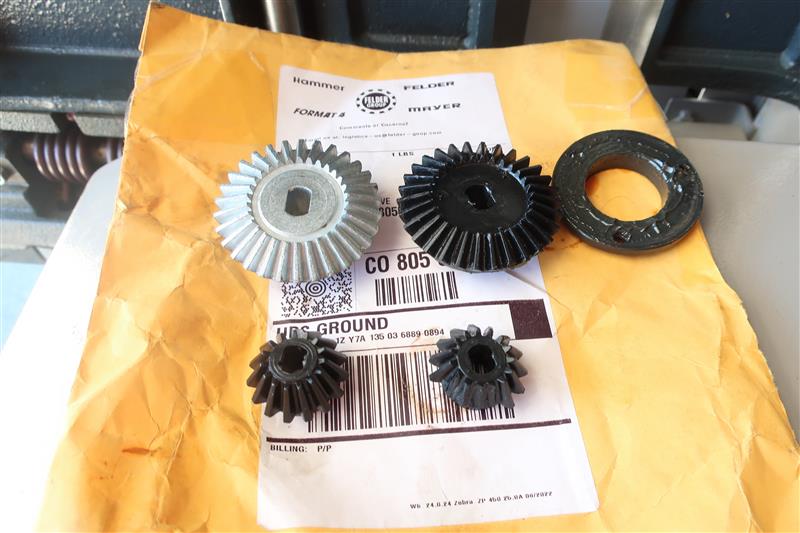
I had many choice words for this, and steeled myself for a $700 repair ticket. But to my pleasant surprise, Felder had the gears in stock in the USA, and they were only $15 a piece.
Other then the parts schematic, I didn't really have any solid instructions on how to replace them, but I figured taking the bed off the column would be a good place to start. It was held in by four stout Allen headed bolts.
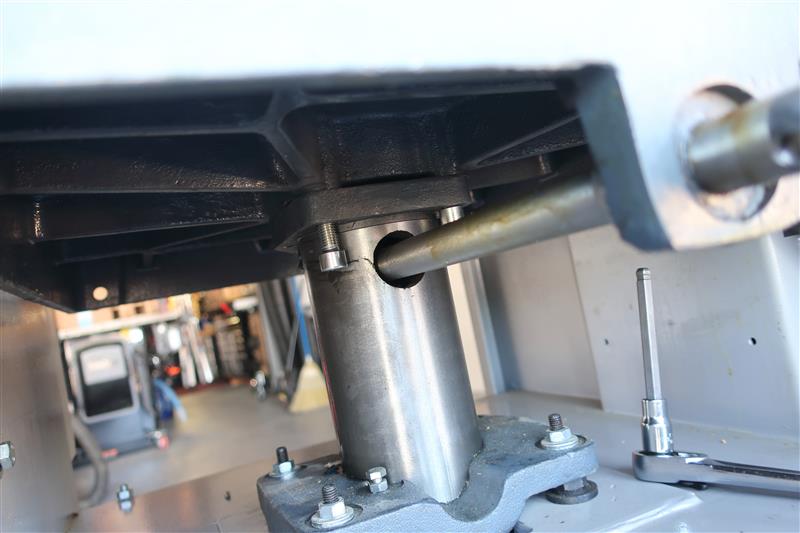
The planer bed weighed a ton, but it came out easily enough. In addition to removing the screws that held the elevation tape in place, I had to drift out two pins. Otherwise, it was fairly simple to get it out.
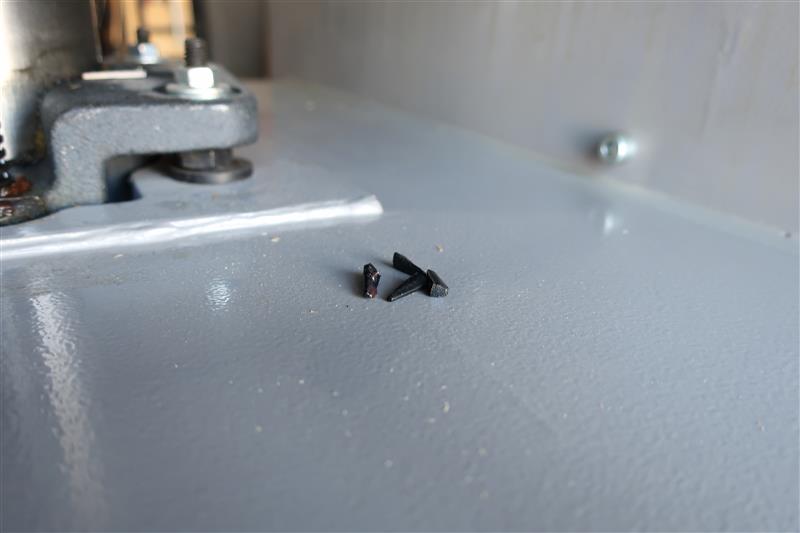
Once the bed was out, I could take off the nut securing the elevation shaft to the gear, and drop the shaft. After some wiggling and cussing, I was able to get the (ring?) gear out, and unscrew the (pinion?) gear. (I am an electrical engineer, not a mechanical one, and I have no idea what these are properly called.) Turns out only the pinion gear was hosed.
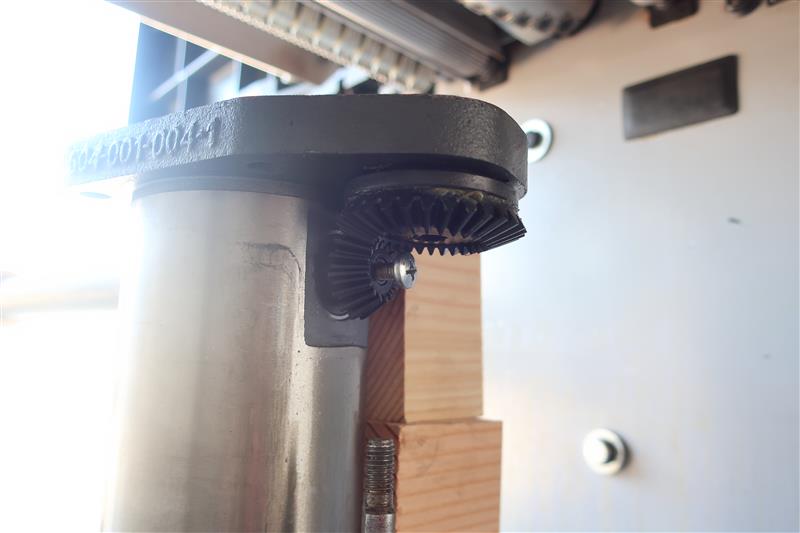
The new pinion gear was the same plastic material as the old one, but the replacement ring gear was made of metal, and much heavier. It also had a set screw in it to secure it to the shaft, but I could not for the life of me figure out how to get it secured to the shaft and inserted into the housing with the other gear in place. There was probably a way, but it was 100+ degrees outside and I ran out of mental capacity after 20 minutes of pondering. Figured if the last one didn't need it, this one probably didn't either, so I chucked the set screw and wiggled everything back in place.
I didn't know what sort of threadlocker was used in the original application, so I applied Loctite Black Max, which is vibration resistant, and figured it would be good enough. Cleaned and regreased all the moving parts. Put it back together and recalibrated the dial.
With everything back together, it ran as it should and moved up and down a little bit easier than I recall it moving before. Might be wishful thinking on my part.
Anyways, I put off dealing with this for a few weeks out of dread for the expense and the nature of the task, but it proved far easier in the doing than I had anticipated. The Felder folks were very helpful in getting me the right parts, and I figured out enough on the fly to get it done. Also made me appreciate the machine that much more for the experience. So, figured I'd share.
Thanks,
John
I had many choice words for this, and steeled myself for a $700 repair ticket. But to my pleasant surprise, Felder had the gears in stock in the USA, and they were only $15 a piece.
Other then the parts schematic, I didn't really have any solid instructions on how to replace them, but I figured taking the bed off the column would be a good place to start. It was held in by four stout Allen headed bolts.
The planer bed weighed a ton, but it came out easily enough. In addition to removing the screws that held the elevation tape in place, I had to drift out two pins. Otherwise, it was fairly simple to get it out.
Once the bed was out, I could take off the nut securing the elevation shaft to the gear, and drop the shaft. After some wiggling and cussing, I was able to get the (ring?) gear out, and unscrew the (pinion?) gear. (I am an electrical engineer, not a mechanical one, and I have no idea what these are properly called.) Turns out only the pinion gear was hosed.
The new pinion gear was the same plastic material as the old one, but the replacement ring gear was made of metal, and much heavier. It also had a set screw in it to secure it to the shaft, but I could not for the life of me figure out how to get it secured to the shaft and inserted into the housing with the other gear in place. There was probably a way, but it was 100+ degrees outside and I ran out of mental capacity after 20 minutes of pondering. Figured if the last one didn't need it, this one probably didn't either, so I chucked the set screw and wiggled everything back in place.
I didn't know what sort of threadlocker was used in the original application, so I applied Loctite Black Max, which is vibration resistant, and figured it would be good enough. Cleaned and regreased all the moving parts. Put it back together and recalibrated the dial.
With everything back together, it ran as it should and moved up and down a little bit easier than I recall it moving before. Might be wishful thinking on my part.
Anyways, I put off dealing with this for a few weeks out of dread for the expense and the nature of the task, but it proved far easier in the doing than I had anticipated. The Felder folks were very helpful in getting me the right parts, and I figured out enough on the fly to get it done. Also made me appreciate the machine that much more for the experience. So, figured I'd share.
Thanks,
John