Adirondack Chair

lunchman

Member
Joined
Mar 19, 2015
Messages
123
Taking a break from building cabinets for the wife's master closet and decided to do something I've always wanted to try. Adirondack chairs. I searched the web for plans, many of which are for odd looking Adirondacks. I finally found Norm Abram's plans, a traditional style, and went with those. I drew them out on graph paper, cut them out and transferred the templates to poster board. I also needed to acquire a bandsaw and spindle sander, both bench top models, but they do the trick.

The only modification I made was to the arm width. Norm's plans call for 5" wide arms, but why bother ripping a 5 1/2" board down a half inch? More room for beer bottles. 

The wood is Meranti, recommended by the folks at The Woodery in Lunenburg MA. Of course, Adirondack chairs pal around in pairs so as Norm always does, this is the prototype -


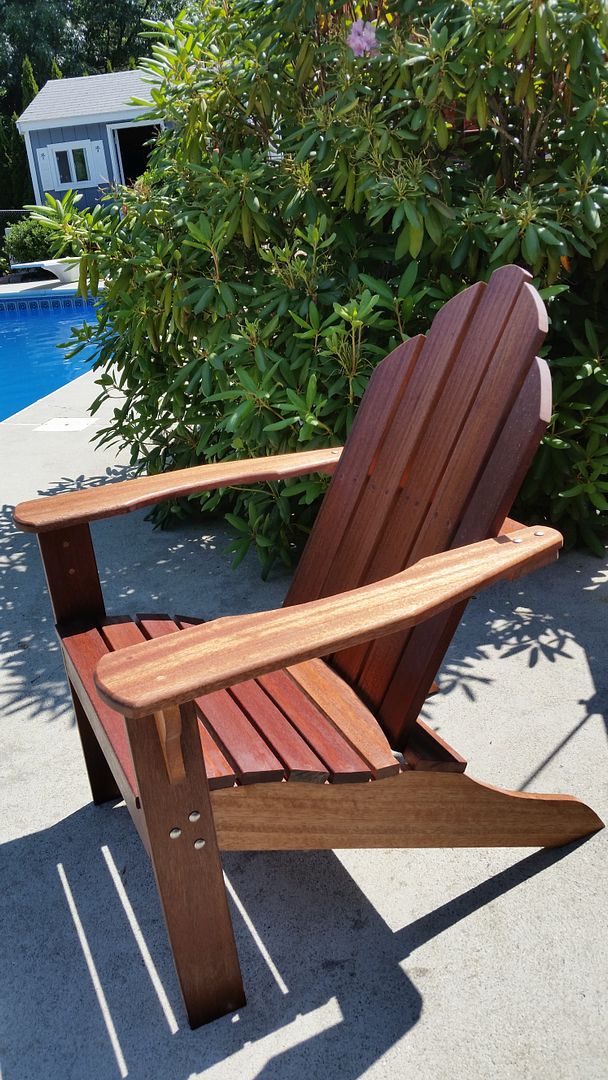
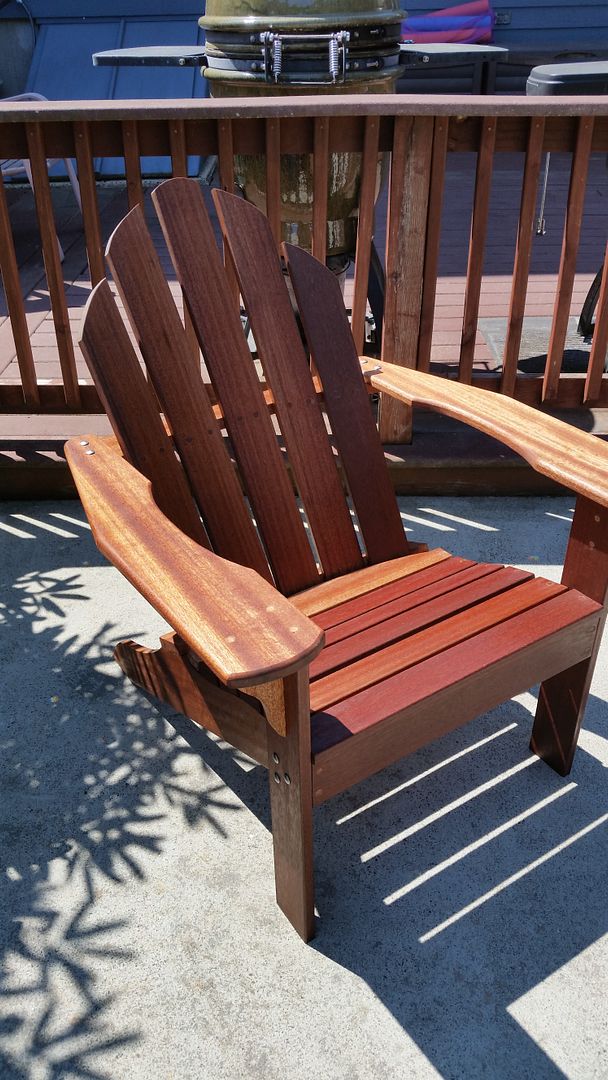
It's finished in Watco Teak Oil. All hardware is Stainless Steel.

And some build pics, I didn't take many. The major Festool use was the RO90 with both the round pad and the delta pad, both with 320 Granat. I also used 60 with the delta pad to help take down the plugs. I also made use of the TS55 for the few straight cuts.

Unfinished -


Clamps and painters tape to help position the slats -


Sanding parts with the RO90 -
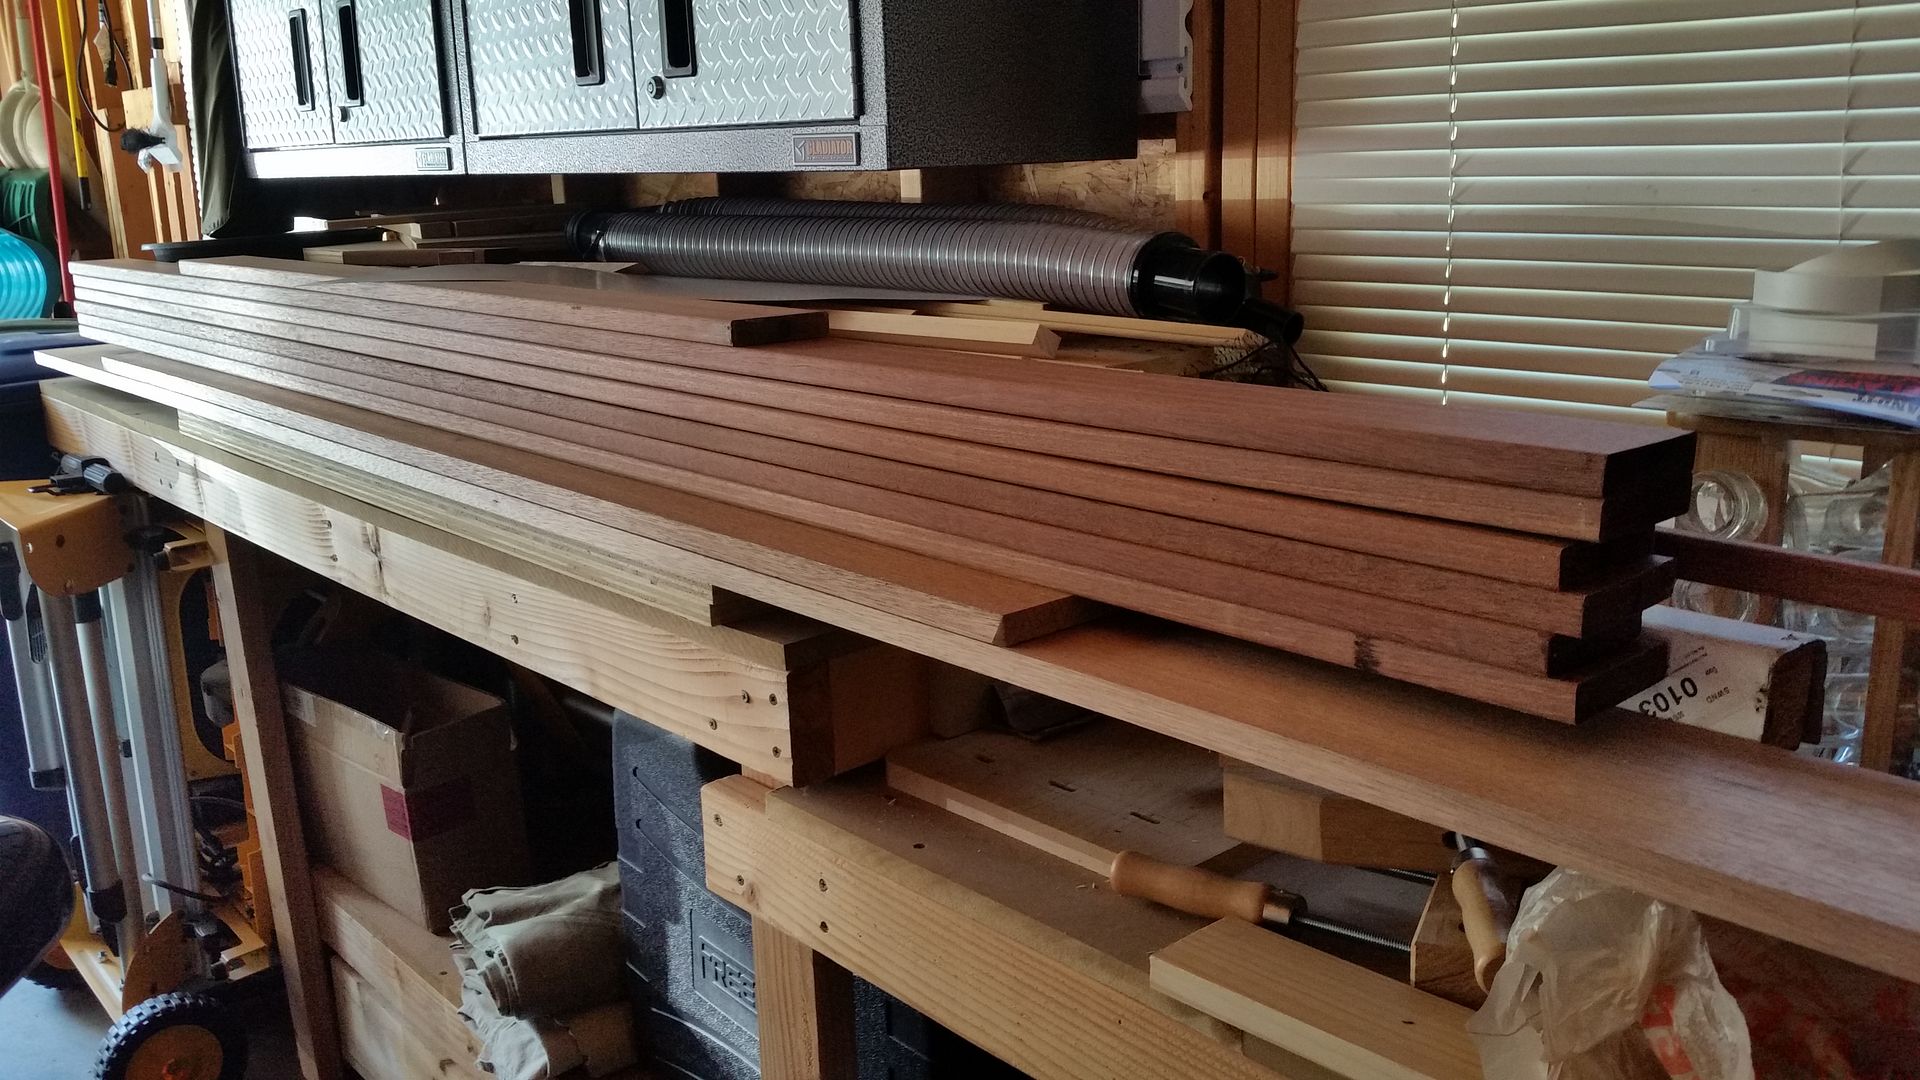


The pile of Meranti -


This was a fun project and I'm pleased with the results. I've never owned a bandsaw or a spindle sander, some new tools to add to the collection. On to chair #2 (and chair #3, I've been asked to build another as a gift), and now I'm thinking about footrests and a matching table.

-Dom
 
lunchman said:
... and now I'm thinking about footrests and a matching table.

-Dom

There's a love seat you can make too!  [cool]

Nice Job!  [big grin]
 
Hmmm.  [member=47668]lunchman[/member] Very well done.  I'm also from central mass and a Woodery devotee. 
 
Thanks, guys.

I've seen the loveseat plans, good thing I didn't show those to my wife. Though she is hinting at the loveseat version of a chaise lounge she's seen. I may have started something here and we'll be replacing all our aluminum deck furniture with stuff I build.

Re: The Woodery. Great place. I went in with my cut list and Steve took the time to arrange it a bit to save me some money. You don't get that sort of service at HD or Lowe's. Nor do you get the exotic woods they carry. I'd never heard of Meranti before and it was his recommendation to go with it, glad I did.

There are a few things I'm seeing on this first one that are already bugging me as far as matching wood slats better, etc. which I'll be sure to address on chairs #2 and #3. Typical woodworker I guess.

My main concern is what to do with these in the winter. You wouldn't believe the amount of deck furniture we have due to the inground pool and how packed the sheds are come Autumn when we put stuff away. I'll deal with it then.

-Dom
 
Nice job! This is something on my project to-do list to go around the fire pit. Thanks for sharing.
 
I like it !!

Something I've often notice with garden furniture .. when it's sunny and you're sitting in shorts or a light shirt or even topless [scared] you can end up with odd marks where the board edges have dug in if there isn't a slight round-over.

Have you tried the "long sitting still" test yet [smile] zzzz zzzz zzzz [wink]
 
Oh Kev,

That explains it.....

I thought pink and white stripes were Oz prison wear or designer wear.
 
[member=47668]lunchman[/member]

Dom, I've made ~12 of these chairs from the same wood using the same plans.  A couple of improvements I've made is using pocket screws to attach the armrests to the front legs w/ ss Kreg screws.  It makes for a seamless joint and it's also much stronger because the screws are attached with cross grain rather than end grain.  With end grain, over time, the screws lose their holding power and the arm rest becomes very loose.  Ask me how I know this?

The other improvement is attaching the little arm rest brackets with 2 sipo dominos and outdoor glue.  It just makes for less visible screw heads or plugs giving it a much more cleaner appearance.

Miranti is a beautiful wood, I finish with General brand outdoor oil and after a couple of years they take on a silver gray patina.  The ones pictured have been recently pressure washed, sanded and had oil reapplied.  Although I'm a little concerned with some checking at the end grain of the arm rests.  Mine are in storage 8 months out of the year.  I think it will double the life of the chairs.

Don't sweat the color and grain matching, after they develop a patina, they all blend together.  I just finished a pair of chairs a couple of weeks ago, (bottom picture).  I had the same problem with the back seat slat showing a different color.  You had to buy a 6" wide piece, no?  Wasn't it also much lighter than the 4"?  But don't worry, they will even out!  Ya done good!

27904256695_ee21b2e1db_c.jpg


27802866222_1f47d11d73_c.jpg


27625864020_a07c7f266d_c.jpg


27368680961_740a187a54_c.jpg
 
[member=3220]Jim Kirkpatrick[/member]

Wow Jim, those are really nice. Yes, the 1x6s were much lighter than the 1x4s. On the second chair which I cut the parts for today, I made sure to turn the pattern over for the mid and end slats (left and right) so they'll all show from the same side of wood. We'll see if that makes a difference. Honestly, I like the variations in color, gives it character.

I had thought of using the Domino on this, but figured for now I'd stick with Norm's plans. I agree with you about the end grain and I had thoughts about what's holding this arm up? Three screws and the screws through the back slats into the cross-member. Hopefully no idiots will try sitting on the arm. I have seen other plans from a builder up in Maine who goes by Chairman of the Board whose plans incorporate a back leg, parallel to the back slats.

All parts for chair #2 are cut out, sanded on the spindle sander and I should be assembling it tomorrow after sanding with the RO90.

BTW, these chairs are comfortable. I took a break today from cutting out parts and relaxed in it for a while.
 
A pair of Adirondacks ready for lounging poolside -


and some build pics -

Parts traced out from templates -


Ready for sanding and assembly -


Assembled, ready for plugs -


Thinking about building a small table to place between them. For that I'd make use of the Domino. I have a third chair I've been requested to build as a gift, so I'll be busy again fairly soon.

These are fun to make and the results are worth the effort.

-Dom
 
They look fantastic!  A job well done!!

Sent from my SM-N900V using Tapatalk

 
I like those Adirondack Chairs, I don't see them hardly at all here in Scandinavia, speculate as to why the Style doesn't catch on, lots of american designs don't make it over here.. 
 
And with some leftover Meranti, I decided a side table would be a good idea -


Again, not much in the way of build pictures, but the top is fastened with 6mm Sipo Dominoes. I realized after getting most of the parts glued up that you can't fasten the long side pieces to one short end and expect to get the other end to just attach.  Yeah, wood doesn't bend so well when you're working with miter joints and Dominoes. So I had to lay all the parts out in an exploded state and work them together as one with the clamps. Loads of fun as you're working against time and glue setting up.

But here it is all put together after working the clamps -


No MFT in my shop/garage, so holdfasts do the trick when cutting the mortises -


The table design is fairly simple with the top held together with Dominoes, the base is butt jointed with pocket screws and fastened to the top in the same manner. Legs are simply glued and screwed on from the inside so no fasteners are visible. I simply drew out the design on a piece of paper, making sure the proportions looked decent and the height was reasonable. Not really rocket science.

My wife has already claimed this to go inside for winter. And I'm on to building chair #3 as a gift.

-Dom
 
Back
Top