Aftermarket track hinge + support?

mattbyington

Member
Joined
Mar 11, 2018
Messages
797
Hey team,

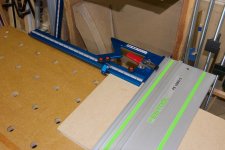
[member=15585]Svar[/member] ‘s thread got me thinking. The stock hinge and supports for the track that come with the MFT aren’t all that great.

Is anyone aware of an aftermarket solution I could purchase? Analogous to like the domiplate or something else made by a reputable company.

I’m looking for repeatability, lack of slop, and I loved on svar’s that you could swing the fence out of the way instead of raising it up.

Thank you!
Matt
 
[member=67555]mattbyington[/member] – two simple ways to eliminate the MFT alignment of the 1080 Guide Rail:

1.) Attach a GRS-16 PE Guide Rail Square to the MFT hinge using the same screws which hold the standard nut-plate. With the GRS-16 PE secured to the hinge, simply install the 1080 Guide Rail the same way you would normally connect a GRS-16.
Bingo – you now have an assured square reference for your workpiece when using the 1080 Guide Rail on your MFT. No further adjustments needed.

2.) The other option employs our PTR-18 PLUS Triangle which now features M6 tapped holes for attaching 25mm tall S.S. Pins (included).  With the triangle referenced on to a pair of Dogs on the MFT, you can now  lock the MFT’s 1080 Guide Rail square to the Dog hole pattern and at the height of the sheet goods you’re cutting. This avoids the problem of losing “square” after adjusting it with the rail on the table surface but then having to raise it to the height required by the workpiece thickness.

TSO’s “System Design” approach:
We’re waiting to see pictures of a TPG-series RIGHT Hand Parallel Guide  T-track being attached to a GRS-16 PE on an MFT hinge bracket. This gives you not only an absolutely square cut but also allows you to make repeatably accurate length cross-cuts using the TPG -track and FlipStop 😊

Hans
 
[member=59331]TSO Products[/member] thank you very much for your prompt and detailed reply. I own both of those items, you make great stuff. I'll check it out when I get home. thank you.

Matt
 
TPG-series RIGHT Hand Parallel Guide  T-track being attached to a GRS-16 PE on an MFT hinge bracket. That is quite a mouth full.. [big grin].. I like the idea, would not the play in the festool hinge mess that up? Maybe you could make a replacement hinge? A soup to nuts solution would be fantastic.
 
As long as the work piece is tight up against the TSO GR-16 or GR-16 PE, the hinge can rattle about without issue.
When you actually screw the GR-16 to the hinge and fix it to your rail, you're in effect creating a large square.
So the GR-16 and rail are always square together. You just have to make sure the work piece is flush on the GR-16.

I have both the GR-16 and GR-16 PE, and I often use them with the rail, and no hinge etc. This is a quicker way of working, with great accuracy when time is limited, or just an option other than the MFT hinged rail
 
I'm having a hard time envisioning this. Are there any pics out there of someone creating this setup? I'm also looking for solutions to improve the slop on my MFT and eliminate the need to re-adjust the fence and rail when raising/lowering the guide rail when cutting different widths. Like Matt, I also like Svar design.

TSO Products said:
[member=67555]mattbyington[/member] – two simple ways to eliminate the MFT alignment of the 1080 Guide Rail:

1.) Attach a GRS-16 PE Guide Rail Square to the MFT hinge using the same screws which hold the standard nut-plate. With the GRS-16 PE secured to the hinge, simply install the 1080 Guide Rail the same way you would normally connect a GRS-16.
Bingo – you now have an assured square reference for your workpiece when using the 1080 Guide Rail on your MFT. No further adjustments needed.

2.) The other option employs our PTR-18 PLUS Triangle which now features M6 tapped holes for attaching 25mm tall S.S. Pins (included).  With the triangle referenced on to a pair of Dogs on the MFT, you can now  lock the MFT’s 1080 Guide Rail square to the Dog hole pattern and at the height of the sheet goods you’re cutting. This avoids the problem of losing “square” after adjusting it with the rail on the table surface but then having to raise it to the height required by the workpiece thickness.

TSO’s “System Design” approach:
We’re waiting to see pictures of a TPG-series RIGHT Hand Parallel Guide  T-track being attached to a GRS-16 PE on an MFT hinge bracket. This gives you not only an absolutely square cut but also allows you to make repeatably accurate length cross-cuts using the TPG -track and FlipStop 😊

Hans
 
[member=18649]myer84[/member]  - as he wrote, [member=69479]Jiggy Joiner[/member] , does not see any remaining concern with the set up I described in words,

We totally agree that w need top get pictures or even some video up on the internet for all to see what we mean.

Eric is just completing a lighting upgrade in our demo space so let's see how well we can illustrate and demonstrate this on camera for all of you, including [member=1572]Matt[/member] byington, in the coming week or two.

Hans
 
[member=59331]TSO Products[/member]

Hans that would be great. I play with the GRS attached to the hinge but not real sure about how it comes together
 
jobsworth said:
[member=59331]TSO Products[/member]

Hans that would be great. I play with the GRS attached to the hinge but not real sure about how it comes together

[member=10147]jobsworth[/member] - about a year ago we introduced an addition to the GRS-16 PE which permits its attachment to the MFT hinge bracket.
Here's what our websitehttps://tsoproducts.com/tso-guide-rail-squares/grs-16-pe-parallel-edge-guide-rail-square/
says about that followed by pictures and more description. Hope that answers it for now:

New For June 2018
We have added the ability to connect the GRS-16 PE to the MFT/3 guide rail hing bracket! The time-consuming re-squaring process of the MFT guide rail is now a thing of the past with the newest GRS-16 PE. Rail squareness is now assured, unaffected by varying material thickness and rail height adjustment. The inspiration for this improvement came from customer Simon H., a Festool MFT/3 user in the UK. We listened and acted on it. Thank you, Simon!

We engineered this feature to keep the kerf line in exactly the same location as your standard MFT/3. You can quickly change back to the original MFT/3 arrangement any time.
 
Ok, I see how the right angle guide and the hinge work together. The question is how does this work with the parallel guid system to provide repeatable cuts? Does the whole system pivot when lifting the rail? Is so does that not make it difficult to move the wood to the stop while the rail is down due to the high friction surface. If the stop rail is not attached to the rail but the table, does this not creat an alignment issue between the two?
 
I'll attempt to shed some light on the various use scenarios for the MTR-18 and the GRS-16 on the MFT. These are old pics I took.

GRS-16PE bolted to guide rail hinge, Seneca Parallel guide mounted to guide rail:
i-S7Hj5Nf-X5.jpg


This is basically the same as having the TSO Parallel guide + GRS-16 mounted. The 1080 rail lifts as normal to any desired height. Material registers against the GRS-16. Cuts are always guaranteed square as long as registration is maintained against GRS-16 regardless of what the front of the rail is doing. It could be hanging without the front hinge support, doesn't matter. The parallel guide allows for repeatable cuts at a desired dimension with the included stop.

MTR-18 with included 25mm pins:

i-nKfxdnx-X5.jpg


I still have the GRS-16 mounted and MFT/3 fence removed but it illustrates how you can use the MTR-18 for setting square. What Hans is alluding to is you would drop some dogs into the MTR-18 (or PTR-18 Plus), not necessary, and use the giant square to register your rail at the desired cutting height. The square would register simultaneously against your stock fence and the guide rail at desired cutting height. Lock everything in square and you know as long as you maintain that cutting height then everything is square. Presumably you'd have to re-adjust if you made a large change in material thickness, i.e. 1.5" down to .5".

Hope this helps.
 
[member=65062]DynaGlide[/member] - "you're hired!"
thanks for the great explanation of the different ways to use our tools in conjunction with MFT.
- well said!
Let's seeif there are any other questions or further clarification needed.

Hans
 
TSO Products said:
[member=65062]DynaGlide[/member] - "you're hired!"
thanks for the great explanation of the different ways to use our tools in conjunction with MFT.
- well said!
Let's seeif there are any other questions or further clarification needed.

Hans

[member=59331]TSO Products[/member] So should I send you my address for a set of TSO parallel guides so I may better illustrate their usage. . .?  [big grin]
 
[member=65062]DynaGlide[/member] - yes, absolutely!
email me and spell out everything needed to fulfill in that email.

info@tsoproducts.com

Hans
 
Here's a photo of how I use mine for repeated cross-cuts.  I just leave it on there.
 

Attachments

  • DSC_3977 copy.jpg
    DSC_3977 copy.jpg
    495.3 KB · Views: 2,586
So the entire assembly pivots when the rail is lifted? I think my visualization problem is that I assumed that the measure stop was fixed to the table to allow length stop engagement before lowering the rail.
 
heidtwd said:
Here's a photo of how I use mine for repeated cross-cuts.  I just leave it on there.
[member=11922]heidtwd[/member]
Is the 30" long enough or do you wish you had the 50" for MFT/3 hinge use?
 
RobBob said:
heidtwd said:
Here's a photo of how I use mine for repeated cross-cuts.  I just leave it on there.
[member=11922]heidtwd[/member]
Is the 30" long enough or do you wish you had the 50" for MFT/3 hinge use?
I also use the 50" when required, it's standing in the background.
 
Tried this method out yesterday on my Paulk-style bench, with a Precision Dogs parallel guide. The MFT hinge was mounted on a dovetail slot I routed in the side of the bench, and uses Matchfit hardware, for the time being at least. While I have to test it out a bit more before using it on a project, it definitely seems promising!

Some thoughts:

The guide rail flips up as per normal -- the parallel guide doesn't make it awkward or unwieldy.

I found I had to slightly lift the guide rail to ensure the material is seated well against the TSO square and the stop on the parallel guide. I dislike that it's less of a solid feeling than butting up to the fence of the MFT and butting into the flip stop. But I think I'll be able to get used to that, and even if a little more care is needed, it's a relatively minor issue if the results prove consistent.

I'd like to experiment a bit more before investing in the TSO guides, but I can see it fitting into my workflow. Maybe a 30" track with stops set for constants such as base and upper cabinet depth, gable height for 30" boxes and shorter OTR cabs, and a 50" track with a few stops that can be set in 3" increments for cutting bottoms and tops to width.

I'm not sure how wide the flip stops are, but I'm guessing they can only be set a minimum of ~2-1/2" from each other. It would be nice to find a way to get them closer - for example, for a 24" cabinet, maybe one stop at ~22-1/2" for bottoms and tops, and one at ~23" for sizing the back to fit in a dado.
 
Back
Top