onocoffee
Member
One of the things I think about a bit for the shop is Air Quality. While I think the SYS-Air is way cool, and if I were a field-based person working in people's homes, I'd probably buy one. But I had already been using a 20" box fan with filters, and since I'm shop-based, I wanted a solution for it.
Typically, I'll setup the fan next to the workpiece to work as near-field filtration. The fan has a 4" pleated Merve 13 filter and a 1" filter ahead of it as a "prefilter" (mainly just to try to lengthen the life of the 4" since they are pricey). However, it is a bit of a PITA to find space next to the workpiece and setup the filter, and I've always thought of an Air Cart to make it a little easier.
The Air Cart is made entirely from salvaged pallet wood. A lot of these pallets came from the local Woodcraft where, evidently, Taiwanese and Chinese manufacturers have loads of oak and poplar to make pallets instead of the pine we use here. If you're willing to take the time and effort to tear apart pallets (it kinda sucks) then it can be worth it. I had surfaced all the sides and then came up with a frame design, assembled panels and created it all from scratch. I could have made it out of plywood which would have taken a lot less time, but I enjoy the challenge.
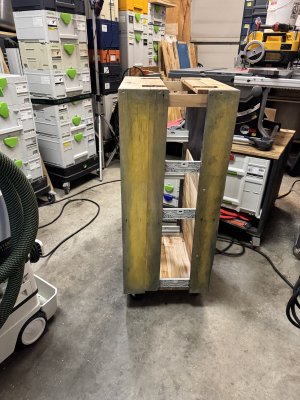
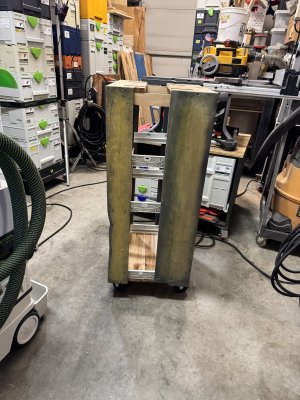
I've been curious about sunburst patterns they put on guitars and tried it out on a tool cart last year with decent effect and wanted to try it again on the sides. these boards were wider than the other cart and I'm starting to understand better how luthiers approach it. I like using shop projects to try different approaches as "practice" for "real" pieces. The general theme of the shop projects is dark blue so that's why the cart is blue.
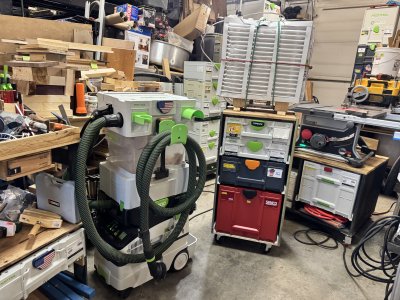
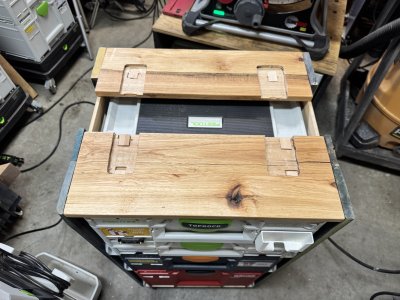
The idea for the cart wasto mount the fan atop the cart and have it at the same height as the workbench. That way, I can just roll it up next to the work and let it do its thing. I also wanted a split top to set the TopRock under it and have it able to pump out the jams. Wasn't sure what other Systainers I was going to keep in the cart but since the PC1010 got bumped out of the workbench with the rebuild, the cart seemed like the most friendly place for it, and then the nail guns had to go too.
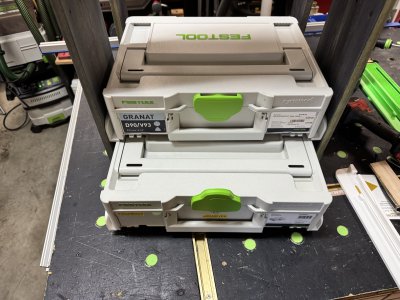
While I've used SYS-Rails, I had been curious about the SYS PRO sliding rails that are available as 3D prints. I used the 2gen to plan the cart and figured that 418mm spacing would be fine, which is also the spec for the SYS-Rail. The SYS PRO does not follow typical hole spacing with the first hole at 58mm instead of 37mm. And it uses smaller holes in the rail so 5mm screws won't fit. And then came a series of issues. First, the 418mm spacing that I had figured out turned out to be too wide. Probably 415mm would be better. 418 is just too wide for the rails to seat the Systainer. Ugh. Then there's the sliders. Great idea. I figured they had worked out how to make it slide so you can access the contents. It slides the Systainer out a little, but not enough to access any tools. Ugh.
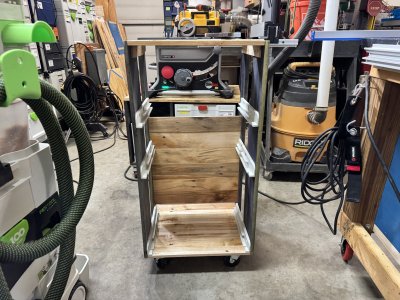
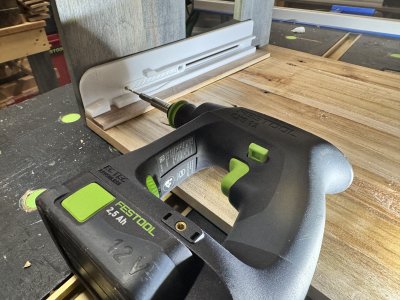
Luckily, I have a bunch of SYS Rails sitting in a box and was able to use those. Finally got to use the miter saw, after not needing it for eight months, to cut the rails to 295mm. And of course, those work flawlessly at 418mm. Solid and secure.
Routed out some recesses in the top to seat the fan, screwed in some black casters harvested from a Harbor Freight moving dolly (like $12 for four) and all done. The cart stands at 920mm to the top where the fan mounts and is level with the workbench. Spacing width is 418mm, so it's probably overall 460mm and 370mm deep.
Time to put it to work!
Typically, I'll setup the fan next to the workpiece to work as near-field filtration. The fan has a 4" pleated Merve 13 filter and a 1" filter ahead of it as a "prefilter" (mainly just to try to lengthen the life of the 4" since they are pricey). However, it is a bit of a PITA to find space next to the workpiece and setup the filter, and I've always thought of an Air Cart to make it a little easier.
The Air Cart is made entirely from salvaged pallet wood. A lot of these pallets came from the local Woodcraft where, evidently, Taiwanese and Chinese manufacturers have loads of oak and poplar to make pallets instead of the pine we use here. If you're willing to take the time and effort to tear apart pallets (it kinda sucks) then it can be worth it. I had surfaced all the sides and then came up with a frame design, assembled panels and created it all from scratch. I could have made it out of plywood which would have taken a lot less time, but I enjoy the challenge.
I've been curious about sunburst patterns they put on guitars and tried it out on a tool cart last year with decent effect and wanted to try it again on the sides. these boards were wider than the other cart and I'm starting to understand better how luthiers approach it. I like using shop projects to try different approaches as "practice" for "real" pieces. The general theme of the shop projects is dark blue so that's why the cart is blue.
The idea for the cart wasto mount the fan atop the cart and have it at the same height as the workbench. That way, I can just roll it up next to the work and let it do its thing. I also wanted a split top to set the TopRock under it and have it able to pump out the jams. Wasn't sure what other Systainers I was going to keep in the cart but since the PC1010 got bumped out of the workbench with the rebuild, the cart seemed like the most friendly place for it, and then the nail guns had to go too.
While I've used SYS-Rails, I had been curious about the SYS PRO sliding rails that are available as 3D prints. I used the 2gen to plan the cart and figured that 418mm spacing would be fine, which is also the spec for the SYS-Rail. The SYS PRO does not follow typical hole spacing with the first hole at 58mm instead of 37mm. And it uses smaller holes in the rail so 5mm screws won't fit. And then came a series of issues. First, the 418mm spacing that I had figured out turned out to be too wide. Probably 415mm would be better. 418 is just too wide for the rails to seat the Systainer. Ugh. Then there's the sliders. Great idea. I figured they had worked out how to make it slide so you can access the contents. It slides the Systainer out a little, but not enough to access any tools. Ugh.
Luckily, I have a bunch of SYS Rails sitting in a box and was able to use those. Finally got to use the miter saw, after not needing it for eight months, to cut the rails to 295mm. And of course, those work flawlessly at 418mm. Solid and secure.
Routed out some recesses in the top to seat the fan, screwed in some black casters harvested from a Harbor Freight moving dolly (like $12 for four) and all done. The cart stands at 920mm to the top where the fan mounts and is level with the workbench. Spacing width is 418mm, so it's probably overall 460mm and 370mm deep.
Time to put it to work!