Hi Everybody,
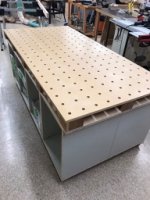
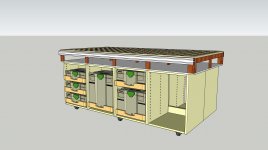
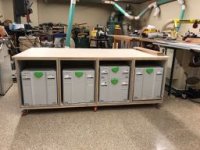
This is my first post here. After purchasing a bunch of Festool products, I decided to take the dive and build my own MFT bench with systainer storage underneath. I based the cabinets underneath on Tim Wilmot's design, with a top configuration similar to the Paulk bench, and I'm using 30x60 extrusions from Misumi Engineering at the front and back edges. Size of the top is (right now) 966 x 1920.
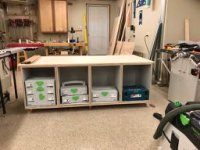
I've gotten a good way through the construction process--cabinets are all built, Euro style with LR32, and they are mounted on six 2.5inch Wood River casters. Seems plenty solid, with the cabinets sitting on a 23mm
Now I'm starting to think about the top. Ideally, I'd like it to be at the height of my table saw outfeed table. That will give me about 140mm of clearance (although clearance will be reduced to about 88mm at the front and rear because of the extrusion). A bit tight, but I think it'll work.
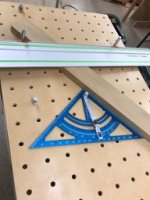
My question is on hole placement. I built the cabinets first and then thought about the hole pattern on top. Not ideal planning, but that's the way it worked out. So does it really matter how far the holes are from the edge of the table? Any problem with having them offset a different amount from the front and rear edges?
Jeff
This is my first post here. After purchasing a bunch of Festool products, I decided to take the dive and build my own MFT bench with systainer storage underneath. I based the cabinets underneath on Tim Wilmot's design, with a top configuration similar to the Paulk bench, and I'm using 30x60 extrusions from Misumi Engineering at the front and back edges. Size of the top is (right now) 966 x 1920.
I've gotten a good way through the construction process--cabinets are all built, Euro style with LR32, and they are mounted on six 2.5inch Wood River casters. Seems plenty solid, with the cabinets sitting on a 23mm
Now I'm starting to think about the top. Ideally, I'd like it to be at the height of my table saw outfeed table. That will give me about 140mm of clearance (although clearance will be reduced to about 88mm at the front and rear because of the extrusion). A bit tight, but I think it'll work.
My question is on hole placement. I built the cabinets first and then thought about the hole pattern on top. Not ideal planning, but that's the way it worked out. So does it really matter how far the holes are from the edge of the table? Any problem with having them offset a different amount from the front and rear edges?
Jeff
")