ear3
Member
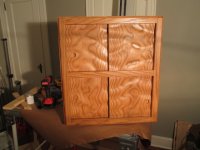
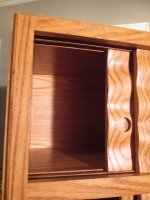
In putting off some other things, I decided to build a small cabinet for my bathroom, which I just finished repairing and repainting. Since I wanted it to be more than just a boring oak box (oak veneer ply plus solid oak face frame), I decided to add some trickery to the doors, courtesy of the angle grinder and the RO90 interface pad. I got the inspiration those cool videos where Jory Brigham does damage to a solid piece of mahogany with the RAS115. I wanted a more quilted look, plus my wood was only 3/4, so I employed a more undulating pattern rather than a series of trenches. There's not much that can compare to blasting a piece of wood with the grinder, except for making it silky smooth with the interface-armed ROTEX.
Mitered joints on carcasse attached with Dominos. Used Domino for face frame as well, though since it protrudes both inside and outside the frame, I only mortised the top and left side for positioning purposes, and then just straight glue for the other sides. I don't think I could have gotten the frame aligned if I had mortised every side. I then ran the OF1010 (which I just got) across the frame with a 1 1/2" Ogee bit, which it did in a single pass, and with only a little bit of burning to clean up on the end grain of the stiles.
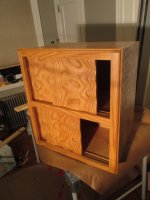
I made wooden tracks for the sliding doors by planing down pieces of oak to 1/4 inch and then cutting them thin on the table saw. They move back and forth really well after some spot sanding on the back with the ROTEX to get rid of those spots that create friction.
I took everything up to 220, and would have gone further, but got worried that this would diminish the effectiveness of the Osmo Polyx Oil finish that was recommended to me by people on the forum. I'm a moron when it comes to finishing, which is why I tend just to use water based poly, but I wanted to try something more durable for the bathroom environment. To tell you the truth, I'm not happy with the finish. In ambient light its ok (if a bit on the amber side), but if you shine a light directly on it there's some blotchiness. I'm not sure if that's because I didn't wipe it down enough, or too much? Peter Parfitt's videos on using Osmo makes it seem pretty simple, but like I said, I'm a moron when it comes to finishing. I may end up doing a third coat, at least on the doors.
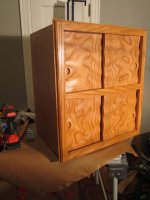
The only obvious mistake is the position of the circle/door handle on the lower left door (cut with router using a plywood template and guide bushing), which was necessary because that was the closest I could get to a thick part on the board. I made the doors before deciding on how I would do the handles, otherwise I would have planned to have the thick parts in the same position on all the doors. If I were to redo it I would also use an oval instead of a circle, or at least use a core box bit on circle instead of straight bit -- my wife liked the circle so that's what I did.
Anyway, thanks for all the answers I got to the questions I asked throughout the building process.
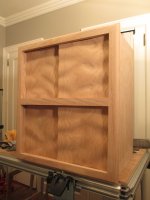
Pre-finish:
[attachimg=1]
After finish:
[attachimg=2]
[attachimg=3]
[attachimg=4]
[attachimg=5]

