- Joined
- Oct 16, 2015
- Messages
- 5,791
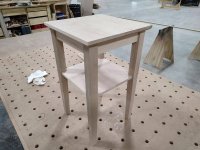
After seeing a few of the tables I have built for my mother, a friend of hers asked if I could do one for her.
The general size was given and the only special request was a lower shelf, but not way down at the bottom.
No paint, stained a medium brown, similar to the Maple one I did for mom. Simple enough.
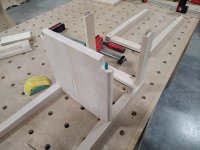
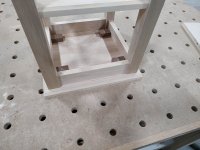
I probably made it harder than it needed to be, by doweling in the notch, but I liked the look of the shelf nearly meeting the edges of the leg.
I would rather have done it in White Oak and skip the stain, but that was too strong, she liked the finer grain of Maple.
The general size was given and the only special request was a lower shelf, but not way down at the bottom.
No paint, stained a medium brown, similar to the Maple one I did for mom. Simple enough.
I probably made it harder than it needed to be, by doweling in the notch, but I liked the look of the shelf nearly meeting the edges of the leg.
I would rather have done it in White Oak and skip the stain, but that was too strong, she liked the finer grain of Maple.