ear3
Member
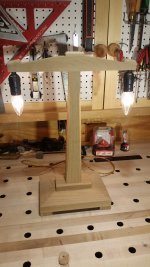
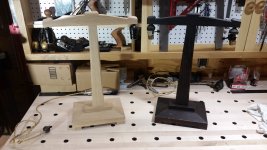
A few years ago my wife got an arts and crafts yoke shaped lamp, and has been asking me ever since to make a reproduction:
View attachment 1
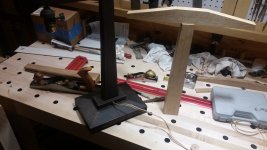
I finally got around to it after Christmas. I figured it was a great project to push my hand tool skills a bit further, and also to break in my new bench, which I outfitted with the Benchcrafted tail and leg vises.
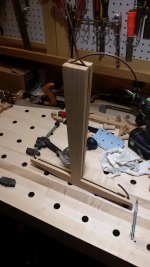
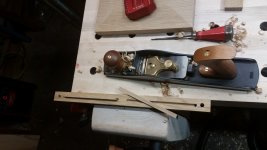
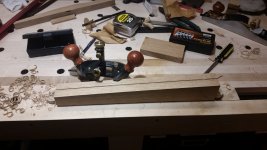
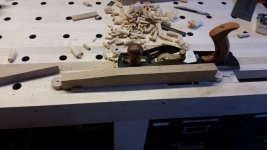
I started with a piece of 8/4 white oak, and used the tracksaw and lunchbox planer to get the pieces to rough size. Since I was following the original, which had fairly haphazard grain selection -- and since it will eventually be stained dark -- I didn't really spend a lot of time on grain matching, but basically just took what my stock gave me. So I ended up with quarter sawn on the cross piece of the yoke and rift sawn on the vertical. All the final sizing was done with the jack plane:
View attachment 2
View attachment 3
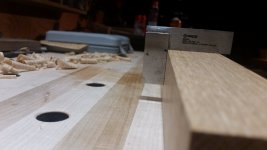
I'm getting a better producing a square edge with the hand plane as well:
View attachment 4
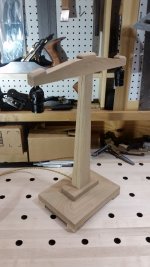
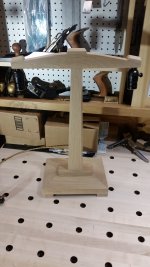
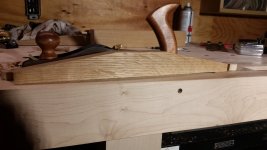
Here are the pieces for the top: the vertical has a taper on all four sides, but I waited to plane the taper on the front and back until I had decided how to fasten everything together. I also used the jack plane to create the beveled edges on the base, but I forgot to take pictures of that
View attachment 5
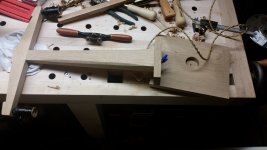
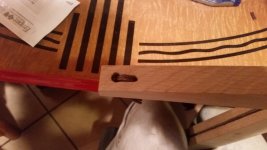
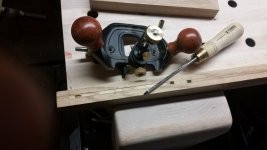
The way the original is wired is that there are dadoes cut along the sides of the vertical and on the underside of the cross piece, which are then plugged with thin wood strips. I decided just to stick to the original design and so used the router plane with a 3/16" blade to make the channels:
View attachment 6
View attachment 7
It would have been quite difficult to rout the cross piece without the leg vise. I had a little bit of trouble with the router plane -- not sure if there was some fence slippage, but the opening of the channel was slightly larger than the bottom, which meant the plugging strips have a pretty loose fit, and I might go back and use filler to treat the gaps.
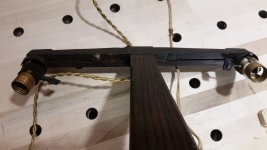
I put two holes at each end of the crosspiece so the cors could come up and through the threaded insert
View attachment 8
View attachment 9
I then cut some strips from some scrap white oak, then used the planer to get them almost flush -- saving the final flushing for the sander
View attachment 10
Here's everything with the lamp cord inserted
View attachment 11
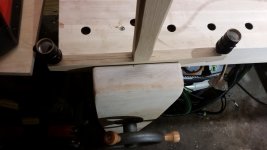
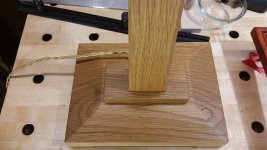
I used a spokeshave to create the deep chamfers on the sides of the vertical, and then got everything wired up and ready for assembly. I used normal lamp cord for the hidden wire, and some twisted nylon covered wire (purchased along with the bulb sockets and plug from an online antique lamp supply company) to run from the lamp itself to the outlet. The wires were connected in a mortise I dug out with a forstner bit in both the small rectangular base to which the vertical was first attached and then larger beveled base.
View attachment 12
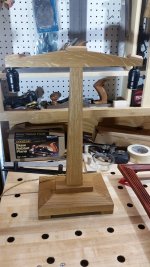
For the joinery, or lack thereof, I simply followed my model and used screws to anchor both the crosspiece and the base to the vertical. The ones on top are hidden in any case by the small beveled strips glued on top of the crosspiece. I had thought about doing dominoes, or even a traditional mortise and tenon, but I was worried about complicating the wire installation. Here's the end result:
View attachment 13
View attachment 14
View attachment 15
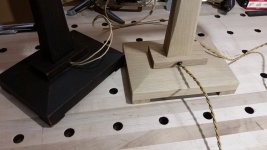
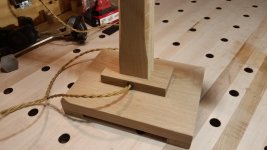
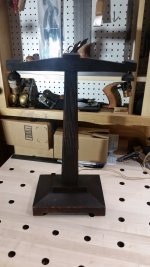
The only departure from the original is that I switched the grain direction on the feet which now runs perpendicular to the grain on the base, rather than parallel. Looking at it now, parallel probably would have looked better, but oh well -- the dark stain will ease the transition. The lamp works -- I made sure to test it before finalizing everything. Just deciding now on what type of dark stain to go with, and whether I should fill the gaps in the dado plugs. I'll post a picture later of the finished piece all lit up.
View attachment 1
I finally got around to it after Christmas. I figured it was a great project to push my hand tool skills a bit further, and also to break in my new bench, which I outfitted with the Benchcrafted tail and leg vises.
I started with a piece of 8/4 white oak, and used the tracksaw and lunchbox planer to get the pieces to rough size. Since I was following the original, which had fairly haphazard grain selection -- and since it will eventually be stained dark -- I didn't really spend a lot of time on grain matching, but basically just took what my stock gave me. So I ended up with quarter sawn on the cross piece of the yoke and rift sawn on the vertical. All the final sizing was done with the jack plane:
View attachment 2
View attachment 3
I'm getting a better producing a square edge with the hand plane as well:
View attachment 4
Here are the pieces for the top: the vertical has a taper on all four sides, but I waited to plane the taper on the front and back until I had decided how to fasten everything together. I also used the jack plane to create the beveled edges on the base, but I forgot to take pictures of that
View attachment 5
The way the original is wired is that there are dadoes cut along the sides of the vertical and on the underside of the cross piece, which are then plugged with thin wood strips. I decided just to stick to the original design and so used the router plane with a 3/16" blade to make the channels:
View attachment 6
View attachment 7
It would have been quite difficult to rout the cross piece without the leg vise. I had a little bit of trouble with the router plane -- not sure if there was some fence slippage, but the opening of the channel was slightly larger than the bottom, which meant the plugging strips have a pretty loose fit, and I might go back and use filler to treat the gaps.
I put two holes at each end of the crosspiece so the cors could come up and through the threaded insert
View attachment 8
View attachment 9
I then cut some strips from some scrap white oak, then used the planer to get them almost flush -- saving the final flushing for the sander
View attachment 10
Here's everything with the lamp cord inserted
View attachment 11
I used a spokeshave to create the deep chamfers on the sides of the vertical, and then got everything wired up and ready for assembly. I used normal lamp cord for the hidden wire, and some twisted nylon covered wire (purchased along with the bulb sockets and plug from an online antique lamp supply company) to run from the lamp itself to the outlet. The wires were connected in a mortise I dug out with a forstner bit in both the small rectangular base to which the vertical was first attached and then larger beveled base.
View attachment 12
For the joinery, or lack thereof, I simply followed my model and used screws to anchor both the crosspiece and the base to the vertical. The ones on top are hidden in any case by the small beveled strips glued on top of the crosspiece. I had thought about doing dominoes, or even a traditional mortise and tenon, but I was worried about complicating the wire installation. Here's the end result:
View attachment 13
View attachment 14
View attachment 15
The only departure from the original is that I switched the grain direction on the feet which now runs perpendicular to the grain on the base, rather than parallel. Looking at it now, parallel probably would have looked better, but oh well -- the dark stain will ease the transition. The lamp works -- I made sure to test it before finalizing everything. Just deciding now on what type of dark stain to go with, and whether I should fill the gaps in the dado plugs. I'll post a picture later of the finished piece all lit up.
Attachments
-
 20170103_195253.jpg782.7 KB · Views: 311
 -
 20170103_195223.jpg809.9 KB · Views: 254
 -
 20170103_194932.jpg744.9 KB · Views: 202
 -
 20170103_194922.jpg819.7 KB · Views: 180
 -
 20170103_173225.jpg675.2 KB · Views: 166
 -
 20170102_205307.jpg822.4 KB · Views: 216
 -
 20170102_190036.jpg696.1 KB · Views: 149
 -
 20170103_111943.jpg690 KB · Views: 193
 -
 20170102_170645.jpg733.1 KB · Views: 148
 -
 20170102_142519.jpg643.2 KB · Views: 153
 -
 20170101_194434.jpg780.8 KB · Views: 154
 -
 20170101_181236.jpg721.4 KB · Views: 166
 -
 20170101_180017.jpg560.4 KB · Views: 152
 -
 20170101_164910.jpg717.1 KB · Views: 166
 -
 20170101_144836.jpg696.4 KB · Views: 187