Ash Pedestal Table

Rutabagared

Member
Joined
Jan 27, 2008
Messages
298
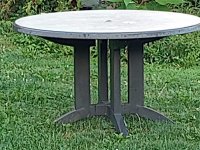
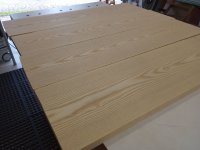
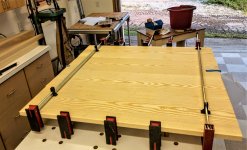
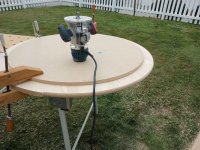
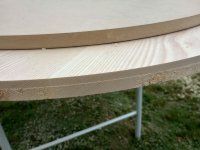
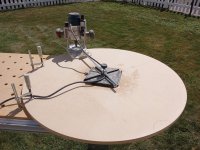
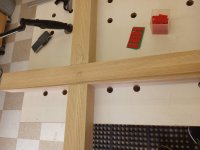
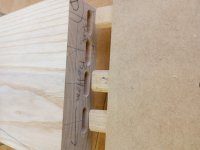
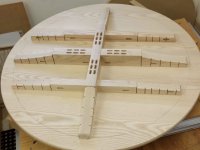
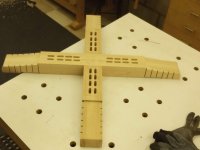
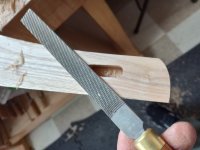
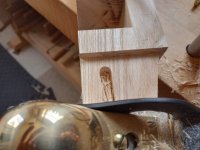
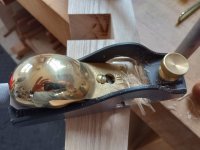
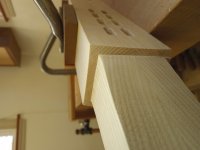
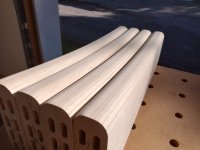
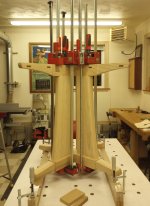
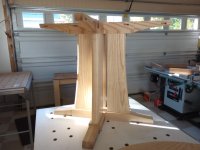
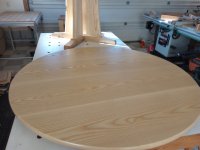
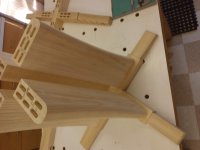
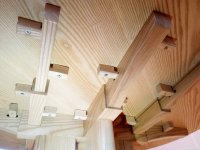
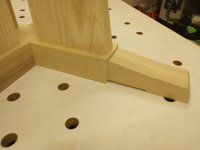
Ash pedestal table built last fall/winter - companion of the sideboard I recently posted here.  Also built for my daughter.  Inspired by a David Lamb piece in a recent issue of Fine Woodworking and an outdoor resin table a spied in an abandoned lot. . . [attachimg=1]View attachment 2[attachimg=2]

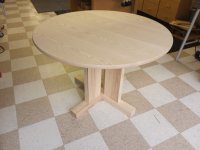
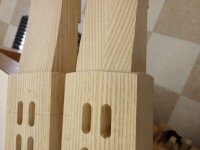
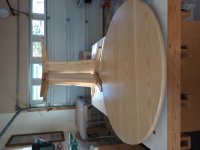
Currently living in my daughter’s childhood bedroom along with a set of Ash chairs (evidenced by the doll wallpaper border and peeled wallpaper patch . . . toddlers like to pick and peel at stuff – now it’s destined for her own place – where does the time go). 
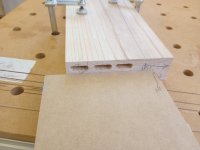
[attachimg=3]
 

Attachments

  • Ash table1.jpg
    Ash table1.jpg
    705.6 KB · Views: 366
  • resin pedestal.jpg
    resin pedestal.jpg
    643.2 KB · Views: 377
  • Ash table and chairs.jpg
    Ash table and chairs.jpg
    940.3 KB · Views: 330
I designed it in Fusion 360 based on napkin sketches and in-process changes when mocking up.  Fusion 360 is a challenge at first.  But like most things just takes practice.  I cannot draw worth a lick.  So I rarely sketch now and just skip directly to designing with it.

Top layout and glue-up. . . [attachimg=1][attachimg=2]
 

Attachments

  • table top layout.jpg
    table top layout.jpg
    897 KB · Views: 326
  • top glueup.jpg
    top glueup.jpg
    924.7 KB · Views: 322
Top machining.  Template is ¾ MDF. . . messy business. . . [attachimg=1]
[attachimg=2]
In a hurry routing the top and got some nasty tear out  Fingers crossed it will be removed when profiling.

I’ve been incorporating large round overs and oval shapes in my pieces – love the Whiteside oval profiles (1476, 1478) and the Whiteside bits in general.  They leave a nearly flawless finish, greatly reducing subsequent sanding. [attachimg=3]

Tear out removed.

[attachimg=4]
 

Attachments

  • top profile in process.jpg
    top profile in process.jpg
    472.7 KB · Views: 319
  • top edge forming.jpg
    top edge forming.jpg
    1.3 MB · Views: 318
  • top edge tearout.jpg
    top edge tearout.jpg
    692 KB · Views: 325
  • top template1.jpg
    top template1.jpg
    1.3 MB · Views: 321
On to the base.  The feet and cleat assembly at the top receive half laps.[attachimg=1][attachimg=2]
 

Attachments

  • half lap layouts.jpg
    half lap layouts.jpg
    854 KB · Views: 315
  • half laps for feet.jpg
    half laps for feet.jpg
    751.9 KB · Views: 319
Four uprights will be attached with Dominos to these assemblies.  Due to the offset, it is difficult to rely on using the fenced height adjustment from opposite sides to ensure proper fit.  So I resort to a “Domi-Shelf”.  I cut a row of mortises in the work pieces, then use a piece of scrap with the domino mortises to register into this row, using the base as a reference.

[attachimg=1][attachimg=2][attachimg=3]
 

Attachments

  • domishelf.jpg
    domishelf.jpg
    518.9 KB · Views: 317
  • domi-shelf.jpg
    domi-shelf.jpg
    498.1 KB · Views: 300
  • domishelf1.jpg
    domishelf1.jpg
    579.5 KB · Views: 305
Michael Kellough said:
Another beautiful way to showcase that beautiful wood!

Thanks for all the photos.

I’m glad the Whiteside profile bit saved the day but you might want to buy one of the new Woodpecker spiral compression bits.

Thank you for the kind words.  Funny you mentioned those bits.  I've been on the fence about them for a while.  Still haven't pulled the trigger.
 
Top cleat assembly and foot assembly mock-up.  The curve profiles on the end have been rough cut.  These profiles will be rebated.  The saw kerfs will serve as gauges when smoothing.

View attachment 1[attachimg=1][attachimg=2]

Base dry fit.

[attachimg=3]
 

Attachments

  • table top cleat layout.jpg
    table top cleat layout.jpg
    777.5 KB · Views: 346
  • table feet layout.jpg
    table feet layout.jpg
    766.9 KB · Views: 297
  • ash pedestal mockup.jpg
    ash pedestal mockup.jpg
    451.6 KB · Views: 307
Rebates cut on the curved ends.  A lot of work to smooth them.  But work that I find enjoyable.  LN and Iwasaki files are a pleasure to use.

[attachimg=1][attachimg=2][attachimg=3][attachimg=4]
 

Attachments

  • foot handwork.jpg
    foot handwork.jpg
    478.9 KB · Views: 283
  • foot detail file.jpg
    foot detail file.jpg
    474.3 KB · Views: 293
  • ln foot handwork1.jpg
    ln foot handwork1.jpg
    731.9 KB · Views: 294
  • ln foot handwork.jpg
    ln foot handwork.jpg
    525.1 KB · Views: 302
The small detail of relieving the shoulders on the foot rebate took most of a Saturday with Iwasaki files and abrasive sheets.  But I believe the results are worth it in the end. . . certainly an improvement over square.

[attachimg=1][attachimg=2]
 

Attachments

  • ash foot detail compare.jpg
    ash foot detail compare.jpg
    763.4 KB · Views: 296
  • footdetail1.jpg
    footdetail1.jpg
    762.7 KB · Views: 289
Uprights profiled and the base is ready for glue-up.  When glue-ups involve this many dominos, I preglue them into one side of the joint the previous day.  This one required some serious persuasion with a mallet.

[attachimg=1][attachimg=2][attachimg=3]
 

Attachments

  • ash table uprights.jpg
    ash table uprights.jpg
    502.5 KB · Views: 296
  • ash table base x.jpg
    ash table base x.jpg
    667.6 KB · Views: 281
  • ash table glue-up1.jpg
    ash table glue-up1.jpg
    444 KB · Views: 280
Finish applied.  I sprayed a combination of 4 or 5 coats of Target EM7000HBL laquer and and EM8000 conversion varnish.  I'm impressed with their ease of application, durability and appearance.  I wouldn't use the laquer in areas intended for high wear.  Hence the conversion varnish, which I find very durable.

I'm in no hurry so I’ll allow them to cure for several days before attaching the top.
[attachimg=1][attachimg=2][attachimg=3]
 

Attachments

  • table top and base 1.jpg
    table top and base 1.jpg
    511.8 KB · Views: 281
  • Ash table base - finished.jpg
    Ash table base - finished.jpg
    485.8 KB · Views: 280
  • table top and base.jpg
    table top and base.jpg
    414.1 KB · Views: 287
Michael Kellough said:
We need a pic of the underside the finished table.

That’s lot of precision mortising!

Below are pictures of the uprights and cleat assemblies with their matching mortises.[attachimg=1][attachimg=2]
 

Attachments

  • table top cleat layout.jpg
    table top cleat layout.jpg
    777.5 KB · Views: 285
  • ash table base x.jpg
    ash table base x.jpg
    667.6 KB · Views: 277
Buttons for attaching the top . . . what’s worth doing is worth over-doing. . .

[attachimg=1][attachimg=2][attachimg=3]
 

Attachments

  • buttons.jpg
    buttons.jpg
    820.4 KB · Views: 278
  • button.jpg
    button.jpg
    364.4 KB · Views: 275
  • Ash buttonsr.jpg
    Ash buttonsr.jpg
    1.4 MB · Views: 278
Profile of feet inspired by the columns of a house in my neighboorhood [attachimg=3]

If I had it to do over, I would reduce the thickness of the uprights supporting the top – just a bit too chunky for me. 
 

Attachments

  • Ash table foot.jpg
    Ash table foot.jpg
    241.3 KB · Views: 77
  • column1.jpg
    column1.jpg
    447.4 KB · Views: 132
  • houser.jpg
    houser.jpg
    1.7 MB · Views: 216
sawdustinmyshoes said:
So I resort to a “Domi-Shelf”.  I cut a row of mortises in the work pieces, then use a piece of scrap with the domino mortises to register into this row, using the base as a reference.

This is a very clever way of making the second row of mortises!  I need to file this away in my brain pan for later.
 
squall_line said:
sawdustinmyshoes said:
So I resort to a “Domi-Shelf”.  I cut a row of mortises in the work pieces, then use a piece of scrap with the domino mortises to register into this row, using the base as a reference.

This is a very clever way of making the second row of mortises!  I need to file this away in my brain pan for later.

Thank you.  I've used this several times with success.
 
Back
Top