gunnyr
Member
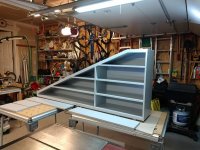
As I posted earlier I am finally having some success with spray finishing. I delivered a project today that I sprayed with my Fuji MM4 and SW Pro Classic Gloss. This is a ramp to make it easier for their dachshund to climb up in bed with space for the lady to display some of her shoes.
[attachimg=1]
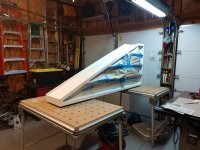
Finishing the piece was quite a challenge for me. I finished all the interior before assembly and then masked the interior and finished the exterior. I was worried about the transition from the interior to exterior finish but I masked it at the trim joint and it worked out well, only a little touch up was needed.
[attachimg=2]
The customer was happy enough with the piece and asked me to build a mid-century nightstand for them!
My question is how to best go about finishing the piece. Below is a CAD drawing of the piece. It will have an open back. It will be built with edge banded Baltic Birch Plywood. I'm thinking I'll miter the corners and install the fixed shelf with dominos. My thought is to finish the interior before assembly just like the ramp. Am I missing something, is there a better approach?
[attachimg=3]
[attachimg=1]
Finishing the piece was quite a challenge for me. I finished all the interior before assembly and then masked the interior and finished the exterior. I was worried about the transition from the interior to exterior finish but I masked it at the trim joint and it worked out well, only a little touch up was needed.
[attachimg=2]
The customer was happy enough with the piece and asked me to build a mid-century nightstand for them!
My question is how to best go about finishing the piece. Below is a CAD drawing of the piece. It will have an open back. It will be built with edge banded Baltic Birch Plywood. I'm thinking I'll miter the corners and install the fixed shelf with dominos. My thought is to finish the interior before assembly just like the ramp. Am I missing something, is there a better approach?
[attachimg=3]