Cheese
Member
Well here's the final product. A white oak slab from the BRANCH of a 200+ year old tree replacing a birch butcher block countertop. The LEDs in the split are connected to the under counter LED task lighting so one switch controls it all. [cool]
Details: The entire slab, all sides, have been given 3-4 coats of General Finishes water based poly.
Then two separate pours of West 105/207 epoxy put on the top surface, each pour approximately 1mm thick.
The entire top was then sanded flat using a combination of a Rotex 125, a RS 2 and an ETS EC 125/6" pad.
Sanding started with 180 grit and went up to 2000 grit. I wanted a smooth flat surface but not a high gloss surface. You can see the light switch and some of the stainless tile reflected in the surface. It gives it some depth without that "plastic" look.
A final buff was done using the Rotex and some Meguiars sealer... [embarassed] that's all I had on hand. [embarassed]
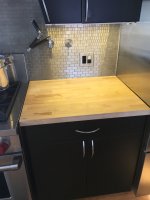
BEFORE: [attachimg=1]
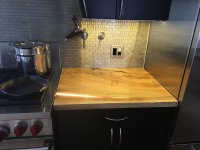
AFTER[attachimg=2]
Some more shots:
Photo 1: Slab in-use.
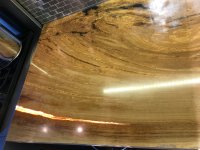
Photo 2: Close-up. Again, you can barely see the stainless tile and the stainless pot on the range reflected in the surface of the slab.
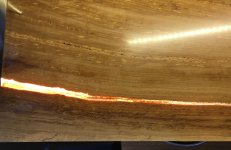
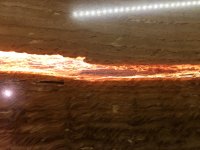
Photo 3: The lit split
Photo 4: Close-up
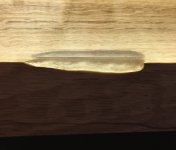
Photo 5: The worm hole captured forever. It's easy to see the 2 mm epoxy thickness in this photo.
Details: The entire slab, all sides, have been given 3-4 coats of General Finishes water based poly.
Then two separate pours of West 105/207 epoxy put on the top surface, each pour approximately 1mm thick.
The entire top was then sanded flat using a combination of a Rotex 125, a RS 2 and an ETS EC 125/6" pad.
Sanding started with 180 grit and went up to 2000 grit. I wanted a smooth flat surface but not a high gloss surface. You can see the light switch and some of the stainless tile reflected in the surface. It gives it some depth without that "plastic" look.
A final buff was done using the Rotex and some Meguiars sealer... [embarassed] that's all I had on hand. [embarassed]
BEFORE: [attachimg=1]
AFTER[attachimg=2]
Some more shots:
Photo 1: Slab in-use.
Photo 2: Close-up. Again, you can barely see the stainless tile and the stainless pot on the range reflected in the surface of the slab.
Photo 3: The lit split
Photo 4: Close-up
Photo 5: The worm hole captured forever. It's easy to see the 2 mm epoxy thickness in this photo.