Blue Pine Garage Cabinets: Build

smartcarpie said:
Iamnothim-

Don't be afraid to tackle the jack miters by hand.  They're really simple once you get going.  And if you ever do any bead and quirk window casing you'll find it a very handy joint that's been around for a few centuries, once again as it allows the joint to stay tight while the material moves with the seasons. 

If you are bound and determined to use a router take a look at garymkatz.com for another jack miter jig, and didn't Brice Burrell do a write up on using an MFS template for that work too?  But unless you are doing production work just dive into the scrap bin, make a jig and have at it.

By hand, do you mean a tenon saw, or coping saw?  I have a nice fret saw but getting straight cuts....  well... let's not go there.

I have a bunch of Katz Videos.  I will look for it.
I know I should learn to do these buy hand but I am a very impatient person.  I tried at least 6 times to make a mortise and tenon joint.  If it wasn't for the Domino I would never be able to pull of some of the projects I done. 

I've coped a few pieces of crown by hand but not crown.  I have the Collins Coping foot and that helps, I just need to make a jig.

Many thinks for the direction.
I think with the CMS and a notch bit I'll be rocking.
 
I figured out the T&G bit set.
Now I need a lesson in reading the grain and selecting the right boards and putting them in the right direction.

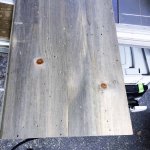
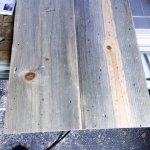
[attachimg=1][attachimg=2]
 

Attachments

  • Blu_Pine-1.jpg
    Blu_Pine-1.jpg
    135.6 KB · Views: 5,636
  • Blu_Pine-2.jpg
    Blu_Pine-2.jpg
    149.7 KB · Views: 5,707
Take a look at my first picture. Once you have your mark where the Miters intersect, slide the jig on and get close with a pull saw, back saw, whatever. As long as it can track against the jig. Cut to the outside of the quirk, then waste away the part of the bead where the rail will intersect.

You can split your way in with a chisel and pare flat or use a table as to rip it mostly thru then clean up with a chisel. Then put the jig back on and use it as a paring guide for your chisel. A clamp on the sides of the jig gives it enough grip to keep it in place, and if it gets torn up just skim a new 45 with your chop saw. But it's really centuries old technology.

Dead simple. Unless you just need an excuse to run the CMS. I get that too. But sometimes I just want to get done and I am happy to only listen to a chisel rather than a router as my ears are torn up enough already.
 
Cutting the french cleats for the uppers[attachimg=1]
 

Attachments

  • GarageWood-1.jpg
    GarageWood-1.jpg
    143.5 KB · Views: 5,500
I finished the first upper box yesterday and applied the frame today.
After trying a number of different power tool methods to notch the frames without good results I used hand tools.

Guess what?  It went a lot better.  Not perfect but "acceptable".  Good for a first attempt.
The angled jig in [member=12398]smartcarpie[/member]  photo worked great.  First try was plywood.  The I used made them from hard maple.
I'll be making at least another ten boxes (upper and lower) so I should get better.  I have a feel for the telemetry that has to be zeroed in to get a tight fit.

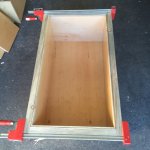
[attachimg=1]
 

Attachments

  • Cabinet.jpg
    Cabinet.jpg
    568.1 KB · Views: 5,502
That face frame looks really nice. You done good!

[big grin]
 
Looks great from the East Coast!  Glad the jig worked out for you. I'll be eager to see the final results. Nice work.
 
iamnothim said:
I finished the first upper box yesterday and applied the frame today.
After trying a number of different power tool methods to notch the frames without good results I used hand tools.

Guess what?  It went a lot better.  Not perfect but "acceptable".  Good for a first attempt.
The angled jig in [member=12398]smartcarpie[/member]  photo worked great.  First try was plywood.  The I used made them from hard maple.
I'll be making at least another ten boxes (upper and lower) so I should get better.  I have a feel for the telemetry that has to be zeroed in to get a tight fit.
[attachimg=1]
Sometimes using hand tools is the better way to go and this is definitely one of those times.  Very nice build so far!  Please keep sharing the photos.

Thanks, Mike A.
 
Thanks for the kind words guys.

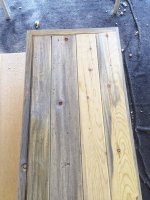
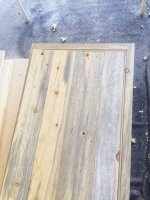
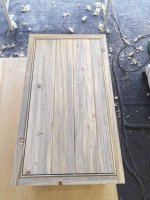
I'm on to the doors.  I just finished planing, jointing, and routing the T&G on a rough sized door.
The question is.... which side of the door should show?
Grooved or Flat?
Should I chamfer the perimeter edges?

[attachimg=1]

[attachimg=2]

Before I made them I was thinking the doors would be flat because I'm going to panel the walls T&G and grooved doors would be busy.
I'm not so sure now as the grooves look pretty nice.

On another note.  My Dewalt DW735 planer dust collection kit worked great.
 

Attachments

  • CabDoor-2.jpg
    CabDoor-2.jpg
    119 KB · Views: 3,151
  • CabDoor-1.jpg
    CabDoor-1.jpg
    109.5 KB · Views: 3,007
iamnothim,
I like the grooved side.  Since the boards are very different in stain, color, etc. I think the grooves help to make more sense of the difference.  In my mind, the other side looks more like the boards are not matched up.  That's my opinion, but it looks very nice either way.

Mike A.
 
I have to agree w/ Mike...

I think the side with more relief looks intentional and more artistic.

Overall, 'pretty cool.

Tom
 
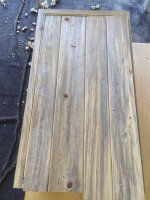
I swapped out the blonde boards with darker ones and glued the door up.  When the wood costs $1.45 BF you can be picky.  That's equivelent to $46 for a sheet of 3/4" ply.

There are plusses and minuses to Beatle Kill.
Plus:
Cost
Beauty
Easy to work with (soft)
Crazy grain pattern and worm holes hide poor workmanship  [smile]
EDIT:  since the wood is dead it does not move and is very flat

Minus:
Soft and easy to scratch.  Even writing with a pencil scratches the wood.  I think a poly top coat will help.
You have to cull the boards.  Hence more waste than other woods.

After the glue dries I will calculate the reveal/gap and cut the door to size.  I may put a tiny chamfer on the edges.
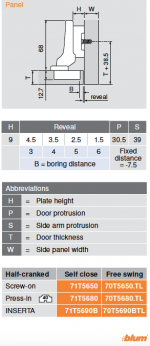
I made my first mistake with the LR32.  I did not read the instructions for the hinge I need.  I thought they would be the same 37mm setback so I subtracted the thickness of the frame and bored the holes.  THEN I read the specs for the hinge I need to use (below).  It needs 38.5mm Plus the thickness of the door.  So now that cabinet has extra hinge holes.

[attachimg=1]
[attachimg=2]


Attachments

  • Screen Shot 2015-02-15 at 12.05.15 PM.png
    Screen Shot 2015-02-15 at 12.05.15 PM.png
    84.4 KB · Views: 2,511
  • CabDoor-4.jpg
    CabDoor-4.jpg
    113.8 KB · Views: 2,556
That looks really nice now.  It looked good before, but the way you matched up the boards now makes it even better.  I still think the grooves really add an extra dimension.  Nice work!

For the mislocated hinges, if you haven't glued up the cabinet, is it possible to make a shallow rabbet the length of the board and the width of the misplaced holes, then glue in a strip of wood over them?  That would completely hide the mistake if it really bothers you.  Otherwise, just leave it.

Mike A.
 
You are doing an amazing job on those cabinets, and I love your story and documentation. It's a great start-to-finish (I assume [wink]) tale of your saga.

Please continue?!
 
Done for today.

The T&G slats joints are fragile so I put a couple of cross bars on the inside.  It's pretty stout now.

MISTAKE:  Can't believe I missed the plank proportions.  This box will go at the far end unless it bugs me so much I scrap the door.

I will have the hinges late tomorrow.  I'm going to bore the holes on a test piece first.
Q:  Should I recess 4 or 5 holes inside the vertical frame so I can connect/ pull together the adjacent cabinet when I'm hanging them?

"Death to Melamine!"

[attachimg=1][attachimg=2]
 

Attachments

  • CabDoor-6.jpg
    CabDoor-6.jpg
    109.5 KB · Views: 2,442
  • CabDoor-5.jpg
    CabDoor-5.jpg
    102.5 KB · Views: 2,489
Luke-

those are looking good.  You're wasting no time! 

You'll want the battens inside the door for sure.  I assume no glue on the T&G right?  Minimize any twisting/warping.  If the wood could gain any moisture you might even gap them a hair (I mean just a hair) to let them move in an unconditioned space.

Looks like a good even margin all the way around too between frame and door panel.  Scrap the door if it will bother you, sometimes it's hard to have stuff stare you in the face after the fact.  You'll remember to lay out from the center next time for sure though;)

As far as joining them, considering they are shop cabinets with doors, I'd happily just screw them together, no fancy connectors.  Maybe a couple trim heads through the face frame edges to keep them tight.  You won't notice them for long.

Great work.
 
smartcarpie said:
Luke-
  I assume no glue on the T&G right?  Minimize any twisting/warping.

As far as joining them, considering they are shop cabinets with doors, I'd happily just screw them together, no fancy connectors.  Maybe a couple trim heads through the face frame edges to keep them tight.  You won't notice them for long.

Great work.
About the glue......  Yes
It's very dry out hear and this wood is as dead as a tombstone in Tombstone.
I also glued and screwed the battens.  Do I leave out the glue entirely?  I can't imagine not glueing them.

I could also use Dominos on the edges of the face frame. That should index them nicely.  Then a screw at the top and bottom.
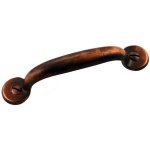
Overall I'm pleased so far.  They look as I expected them to look.  Here is the door and drawer pulls I ordered.  Copper

[attachimg=1]
 

Attachments

  • p107c.jpg
    p107c.jpg
    10.3 KB · Views: 2,338
I don't know much about your climate. Here in New England with our seasonal swings movement is a big deal.

Board and batten doors are traditionally built with no glue, just tongue and groove and clinch nailed battens. They last a long time because they can move.

Frame and paneled construction is just an extension of that evolution. The panel is loose and can change size while the narrow rails and stiles move little by comparison.

IF humidity is constant where you are then method matters less. But for light doors I would 've fine skipping the glue. Maybe just two fasteners wherever a batten crosses a board at a diagonal pattern to help with any sag potential without the glue.

 
Back
Top