Cabinet construction confirmat screws vs staples

usernumber1

Member
Joined
Aug 7, 2018
Messages
406
I've been making cabinets without stretchers : dadoed sides and back. Full piece on top and full piece back - 3/4 melamine all around. -  then stapling and it's been working quite well.

Now we're considering but joints to skip dado and using confirmat screws and domino for alignment. Does anyone have experience with these? How does it compare for assembly? Would need to predrill but no dado and maybe easier to align as well.

Also what length screws? I was looking most common is 50mm, seems short? Guessing 2.6TPI coarsest thread for 19mm melamine particle board or 3TPI does it even matter?

 
Both the kitchen cabinet trade association and the flat pack (kd) trade association contracted with a testing firm to test the strength of various joinery methods.  The results are on line.  It took me a while to find the tests on google.

I have a pretty good memory of the results.  Both sets of gave similar results and recommendations.

I don’t have time to post those results now.  I will tomorrow.  Maybe you can find the finding on google.

I would start my google search with “joinery methods strength tests for kitchen cabinet/knock down furniture”.

If you don’t find those results, I will post what I remember tomorrow.
 
I've built a number of cabinets from melamine with a combination of 50mm x 7mm confirmat screws and dominos. For me, the screws are used to hold it together while the glue dries for the dominos. I've never had a failure on permanently installed cabinets.

Where I've seen issues is where they are used for knock down furniture and they are installed and removed multiple times (e.g. college students moving every year), You can do that a few times, but then they just don't hold anymore.
 
The two studies I read were sponsored by the industry groups that represent the flat pack kitchen cabinet companies and the flat pack furniture companies.  They only tested joinery that were suitable for high productivity.  That left out biscuit joinery and Domino joinery.

Both studies (by different labs, it seems) used similar methods.

They had a vertical panel and a horizontal panel.  The vertical panel was rigidly clamped in place.  The horizontal panel was joined to the vertical panel on one end only.  They then added load to the free end by using something that probably resembled a heavy duty digital fish scale.

My recollection was that they tested dadoes, conventional wood screws, Confirmat screws, quarter turn cam fasteners and dowels.

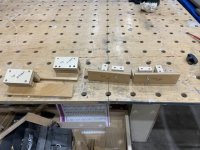
Cam lock screws and cams:

images


Note:  There are different priorities for flat pack furniture and flat pack cabinets.  The cabinets assume that the walls will be a integral part of the structure, so racking side to side is of less importance to the cabinet makers than to the furniture makers.

Both studies concluded that no fastener should be closer than 2” from the edges of the panel.  This is probably because you need 2” of space to keep the panel from splitting open.

They tested dadoes (no glue).  The horizontal shelf failed at a load that was too low to measure.  This was a “moment” for me, as dadoes were my method of construction up until the time I read the studies.  Dadoes faired the worst of all the tested joints. 

They tested the cam and cam lock screws and that came in second to the last for strength.  Pull out strength was OK, but racking strength was lacking.

Conventional screws were slightly better than the cam and cam locks.

Confirmat screws fared much better.  They had good pull out strength and all the racking strength of dowels, plus they needed no clamping.  But, and a major consideration in my mind, they remain highly visible (and they are expensive).

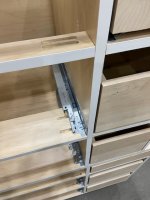
Dowels had the highest racking strength and can be kept hidden, but require clamping.

When I am building face frame cabinets, I use a combination of Confirmats and dowels.

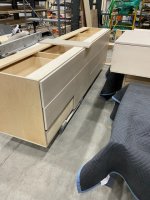
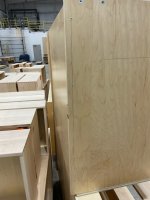
On a base cabinet, I would use three Confirmats per joint (no glue).  After the cabinet is fully assembled, I through drill several more holes and insert dowels with glue.  The sides of my cabinets are either hidden or have an end panel so the holes and Confirmats do not show.

I do the same on wall cabinets, but with only two Confirmats.

I suppose that after the glue had dried, I could back out the Confirmats and replace them with dowels.  I don’t do that, but I considered it as Confirmat screws are fairly expensive.

This video shows the assembly of a base cabinet, using equipment that is not available to most of us, but is to large manufacturers.  A complete cabinet assembled in about 2 minutes.  Gang drilling made the holes.

From the manufacturers’ point of view, dowels make the most sense. 

I pick and choose.  I use pocket holes when racking strength is not required.

I use a combination of dowels (through drilled for face frame cabinets, blind drilled for Euro cabinets) and Confirmats.  The Confirmats eliminate the need for clamping. I don’t use staples, and they did not test staples.  They did not say why it was not included.


Thank you sir that's fantastic info. I'll be switching to confirmat and dowels or maybe domino just for alignment of panels. All the exposed sides are also behind panels so that's not an issue.

The video is interesting because it shows a high production environment yet they have the working area a little high to be swinging a mallet overhead like that.
 
usernumber1 said:
Thank you sir that's fantastic info. I'll be switching to confirmat and dowels or maybe domino just for alignment of panels. All the exposed sides are also behind panels so that's not an issue.

The video is interesting because it shows a high production environment yet they have the working area a little high to be swinging a mallet overhead like that.

If they did not make it so high, then it would be uncomfortably low for the gluing operation. Neither height is ideal.  It was a compromise.
 
Bent's did a video on assembling cabinet boxes that caused me to rethink my approach.


I'm going to try this on my next project. Not sure if confirmat will make much difference over say Spax, but I have both available.

RMW

 
Lots of good ideas in that video.

We found pre drilling the end panels on the drill press for the screws was faster and more accurate if you have any amount of boxes to build. If you are using confirmat screws, the 5 mm pilot on the drill bit holds the drill straight and in the middle of the top or bottom. We used a countersink if using standard wood screws.  We had a fence made from melamine we had marked with red for top ends and black for bottom.  We always use full depth tops on our base cabinets except sinks, as we found the savings in material costs did not justify the extra labour when stretchers are used. 

I agree that most cabinet boxes are overbuilt, but the one spot that the top to side joints can fail is if your bottom cabinet overhangs a ladder kick. Imagine 4 drawers and a granite counter, then a 200 lb teenager jumps up to sit on the counter. All the weight is in shear on the joint unless you have your ladder kick under the end panel. We always make sure the weight is carried by the end panel to the kick.

PL premium will stick to melamine and some prefinished ply. It only sticks when one side is porous and the squeeze out is best left to dry then cleaned off with a sharp chisel.  We used it for a while but quit using it as I don't think it is needed.
 
Richard/RMW said:
I'm going to try this on my next project. Not sure if confirmat will make much difference over say Spax, but I have both available.

RMW

Try this experiment:

Start by taking a 12” wide board and clamping it vertically.  Then take a second 12” wide board and attach it horizontally with two Spax screws.

Repeat the same with two Confirmats.

For a subjective results, press down on the free end of the Spax mounted board.

Repeat for the Confirmats. 

If there is a significant difference between the two, you will feel the difference.

Better, if you have a heavy duty fish scale with a tell-tale, you can get quantified results.

As I recall they tested conventional wood screws and drywall screws.  But it is at least 10 years since I read the results.  I took away the information that I needed.  Maybe someone could search for the data.

With Confirmats you can assemble the cabinet in your shop and check the fit.  Then disassemble and paint.  Then carry the cabinet to the installation location and assemble on site.  Transportation is going to be cheaper, easier and more dense.

If you are a one-man shop, it makes larger cabinets fore feasible.

If you do the test, please post your findings.  Spax screws are definitely more robust than drywall screws.  I don’t know how much stronger they are than conventional screws.
 
I just did a quick Google search trying to find relative strengths of Spax and Confirmat screws.

The only test I saw was about pull-out strength.  And in my opinion, and apparently the opinion of the trade associations that contracted the testing, that is not the most important characteristic.

Racking strength (side to side wobble) is more important.

If you need more pull out strength, you only need to use a longer screw. 

Also, Confirmats require far fewer rotations to drive home.  For reassembly at the site, that means you can do it with a simple, old-fashioned screwdriver.
 
Richard/RMW said:
Bent's did a video on assembling cabinet boxes that caused me to rethink my approach.


I'm going to try this on my next project. Not sure if confirmat will make much difference over say Spax, but I have both available.

RMW


I just watched the video and I compared it with the video I linked, and his final assembly is much slower than the doweled assembly.

My assembly method is slower too.  I might go to just dowels and use the confirmats to replace the clamps.

Also, the one prohibition that both tests listed is that you should not drill into the edge of sheet goods within 2” from the ends.  It looks like he is within 1”.  It is so easy to comply with that prohibition that I abide by all the time.
 
That video got me rethinking the dados I was doing.
I'm honestly not concerned with racking, every cabinet is screwed to the wall behind it as well as the cabinet next to it. The ladder bases are screwed to the floor and cabinets screwed to the bases.

I was mostly concerned with weight sitting on the confirmats+dowel/domino. The new combo applicances are heavy, the bosch combo is 300lbs. Even the wall oven alone is 160lbs.
And then there's the stacking washer dryer but they are separate so the dryer sits on its own shelf and it's also heavy and it moves as well.
But info from Packard info was quite revealing that the dados were the weakest. So out they go. This is for melamine chipboard maybe plywood would be stronger but I'm not using that

Good point on lining up ladder bases to the ends, thanks

Spax are really hard to find here. How much are confirmats priced for you guys? A pack of 2000 is ~$100 + add the drill bit, it's not that crazy
 
I am in Alberta my price is $193.6 for a case of 4000, so about the same as you, but I have to buy a full case.
 
Woodworker Express has confirmats in three sizes.  Sold in full cartons of 1,000 each, ranging in price from $54.00/m to $60.00/m.

Not a savings, but 1,000 screws will last a long time. (I said the same thing about the 1,000 dowels I bought and more than half are gone.)

I looked at AH Turf’s website and I could not find the.  That does not mean that they don’t have them.  They have a truly crappy website that fairly dares you to place an order.  I always make a list and phone in the order.  But their prices are usually excellent, the never collect sales tax, and in an act of defiance against the website, the give excellent service.

If you decide to order from them, use the phone.
 
This thread is matter of timing————95% of my shops cabinet builds area face frame with 60-70% of those being inset. We happen to have two euro builds in progress right now and just finished one.

These two jobs consumed ~200 sheets of 4x8 plywood and 10 sheets of 10x4.
All the sheets were processed as Bent does. I do own a CNC machine, I just don’t have one——yet.

A few things we do different. If there is a run of cabinets we will fabricate the run as one cabinet. It is not unusual for us to deliver a 12-14’ unit.

This cabinet is ~12’ drawer base. The hardware is push to open, soft close Blum.
[attachimg=1]

This cabinet is ~10’, sink area, trash pullout, 3 drawers.

[attachimg=2]

Various configurations.

[attachimg=3]

We match the edge banding to the face color, most times the EB is finished to match, every once in awhile we can get a PVC that matches.

On to the build and screws.

In the photos above, notice we land the gables (cabinet sides) on to the bottom, not screwed to the deck. I feel this carries the load better than just screws into the edge of the plywood. Doing this also “hides” the plywood edges on uppers, you have to deal the screws, there’s caps that.

All of the backs are 1/2”, french cleats are fitted to the upper for easier install.

The panels are pre drilled for assembly.

[attachimg=4]

Conformat screws are used for case assembly. We have tried Spax, we found they did not hold the box in square as well.

[attachimg=5]

The back is secured with Spax screws. We’ve tried staples, the Spax work better.

[attachimg=6]

For center stretchers, the good ol’ pocket screws.

[attachimg=8]

For this job we created a couple of jigs to assist in assembly.

[attachimg=7]

A recently completed euro job.

[attachimg=9]

[attachimg=10]

It is not real clear in the pictures, all of the ends of runs get a panel which covers any fasteners in the sides of the cabinets.

Again, I find the Conformats resist racking better than the Spax.

Face frame kitchen.

[attachimg=11]

Our IG page.
https://www.instagram.com/tjscustomcabinetry/

Tom


Attachments

  • 131958AC-408D-4D1E-B6B4-16CDE4F3FE8A.jpeg
    131958AC-408D-4D1E-B6B4-16CDE4F3FE8A.jpeg
    108 KB · Views: 801
  • 10AE8F92-50DA-4E5C-B221-4300096C4B0A.jpeg
    10AE8F92-50DA-4E5C-B221-4300096C4B0A.jpeg
    100.2 KB · Views: 774
  • 374E7383-0F34-4CF2-B5D8-25AEBB7246E2.jpeg
    374E7383-0F34-4CF2-B5D8-25AEBB7246E2.jpeg
    65.4 KB · Views: 788
  • C96DF441-B6CB-4F36-9E2D-0EFA60A7B8C3.jpeg
    C96DF441-B6CB-4F36-9E2D-0EFA60A7B8C3.jpeg
    73.2 KB · Views: 788
  • CBB40380-D20E-41C2-AAA8-28F0434E82D7.jpeg
    CBB40380-D20E-41C2-AAA8-28F0434E82D7.jpeg
    78.3 KB · Views: 783
  • 423E45B3-A367-4233-89C3-0AC51ECCA7E0.jpeg
    423E45B3-A367-4233-89C3-0AC51ECCA7E0.jpeg
    116 KB · Views: 780
  • 05B02067-C95B-4942-9F48-44DF2CC35581.jpeg
    05B02067-C95B-4942-9F48-44DF2CC35581.jpeg
    76.7 KB · Views: 785
  • 6E019D79-D3E5-479E-A0D2-50B465BD6DAB.jpeg
    6E019D79-D3E5-479E-A0D2-50B465BD6DAB.jpeg
    84.8 KB · Views: 808
  • 054EA33E-BF60-4DD5-8E6C-D383B4FE325E.jpeg
    054EA33E-BF60-4DD5-8E6C-D383B4FE325E.jpeg
    82.4 KB · Views: 787
  • 62C57CC0-6A90-41D7-85DF-6EC7FD3EB87B.jpeg
    62C57CC0-6A90-41D7-85DF-6EC7FD3EB87B.jpeg
    106.1 KB · Views: 792
  • 83F269A8-CB60-4271-93C9-443B6204F83C.jpeg
    83F269A8-CB60-4271-93C9-443B6204F83C.jpeg
    87.6 KB · Views: 789
“we land the gables (cabinet sides) on to the bottom, not screwed to the deck. I feel this carries the load better than just screws into the edge of the plywood.”

I’ve never understood the rationale for doing the opposite, especially when the cabinet sits on legs instead of a ladder frame. And the legs usually don’t even catch the gable, which is just holding onto the end grain of particle board with a few dowels and screws? Post and lintel for me.
 
Massive thanks sir. That's some beautiful work.

Ikea and Blum cabinet builder both run the cabinet sides to the end and screw the bottom from the side. I agree with you this would not be as strong. I suspect the variation of lr32 they use requires this?

Also they do not use any center stretchers if the cabinet is just drawers, unless they are internal drawers behind a door panel
But again they are full of system32 holes and no jigs

When you run the cabinets to the ceiling you are limited how high you can go because of the french cleat right? I was thinking of going 1-1.5" from the ceiling and not using any fillers to the ceiling just a very small gap
I'm still thinking maybe that is a bad idea and to just use a 4" gap with a filler scribed to hide any ceiling issues

[attachimg=1]

Do you every run this filler/spacer short, as in not to the floor? Is this a design or client choice?
[attachimg=2]


Attachments

  • Screenshot 2023-04-07 222746.jpg
    Screenshot 2023-04-07 222746.jpg
    15.9 KB · Views: 757
  • Screenshot 2023-04-07 222812.jpg
    Screenshot 2023-04-07 222812.jpg
    27.8 KB · Views: 764
I think Euro cabinet construction is favored by the flat pack makers because there is no simple way to add the face frame at the job site.  Likewise, the stretchers.  Pocket hole assembly would depend too much on the skill of the assembly person.

A friend asked me to repair a drawer that was on site assembled using hot glue.  Easy enough.  I used a heat gun to soften the adhesive. It was a chore getting the pins and tails clean enough to glue though.

Does anyone thing that hot glue is acceptable for that purpose.

Note:  I have used hot glue to tighten up the back panel in the groove.  Jus a few dabs because the groove was too wide. No strength requirement to meet.
 
usernumber1 said:
I was thinking of going 1-1.5" from the ceiling and not using any fillers to the ceiling just a very small gap
I'm still thinking maybe that is a bad idea and to just use a 4" gap with a filler scribed to hide any ceiling issues

The closer you get to the ceiling, the shadow line becomes more prominent and any deviation % because of wonky ceilings will show more than something that is 4" away and scribed.

Ceiling tape joints are notoriously bad where you're getting so close and will need to be screed if you're going to be running a tight gap.

 
Back
Top