onocoffee
Member
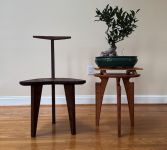
After the recent discussions about George Nakashima, I was curious to see and learn more about his work. And while most people seem to be captivated by the Conoid Chair, I found the Concordia Chair, designed by Mira Nakashima, to be more intriguing to my tastes.
The chair was originally designed in 2003 for the Concordia Chamber Players. It's meant to be flat-seated and open to allow for the expressiveness of the stringed musician (like celloists). I just loved the design and wanted to mimic it.
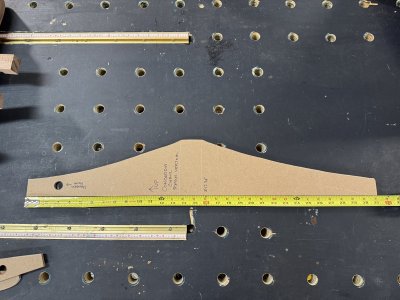
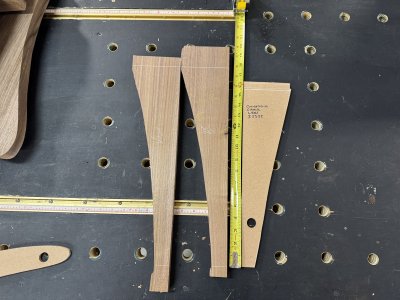
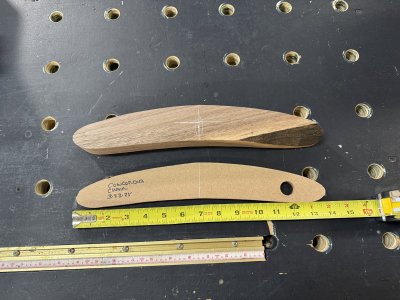
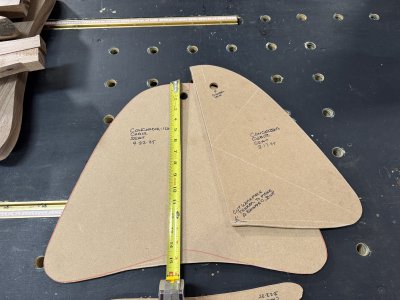
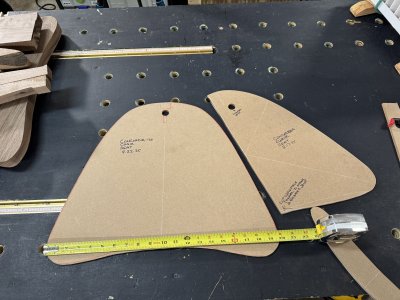
Luckily, the website provides some basic measurements (seat height 17.5", depth 19.5", width 19.5"), so working with images from the Nakashima website, as well as The Concordia Players and American Music Furniture, and a ruler pressed to my screen, I tried to figure out the different measurements and then created templates for each of the five pieces.
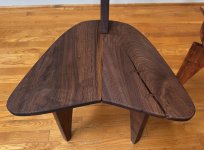
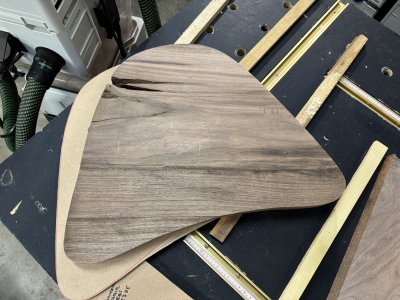
Made the chair from an 8/4 walnut slab from a tree that was felled about 2 miles from my house and milled and kiln dried by my local sawyer. This was also the slab I had trouble rough cutting with the ATF 55 E.
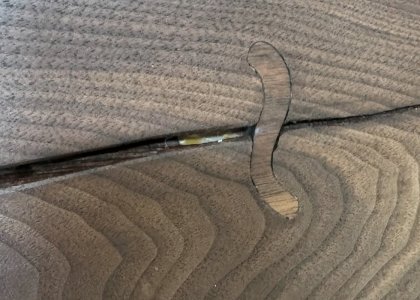
It's not an exact replica of Mira Nakashima's chair but it's fairly close. The seat has a split that I tied using "bowties" in the shape of characters from the Filipino Baybayin script. The other two tenons are also characters from that script hiding the pocket holes that I drilled into the top when my clamps weren't holding the two pieces of the seat together. I figured the opposing pocket hole screws would pull the glue up tight and it worked brilliantly - except in my panic, I drilled the pockets into the top instead of the bottom. C'est la vie.
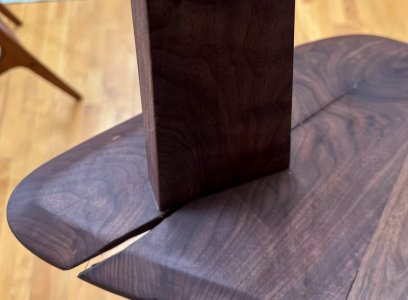
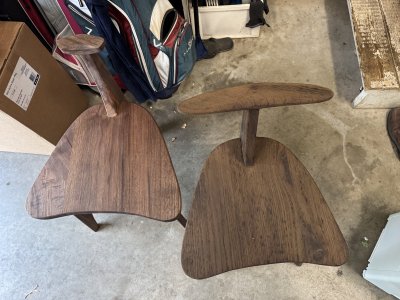
The seat and the rear leg are assembled in a kind of half-lap (I guess that's what it's called). The legs and back attach using 10mm Dominos. I'm pretty sure Nakashima Woodworkers cut integrated mortises and tenons for all these parts, but they're true Woodworkers, as opposed to me: "woodworker".
The chair was sanded from P40 to P240 using a variety of Rubin 2, Granat and Cubitron Xtract. I just finished it this morning with a coat of pure tung oil - which I'm really liking.
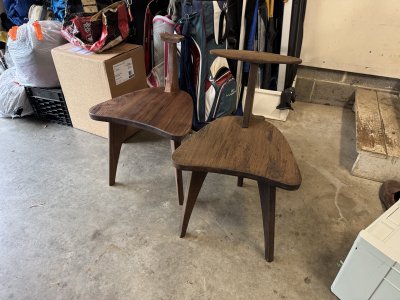
In the pic, the chair is with the cherry side table I made previously, as well as a Ficus on a white oak bonsai stand.
[attachimg=1][attachimg=2]
The chair was originally designed in 2003 for the Concordia Chamber Players. It's meant to be flat-seated and open to allow for the expressiveness of the stringed musician (like celloists). I just loved the design and wanted to mimic it.
Luckily, the website provides some basic measurements (seat height 17.5", depth 19.5", width 19.5"), so working with images from the Nakashima website, as well as The Concordia Players and American Music Furniture, and a ruler pressed to my screen, I tried to figure out the different measurements and then created templates for each of the five pieces.
Made the chair from an 8/4 walnut slab from a tree that was felled about 2 miles from my house and milled and kiln dried by my local sawyer. This was also the slab I had trouble rough cutting with the ATF 55 E.
It's not an exact replica of Mira Nakashima's chair but it's fairly close. The seat has a split that I tied using "bowties" in the shape of characters from the Filipino Baybayin script. The other two tenons are also characters from that script hiding the pocket holes that I drilled into the top when my clamps weren't holding the two pieces of the seat together. I figured the opposing pocket hole screws would pull the glue up tight and it worked brilliantly - except in my panic, I drilled the pockets into the top instead of the bottom. C'est la vie.
The seat and the rear leg are assembled in a kind of half-lap (I guess that's what it's called). The legs and back attach using 10mm Dominos. I'm pretty sure Nakashima Woodworkers cut integrated mortises and tenons for all these parts, but they're true Woodworkers, as opposed to me: "woodworker".
The chair was sanded from P40 to P240 using a variety of Rubin 2, Granat and Cubitron Xtract. I just finished it this morning with a coat of pure tung oil - which I'm really liking.
In the pic, the chair is with the cherry side table I made previously, as well as a Ficus on a white oak bonsai stand.
[attachimg=1][attachimg=2]