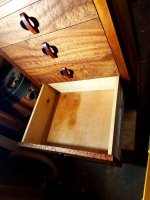
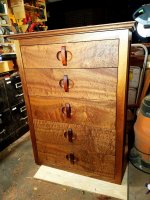
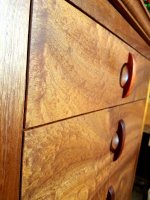
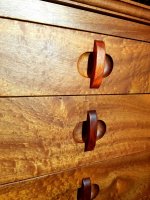
Curly Sapele Cabinet

ear3

Member
Joined
Jul 24, 2014
Messages
4,341

Attachments

  • 20171030_203232.jpg
    20171030_203232.jpg
    328.3 KB · Views: 508
  • 20171030_213513.jpg
    20171030_213513.jpg
    239.3 KB · Views: 326
  • 20171030_203642.jpg
    20171030_203642.jpg
    360 KB · Views: 300
  • 20171030_203419.jpg
    20171030_203419.jpg
    333.4 KB · Views: 259
  • 20171030_203405.jpg
    20171030_203405.jpg
    405.6 KB · Views: 304
  • 20171030_203617.jpg
    20171030_203617.jpg
    342.6 KB · Views: 216
  • 20171030_203632.jpg
    20171030_203632.jpg
    355.1 KB · Views: 288
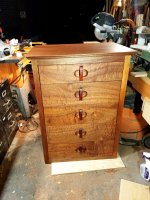
You did a good job with a very difficult wood to work with.  I’ve seen a lot of very bad sappele cabinets in my time with the grain detial totally in the mud. 

You kept your grain clean and visible.

What process did you use for the finshing?
 
Steven Owen said:
... a very difficult wood to work with.
What? Sapele, even curly, is a joy to work with. Finishes beautifully with oil.
 
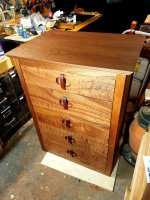
First on the handles/pulls -- I was initially just going to use some metal ones, but my eyes started to glaze over after like the 20th page of handles in the Lee Valley hardware catalog, so I just decided to make my own working off a reference image I had seen some place online.

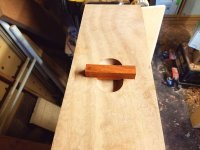
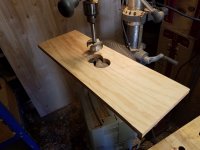
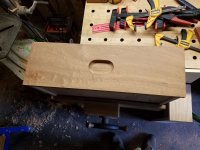
I had already built the drawers, however, so the challenge was to do all that excavation of a recess on the fully assembled drawers.  I did it in two stages.  First I built a jig to create the oval shape.  Two side by side plunges with a 2 3/4" fostner bit on the drill press:

View attachment 1

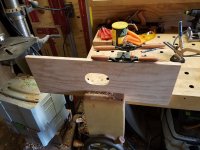
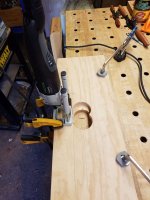
Then connected the holes using the plunge attachment on the Vecturo, followed by some final smoothing of the transition with a spokeshave:

View attachment 3

View attachment 2

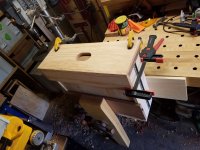
Then I attached a lip on two sides of the board, so that it would automatically align in the same place on each drawer front:

View attachment 4

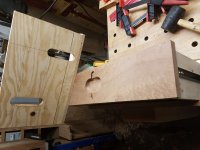
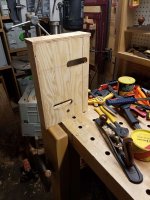
Clamped up the each drawer in my leg vise, and clamped the jig to the drawer:

View attachment 5

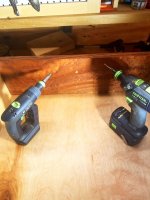
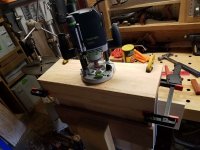
Then used the 2200 with a 1 3/8 core box bit and the 40mm copying ring to create the rounded depression:

View attachment 6

View attachment 7

The core box bit doesn't really leave a flat bottom, so I sanded it out smooth with a bowl sanding drill attachment I normally use on my lathe:

View attachment 8

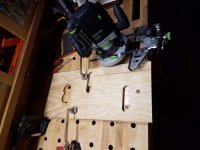
Similar principle for the vertical handle mortise.  Used a 1 3/8" straight bit to cut some slots (I had to make two because the top drawer was 6", while the rest were 8") in a board with the edge guide:

View attachment 9

Then put lips on two sides (which were later reversed when I was doing the mortise for the 6" drawer):

View attachment 10

Then swapped out for a 1" straight bit on the 2200 outfitted with a 1 3/8" copy ring, which fit snugly in the slot so there would be no movement in creating the vertical mortise:

View attachment 11

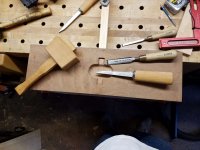
Finished up by squaring off the mortise with some chisels:

View attachment 12

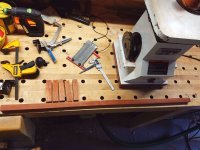
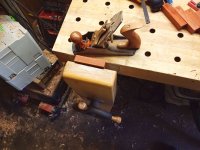
I had some scrap padauk lying around, so I cut it into 1" x 1 1/32" strips.  The extra 1/32" was so that I could get an exact fit shaving off a bit at a time with a plane:

View attachment 13

View attachment 14

View attachment 15

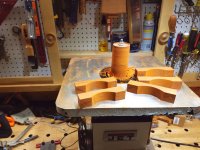
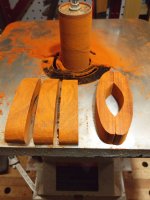
The shaping of the handles was done on the spindle sander:

View attachment 16

View attachment 17

Followed by some hand sanding to relieve the edges.

Applied the handles in the mortise with CA glue, but countersink some screws through the back for extra security:

View attachment 18
 

Attachments

  • 20171029_083310.jpg
    20171029_083310.jpg
    243.8 KB · Views: 197
  • 20171029_091845.jpg
    20171029_091845.jpg
    243.8 KB · Views: 212
  • 20171029_124827.jpg
    20171029_124827.jpg
    264.8 KB · Views: 217
  • 20171029_125034.jpg
    20171029_125034.jpg
    256.3 KB · Views: 213
  • 20171029_125548.jpg
    20171029_125548.jpg
    216.9 KB · Views: 215
  • 20171029_145403.jpg
    20171029_145403.jpg
    234.7 KB · Views: 224
  • 20171029_153654.jpg
    20171029_153654.jpg
    197.8 KB · Views: 180
  • 20171030_201105.jpg
    20171030_201105.jpg
    221 KB · Views: 225
  • 20171028_181737.jpg
    20171028_181737.jpg
    307.7 KB · Views: 222
  • 20171028_180615.jpg
    20171028_180615.jpg
    196.9 KB · Views: 218
  • 20171028_122835.jpg
    20171028_122835.jpg
    196.7 KB · Views: 231
  • 20171028_124903.jpg
    20171028_124903.jpg
    297.2 KB · Views: 235
  • 20171028_123653.jpg
    20171028_123653.jpg
    241.9 KB · Views: 254
  • 20171028_131329.jpg
    20171028_131329.jpg
    264.3 KB · Views: 247
  • 20171028_132608.jpg
    20171028_132608.jpg
    291.8 KB · Views: 231
  • 20171028_155736.jpg
    20171028_155736.jpg
    259 KB · Views: 241
  • 20171028_155059.jpg
    20171028_155059.jpg
    276.1 KB · Views: 233
  • 20171028_165943.jpg
    20171028_165943.jpg
    259.6 KB · Views: 230
Thanks.  Just two coats of Surfix.  I will probably add some wax and buff it out after the oil cures.

Steven Owen said:
You did a good job with a very difficult wood to work with.  I’ve seen a lot of very bad sappele cabinets in my time with the grain detial totally in the mud. 

You kept your grain clean and visible.

What process did you use for the finshing?
 
ear3 said:
Thanks.  Just two coats of Surfix.  I will probably add some wax and buff it out after the oil cures.
That's what I prefer on sapele if it's not for heavy use. Danish Oil or some other "oil", then Renaissance wax. Can't go wrong with that.
 
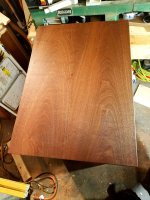
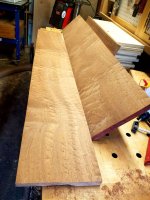
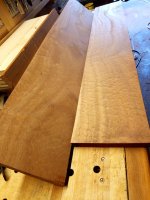
The curly sapele was actually serendipity.  I had already bought the wood for the drawer faces (just flat cut sapele), but after I built the carcasse I decdied I wanted to do just 5 drawers instead of the original planned 6.  But that meant that the 1x8 flat cut sapele I had gotten would no longer cut it.  So I went back to the lumber yard (Rosenzweig in the Bronx), and while flipping through the pile I came across this incredible 10" x 5/4 x 14 ft. long piece of curly sapele -- enough to do all 5 drawer faces:

View attachment 1

View attachment 2

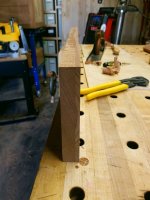
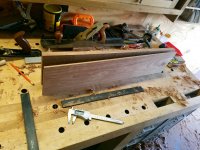
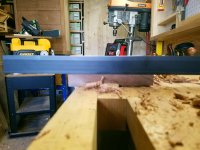
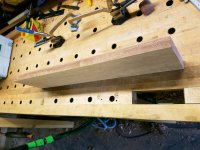
I thicknessed the board to 1" in 3 pieces.  Everything was going great until I cut the last piece to make the smaller 6" drawer.  As sometimes happens, the tension released by cutting the board caused it to twist, rather severely in fact:

View attachment 3

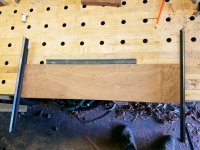
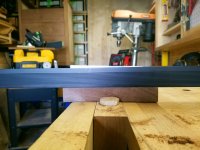
So I had to hand joint the face to bring one side back to flat:

View attachment 4

View attachment 5

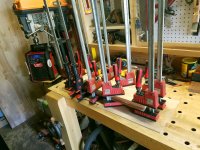
And after sending it through the thicknesser to even the other side, I ended up with a 3/4" thick board.  I briefly considered just leaving it and having the top drawer face a little thinner, but I wisely reconsidered and ended up solving the problem by simply laminating the back with a thin piece of flat cut sapele (which I had an abundance of since finding the curly wood):

View attachment 6

View attachment 7

No one is the now the wiser except me:

View attachment 8

View attachment 9
 

Attachments

  • 20171021_121136.jpg
    20171021_121136.jpg
    192.4 KB · Views: 203
  • 20171021_104153.jpg
    20171021_104153.jpg
    326.3 KB · Views: 198
  • 20171021_102406.jpg
    20171021_102406.jpg
    338.2 KB · Views: 196
  • 20171021_095944.jpg
    20171021_095944.jpg
    235.5 KB · Views: 137
  • 20171021_094555.jpg
    20171021_094555.jpg
    320.6 KB · Views: 199
  • 20171021_094543.jpg
    20171021_094543.jpg
    222.2 KB · Views: 220
  • 20171013_165226.jpg
    20171013_165226.jpg
    322 KB · Views: 149
  • 20171013_165201.jpg
    20171013_165201.jpg
    259.9 KB · Views: 234
  • 20171021_153042.jpg
    20171021_153042.jpg
    236.6 KB · Views: 214
ear3 said:
Just finished up a sapele cabinet I've been working on for the last few weeks (handles are Padauk):
...
Gonna post some build pics in a separate post.

Awesome - great use of a beautiful piece of wood.  Nice work on handles - both design and implementation.
 
ear3 said:
...
No one is the now the wiser except me:
...

A statement that may have been true when you previewed it, but then you clicked "Post" and now we all know.  For my part, I'm not telling anyone :).
 
Pretty stuff Edward...both your work and the wood. I’m a big fan of birds eye maple 🍁 but this sapele thing is something I may need to try.  [thumbs up]
 
Nice job Edward. I like the choice of wood and your pulls.
Very nice.
No toe kick or feet/ stand?
Rick
 
Thanks!  Yeah, technically it's not finished, as I still have to add the feet.  I haven't decided on style yet, though, as I need to deliver it to where it's going (the client in this case being my mother) and get a sense of how it looks in the environment and then make a determination on that basis.  Right now I'm leaning towards just chucking up some blocks on the lathe and turning some low, round, unobtrusive risers

RJNeal said:
Nice job Edward. I like the choice of wood and your pulls.
Very nice.
No toe kick or feet/ stand?
Rick
 
Edward, THANK YOU!!!  This is the type of contribution this board has been in dire need of!  Very informative, very educational, very beautiful.  Reminds me of pasts posts from the likes of erock, halfinchshy, and other of the old timers.

Thanks,

Don
 
Back
Top