ear3
Member
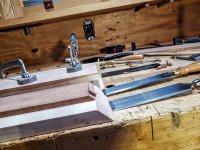
[attachimg=1]
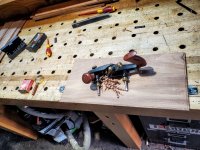
Last year I stumbled across a bonkers piece of curly ribbon-striped sapele at Rosenzweig lumber in the Bronx. They had just brought in a fresh pile of sapele to load onto the racks, and I saw this one was sitting on the top as they unstrapped the boards, so I swiped it immediately before anyone else could, and tucked it away in my lumber loft for a TBD build down the road.
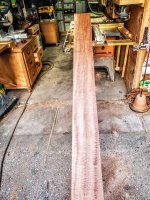
[attachimg=2]
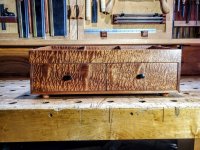
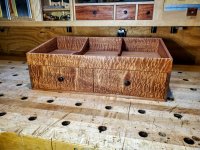
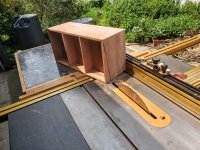
It was just a single 9ft x 8.5" board, and whatever I used it for would have to be a smaller project, so I decided last week to dedicate it to a small case and drawers I had been requested to build to fit on someone's bathroom cabinet.
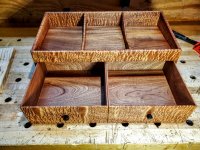
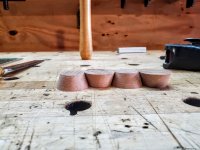
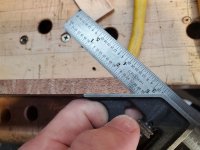
The design is just a simple mitre box construction on both the 20x10x8 casing (with 3/8" thick stock) and the twin drawers, which are only 3/16 thick, a thinness that allows them to slide in and out much more easily in the absence of drawer guides. The only trickiness was the front rail, which, because I wanted to have it mitred to the sides, had to be done by hand with a paring chisel to produce the stopped mitre.
[attachimg=3]
[attachimg=4]
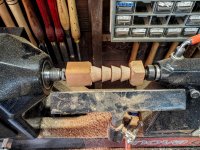
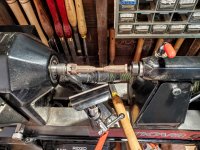
[attachimg=5]
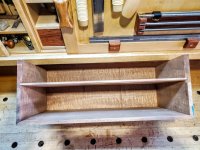
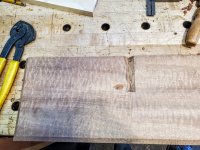
The captured panel (as well as the bottom of the casing and the drawer parts other than the front) were done with regular flat cut sapele, since I only had the one curly board to work with. One of the things that's nice about sapele is that it tends to remain straight even after planing it thin, unlike say maple or cherry, which will sometimes cup even if you start out having jointed the board. I'm not sure if that's about the wood itself, or maybe since it's imported it tends to have seasoned longer and so stabilized in terms of its moisture content.
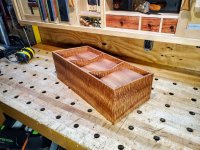
I planed down the captured panel to around 5/16, then gave it a small rabbet to fit into the 1/4 dado I applied to the casing on the router table
[attachimg=6]
[attachimg=7]
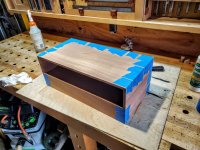
Also added a groove on the front and back of the casing with a dado stack for the dividers, then glued it up, only needing blue tape to secure the joints, which is one of the virtues of doing thin mitre box construction
[attachimg=11]
[attachimg=12]
[attachimg=13]
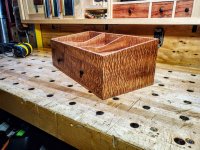
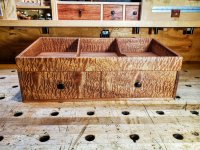
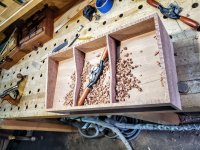
Added in the dividers, then cut the entire casing with table saw at 8 degrees to produce the angle, finishing up by hand in the center.
[attachimg=8]
[attachimg=9]
Used a spokeshave to curve the dividers in place. It was a spontaneous decision, and I'm still not totally sold on that particular design element, though it does add a bit more functionality -- since it is destined for a bathroom, there will be lots of smaller items stored on top, and so a little easier access to them if the storage area gets crowded.
[attachimg=10]
Next post, finishing it all off.
Last year I stumbled across a bonkers piece of curly ribbon-striped sapele at Rosenzweig lumber in the Bronx. They had just brought in a fresh pile of sapele to load onto the racks, and I saw this one was sitting on the top as they unstrapped the boards, so I swiped it immediately before anyone else could, and tucked it away in my lumber loft for a TBD build down the road.
[attachimg=2]
It was just a single 9ft x 8.5" board, and whatever I used it for would have to be a smaller project, so I decided last week to dedicate it to a small case and drawers I had been requested to build to fit on someone's bathroom cabinet.
The design is just a simple mitre box construction on both the 20x10x8 casing (with 3/8" thick stock) and the twin drawers, which are only 3/16 thick, a thinness that allows them to slide in and out much more easily in the absence of drawer guides. The only trickiness was the front rail, which, because I wanted to have it mitred to the sides, had to be done by hand with a paring chisel to produce the stopped mitre.
[attachimg=3]
[attachimg=4]
[attachimg=5]
The captured panel (as well as the bottom of the casing and the drawer parts other than the front) were done with regular flat cut sapele, since I only had the one curly board to work with. One of the things that's nice about sapele is that it tends to remain straight even after planing it thin, unlike say maple or cherry, which will sometimes cup even if you start out having jointed the board. I'm not sure if that's about the wood itself, or maybe since it's imported it tends to have seasoned longer and so stabilized in terms of its moisture content.
I planed down the captured panel to around 5/16, then gave it a small rabbet to fit into the 1/4 dado I applied to the casing on the router table
[attachimg=6]
[attachimg=7]
Also added a groove on the front and back of the casing with a dado stack for the dividers, then glued it up, only needing blue tape to secure the joints, which is one of the virtues of doing thin mitre box construction
[attachimg=11]
[attachimg=12]
[attachimg=13]
Added in the dividers, then cut the entire casing with table saw at 8 degrees to produce the angle, finishing up by hand in the center.
[attachimg=8]
[attachimg=9]
Used a spokeshave to curve the dividers in place. It was a spontaneous decision, and I'm still not totally sold on that particular design element, though it does add a bit more functionality -- since it is destined for a bathroom, there will be lots of smaller items stored on top, and so a little easier access to them if the storage area gets crowded.
[attachimg=10]
Next post, finishing it all off.
Attachments
-
 20230609_200901.jpg517.1 KB · Views: 371
 -
 20230606_130203.jpg467.7 KB · Views: 330
 -
 20230606_123959.jpg462.3 KB · Views: 333
 -
 20230606_120518.jpg441.1 KB · Views: 332
 -
 20230608_140349.jpg483.2 KB · Views: 315
 -
 20230608_121140.jpg450.4 KB · Views: 320
 -
 20230608_120903.jpg511.8 KB · Views: 331
 -
 20230605_163104.jpg428.9 KB · Views: 327
 -
 20230605_190743.jpg494.1 KB · Views: 331
 -
 20230605_153631.jpg333.3 KB · Views: 330
 -
 20230605_134036.jpg502.8 KB · Views: 336
 -
 20230605_125228.jpg438.7 KB · Views: 358
 -
 20230601_195319.jpg546.1 KB · Views: 357