Some progress after a couple delays and deferments.
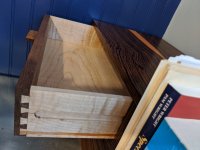
I put the drawers together this past week - even though everything had been milled weeks ago, I was putting off cutting the dovetails as it has been a couple years since I did any and three drawers was kind of a big jump back in. Fortunately, I've been making a lot of picture frames the past few months, cutting the miters by hand, so I have not been completely out of practice with a handsaw.
Prior to cutting them, I made a small dovetailed box out of some walnut that used to be my coat rack. This helped me get back in the groove a little more. Fortunately, when I learned to cut dovetails, my instructor had us do a project where one of the last steps was learning to repair mistakes and how to hide gaps or other blemishes. So, I've got some useful experience to rely on for the most important part [big grin] I used old brown glue for the glueup as well as prefinished the interior of the drawers, so cleanup would be easy where needed. Unfortunately OBG has a long time to set, so I waited around and worked on another picture frame while this was setting.
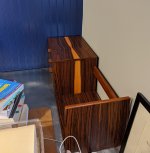
View attachment 1
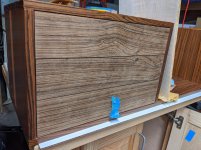
I inlaid a strip of Spanish Cedar on the outside of the drawers and I
swear it was completely intentional and in no way related to any errors along the way. :-X I love the smell and color of Spanish Cedar, but it is the most fragile wood to work with - it seems to shear voluntarily at times.
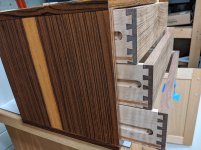
They turned out okay - mostly small problems and only a couple where the baseline got a little crushed. Fortunately, I saved my dust from sawing and all the splinters and bits from paring/chiseling the pins, so there's something to fill the gaps with. While it's very satisfying to put a dovetail together with just light taps from a small hammer, I'm very very slow at it. Particularly the chiseling out part. I did a couple new things on this project that I had not tried before and one was to make the back of the drawer about 1/16 narrower than the front. The other thing I did was let the drawer set up in the box rather than in clamps. In theory, this should help compensate for any quirkiness with the box. I don't know if it made much difference, but it was also the first time I didn't leave something clamped while it set up.
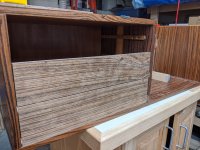
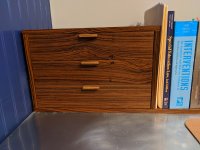
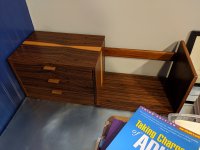
Tonight I spent a couple hours fine tuning the drawer faces to get the reveals as dialed in as I could. For the most part, this was a process of taking 3 or 4 swipes, testing, retesting, identifying what was going on, and then repeating for a while until I could slide my spacer (a dime) between the components without it moving anything and also without too much space around it. Because the drawers are side-hung, there is a little vertical play, so I had to be sure that the dime wasn't slipping between and lifting the element above it.
View attachment 2
I got pretty close, although I'm probably off by a couple thou here and there. I'll take it. Interestingly, I think the bottom drawer half-pin on the bottom might have gotten pushed down slightly by the tail - the reveal between the floor and drawer face was a little off. Or maybe I just made a layout error. In either case, a couple partial hits from the plane took care of it.
View attachment 3
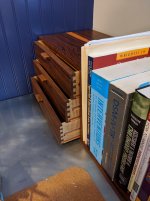
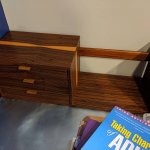
One thing I'm going to need to revisit are the wooden runners that the drawers slide on - I didn't account for my reveals when I decided how thick to mill them, so there is more play side to side than I'm happy with right now. I don't want to remake them, so I may try shimming them with some veneer to tighten things up
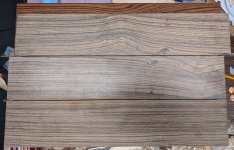
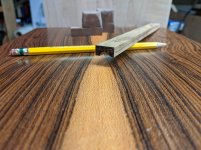
Lastly, I had started to work on the pulls for the drawers this week. My initial efforts were carved/shaped in walnut, and my thinking was to install w/ a wedged tenon. However, upon review with my girlfriend, these don't fit the rest of the piece : the piece is very rectilinear and the drawers repeat this motif. So I tried something different this afternoon and used a dovetail bit and a core box bit to make a more rectangular shaped pull. I ran the bits on the table while the board was wide enough to keep safe, and then ripped off the shaped part on the bandsaw. After some cleanup, this is what I have:
View attachment 4
This is the same species as the rest of the box. It's striking how much darker the veneer is compared to the solid piece. Maybe it's a product of oxidation?
The plan is to cut this down to 2.5-3" long pieces and attach them to the drawer faces. I'm still thinking through what I will do to attach them. On one hand, I could probably get away with just gluing them to the drawer face - it's a long grain to long grain joint and there's no finish on either part yet. However, that could be tricky to align precisely. I could also route a small groove in the back of the pull (1/8 x 3/32) and in the drawer face, putting a spline between them. This would have the benefit of positively registering the parts, but would certainly require some jigs I don't have right now and will introduce another delay.