Dewalt 735 with Shelix head

blues

Member
Joined
Jun 8, 2015
Messages
196
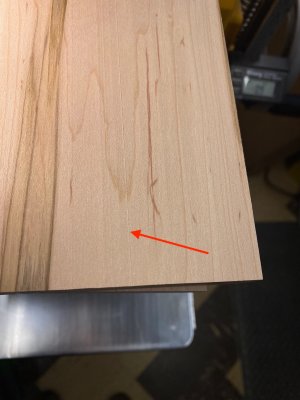
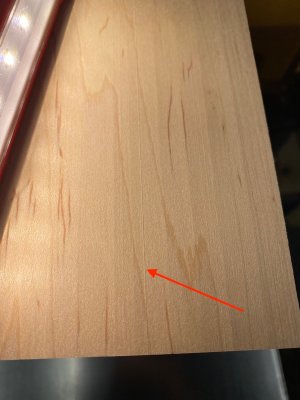
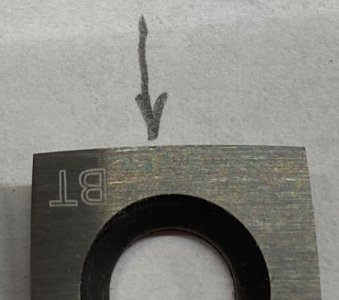
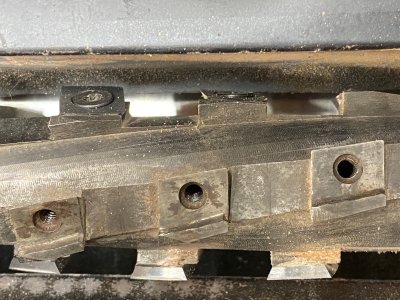
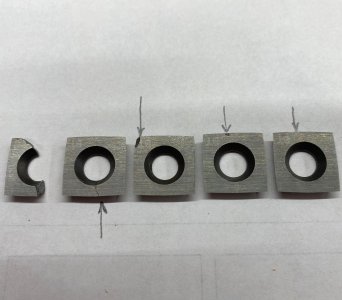
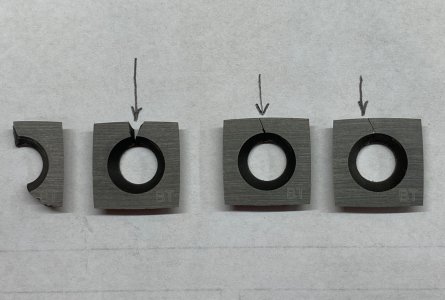
I upgraded my cutter head. Replaced it with the original size head so I had to take off all the cutters and put them back after installing the head. And in doing so, I took care to not have any dirt or debris and ensured these cutters were all correctly oriented and all screws were installed with the same amount of torque.

I seem to be getting the ridges and the quality is far from being acceptable. Any pointers / tips as to what i may be doing wrong? And is there a way to quickly and easily zero in on the problem?

Thank you.
 
I also installed the original size Shelix in my 735. This is what the wood surface typically looks like, a series of very uniform & shallow "waves" across the entire surface. The depth of the scallops is about .001" but they sand out very quickly using an ETS EC sander with 150 grit.

Where the Shelix really shines though is on figured wood, specifically birds-eye maple.
 

Attachments

  • 5101_s.jpg
    5101_s.jpg
    665 KB · Views: 29
  • 5102_s.JPG
    5102_s.JPG
    452.1 KB · Views: 17
  • 5103_s.JPG
    5103_s.JPG
    452.5 KB · Views: 24
Thank you @Cheese. I could be wrong, but in your case where you have "waves" if it is transverse across the board, the bearings could be suspect. And if the regularity with which they occur is measured it may correspond with the diameter of the bearing - may be.

In my case the ridges are longitudinal. Clearly pointing to some cutters that are proud. Ex: If I paste a sheet of paper on a board and run it through where the cutters just kisses the board, when it comes through it would be in longitudinal strips.

I'm going to completly remove all cutters and refit them all in the hope I fix the issue. But if these ridges moves to a different location after i do it, ... I am going to feel challenged. Will share an update as i make progress.
 
Many years ago I did this replacement and never got rid of all the ridges but like @Cheese said they sand out easily. "Stumpy Nubs" has a video on YT that gives some good tips on replacing the cutters if you search for "shelix dw735 leaving lines".

Good Luck!

(FYI - not too long after setting up my 735 I ended up buying a 15" floor standing planer since we decided to remodel our kitchen. I was surprised how many more door panels would fit with the 15" capacity. I found the floor standing didn't take up more floor space, is much quieter, and has no snipe (unless I mess up). Strange it has a spiral head and I don't even think about the small ridges I get.)
hehe - i did the EXACT same thing

I put the Shelix head in my 735 - used it once and a 15" 3hp planer fell in my lap and I haven't looked back
 
Thank you @Cheese. I could be wrong, but in your case where you have "waves" if it is transverse across the board, the bearings could be suspect. And if the regularity with which they occur is measured it may correspond with the diameter of the bearing - may be.

In my case the ridges are longitudinal. Clearly pointing to some cutters that are proud. Ex: If I paste a sheet of paper on a board and run it through where the cutters just kisses the board, when it comes through it would be in longitudinal strips.

I'm going to completly remove all cutters and refit them all in the hope I fix the issue. But if these ridges moves to a different location after i do it, ... I am going to feel challenged. Will share an update as i make progress.
I'm going to reply to your message with 2 separate posts so I can keep each reply married to the correct photos. :)

I also had longitudinal ridges from time to time and it was caused by this small, almost imperceptible chip in the carbide insert. Just a heads-up...you have to look at the individual inserts very closely.
 

Attachments

  • 9361.JPG
    9361.JPG
    869.8 KB · Views: 17
  • 9362.JPG
    9362.JPG
    818.4 KB · Views: 23
  • 9363 culprit.jpg
    9363 culprit.jpg
    352.6 KB · Views: 25
There was also a time when I was getting a lot of cracked/chipped inserts because when I reinstalled the inserts after installing the new cutter head, unknown to me, there were very small pieces of ??? under some of the inserts. Everything was torqued to the proper value of 40 in/lbs.
 

Attachments

  • 9337.jpg
    9337.jpg
    674.3 KB · Views: 24
  • 9331.jpg
    9331.jpg
    450.7 KB · Views: 20
  • 9336.jpg
    9336.jpg
    480.8 KB · Views: 21
I'm going to reply to your message with 2 separate posts so I can keep each reply married to the correct photos. :)

I also had longitudinal ridges from time to time and it was caused by this small, almost imperceptible chip in the carbide insert. Just a heads-up...you have to look at the individual inserts very closely.
Oh wow! Thanks cheese. Looking at the 9363 picture I could not believe that small chip would leave a ridge. I sure will have to inspect all cutters closely.
 
There was also a time when I was getting a lot of cracked/chipped inserts because when I reinstalled the inserts after installing the new cutter head, unknown to me, there were very small pieces of ??? under some of the inserts. Everything was torqued to the proper value of 40 in/lbs.
Got it. Everything single cutter will be removed and inspected. Geez! Did not realize it would mean so much work! Guess it would be worth it once everything is fixed right. Will report back.
 
Many years ago I did this replacement and never got rid of all the ridges but like @Cheese said they sand out easily. "Stumpy Nubs" has a video on YT that gives some good tips on replacing the cutters if you search for "shelix dw735 leaving lines".

Good Luck!

(FYI - not too long after setting up my 735 I ended up buying a 15" floor standing planer since we decided to remodel our kitchen. I was surprised how many more door panels would fit with the 15" capacity. I found the floor standing didn't take up more floor space, is much quieter, and has no snipe (unless I mess up). Strange it has a spiral head and I don't even think about the small ridges I get.)
Thanks Mike. Will look at the YT from Stumpy Nubs.
 
I put the smaller diameter Shelix on my 735 ten years ago and have had very good results with it. As noted above when you rotate or change inserts it is very important to get the mounting surface on the head and underside of the insert clean and free of contaminants. When you install an insert be sure to follow the instructions for positioning it before tightening the screw to allow the insert to properly center and align as it is torqued. If it's all done carefully you should end up with a very subtle wavy finish that is a few thousanths of an inch (less than 0.1mm) that will sand out quickly and easily. I have a digital readout on my planer, and I make a practice of taking a final pass of 0.005" (~0.1mm) as I approach the final dimension.
 
Back
Top