Neal W
Member
- Joined
- Jan 6, 2015
- Messages
- 128
For most people when they build things, the pieces need to be square and consistently sized. This has always been one of my biggest challenges in woodworking prior to investing in the Festool System. How do I cut a piece of 4x8 plywood into equally sized, very square pieces to make these things?
The first thing was a track saw. It allowed me to cut long straight lines. Free handing a circular saw was not a good option for me. I could practice all day long and could not stay on that line.
The second thing was a 1281 square and then the 26" woodworkers square from woodpeckers. This allowed me to line up the tracks for that perfectly square cut. Eventually I also purchased the 18" precision square from woodpeckers.
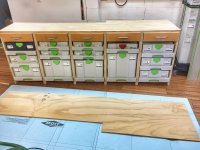
Then it was the need to have a perforated top for the smaller, repeatable cuts, and other functions. So I made one. Like you said, your holes are only square if you do the work on the front side and have square and parallel sides to work from. And the factory edge may or may not be (and it always ugly and rough). I made mine with the LR-32. Bought it used. I've also used it for other things and will use it for more in the coming years.
But I still wanted an easier way to make those long square cuts, so I bought the GRS-16 from TSO products. You want to talk about money well spent. Always square and makes it easier to use. If I had to choose between my Woodpecker's squares and the GRS for rail setup, I'll take the GRS-16.
I will pick up my MFT table next Monday. Again, accurate repeat-ability are important for many projects, and I'm hoping the MFT with it's bells and whistles will further improve my ability to achieve those results over and above my homemade top and table.
If I knew then what i know now, this is what I would purchase (if available).
TS-55 with the holey rail.
GRS-16 from TSO products.
EITHER the 26" (or metric equivalent) woodpecker's square or the 18" Woodpecker's precision triangle, both are one time tools though. AT that point TSO's triangle starts to look appealing because you can get it more easily. At worst the Woodpecker 1281 square. I don't think I would buy both the Woodpecker's OTT's.
LR-32 system, which is great for making tops, AND shelf pin holes too.
Festool OF1400 router (to use with the LR-32 of course and other things).
This gives me a great foundation to make square, straight, and repeatable cuts, so when I put a box together it looks like a box and not a wonky parallelogram.
The first thing was a track saw. It allowed me to cut long straight lines. Free handing a circular saw was not a good option for me. I could practice all day long and could not stay on that line.
The second thing was a 1281 square and then the 26" woodworkers square from woodpeckers. This allowed me to line up the tracks for that perfectly square cut. Eventually I also purchased the 18" precision square from woodpeckers.
Then it was the need to have a perforated top for the smaller, repeatable cuts, and other functions. So I made one. Like you said, your holes are only square if you do the work on the front side and have square and parallel sides to work from. And the factory edge may or may not be (and it always ugly and rough). I made mine with the LR-32. Bought it used. I've also used it for other things and will use it for more in the coming years.
But I still wanted an easier way to make those long square cuts, so I bought the GRS-16 from TSO products. You want to talk about money well spent. Always square and makes it easier to use. If I had to choose between my Woodpecker's squares and the GRS for rail setup, I'll take the GRS-16.
I will pick up my MFT table next Monday. Again, accurate repeat-ability are important for many projects, and I'm hoping the MFT with it's bells and whistles will further improve my ability to achieve those results over and above my homemade top and table.
If I knew then what i know now, this is what I would purchase (if available).
TS-55 with the holey rail.
GRS-16 from TSO products.
EITHER the 26" (or metric equivalent) woodpecker's square or the 18" Woodpecker's precision triangle, both are one time tools though. AT that point TSO's triangle starts to look appealing because you can get it more easily. At worst the Woodpecker 1281 square. I don't think I would buy both the Woodpecker's OTT's.
LR-32 system, which is great for making tops, AND shelf pin holes too.
Festool OF1400 router (to use with the LR-32 of course and other things).
This gives me a great foundation to make square, straight, and repeatable cuts, so when I put a box together it looks like a box and not a wonky parallelogram.