Domino edge dogs alignment issue

texpilot

Member
Joined
Feb 22, 2017
Messages
10
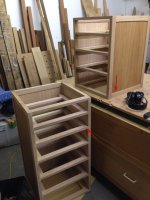
I have an issue with my Domino DF500 edge dog alignment. At first I thought it was my technique/inexperience but now I'm pretty sure it is my Domino. It's a new model, purchased Dec 2016.

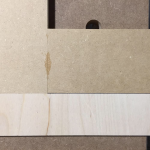
The issue is my joints are coming out with a proud edge for the edge that was aligned with the right edge dog. Consistently.

So I re-read the Manual and came across the section "Calibrating the Locating Pins or Edge Stop Dogs" and I was hopeful this would solve my problem. So I replaced my original right edge dog with the .006" smaller one, and it made the proud edge larger.

Okay, I read the manual wrong, so I re-installed the original right edge dog and then installed the .006" smaller left edge dog and made another joint: now the edge made with the LEFT edge dog is the proud one. Same amount of proudness as how the right edge dog edge was before swapping.

Any ideas how I can get these joint edges perfectly flush? Thanks in advance folks.
 
Had a similar problem and after replacing the stop it was still slightly out. Grabbed a file and fine adjusted the stop and now they are both perfect. Of course this will only work if your stop is too thick.
 
If the amount of mismatch is in the 0.006 inch area then you have nothing to worry about....

The Domino joint does have a small degree of wiggle room and certainly far more than 0.006 inch. When I am assembling rails and stiles I bring everything together with clamps and then loosen off the clamps to adjust any joints which are not completely flush. In order to make this adjustment I use a block of wood and a mallet used against the inner edge of a rail to move it out to be flush with the end of the stile. If the rail is proud of the stile then a clamp can be used to produce the flush edge.

I am in the process of making some cabinets and in the picture below I have put a couple of arrows to show the direction of the adjustments routinely applied during assembly. I can easily adjust any domino joint by 0.5 mm across the width of the domino.

[attachimg=1]

Peter
 

Attachments

  • Domino Adjust.jpg
    Domino Adjust.jpg
    582.6 KB · Views: 1,459
Bohdan said:
Had a similar problem and after replacing the stop it was still slightly out. Grabbed a file and fine adjusted the stop and now they are both perfect. Of course this will only work if your stop is too thick.

Thanks Bodhan, I had considered that might be my only option if the Festool-supplied smaller stop dog didn't do the trick. I was most worried I'd adjust the wrong one though (which I did initially when swapping out the dog!).

Now that I know which one to adjust, I just might try this, thanks.
 
Peter Parfitt said:
If the amount of mismatch is in the 0.006 inch area then you have nothing to worry about....

The Domino joint does have a small degree of wiggle room and certainly far more than 0.006 inch. When I am assembling rails and stiles I bring everything together with clamps and then loosen off the clamps to adjust any joints which are not completely flush. In order to make this adjustment I use a block of wood and a mallet used against the inner edge of a rail to move it out to be flush with the end of the stile. If the rail is proud of the stile then a clamp can be used to produce the flush edge.

I am in the process of making some cabinets and in the picture below I have put a couple of arrows to show the direction of the adjustments routinely applied during assembly. I can easily adjust any domino joint by 0.5 mm across the width of the domino.

Peter

Thanks Peter. I quoted the manual on the .006" figure, I don't have any feeler gauges to measure the actual joint proudness offset myself. The bottom line is the joint is not flush, you can easily feel the proudness, and if applying edge banding the such a joint the resulting seam is just not acceptable.

Great point about "adjusting" the joint with a bit of positive persuasion (a.k.a. Force). I must admit I haven't tried that, and will do so on my next set of joints this weekend.
 
It would be helpful to know just how far the joint is mismatched. Something like .006" off, as Peter says, is slightly less than 1/128". I don't know about you, but I don't believe I can work to that tolerance anyway. And, since wood moves more than that with changes in humidity, I don't think it matters. However, if the misalignment is much greater than that, like 1/16" to be extreme, then I'd send the Domino in to Festool service. The Domino is a very precise and accurate tool. I have never had to adjust anything on mine, much less file something to make it "accurate". Unlike others, I would never recommend filing a part on the Domino to make it more accurate or get it back to alignment. Let Festool fix it if there is a problem. That's what the warranty is for. (I assume it is more than 30 days old or I would say just return it for a new one.)
 
grbmds said:
It would be helpful to know just how far the joint is mismatched. Something like .006" off, as Peter says, is slightly less than 1/128". I don't know about you, but I don't believe I can work to that tolerance anyway. And, since wood moves more than that with changes in humidity, I don't think it matters. However, if the misalignment is much greater than that, like 1/16" to be extreme, then I'd send the Domino in to Festool service. The Domino is a very precise and accurate tool. I have never had to adjust anything on mine, much less file something to make it "accurate". Unlike others, I would never recommend filing a part on the Domino to make it more accurate or get it back to alignment. Let Festool fix it if there is a problem. That's what the warranty is for. (I assume it is more than 30 days old or I would say just return it for a new one.)

I believe the gap is about 1/32". This project is a home theater renovation, with quite a bit of MDF in use (will be painted), thus wood movement is not going to be a factor.

The image below is a good example that shows how bad the gap would affect say a credenza carcass that would have a flush face frame attached. Quite a gap to fill.  (This is looking at the backside of a column frame, thus the unaddressed glue squeeze-out)

I got my Domino last Christmas, so it's definitely out of the return period. I guess what I'm looking for more than anything would to understand whether Festool could do anything about it, as once I send it in I'll be without it for a while I presume.

[attachimg=1]
 

Attachments

  • IMG_0392.PNG
    IMG_0392.PNG
    1.1 MB · Views: 1,137
texpilot said:
grbmds said:
It would be helpful to know just how far the joint is mismatched. Something like .006" off, as Peter says, is slightly less than 1/128". I don't know about you, but I don't believe I can work to that tolerance anyway. And, since wood moves more than that with changes in humidity, I don't think it matters. However, if the misalignment is much greater than that, like 1/16" to be extreme, then I'd send the Domino in to Festool service. The Domino is a very precise and accurate tool. I have never had to adjust anything on mine, much less file something to make it "accurate". Unlike others, I would never recommend filing a part on the Domino to make it more accurate or get it back to alignment. Let Festool fix it if there is a problem. That's what the warranty is for. (I assume it is more than 30 days old or I would say just return it for a new one.)

I believe the gap is about 1/32". This project is a home theater renovation, with quite a bit of MDF in use (will be painted), thus wood movement is not going to be a factor.

The image below is a good example that shows how bad the gap would affect say a credenza carcass that would have a flush face frame attached. Quite a gap to fill.  (This is looking at the backside of a column frame, thus the unaddressed glue squeeze-out)

I got my Domino last Christmas, so it's definitely out of the return period. I guess what I'm looking for more than anything would to understand whether Festool could do anything about it, as once I send it in I'll be without it for a while I presume.

[attachimg=1]

I mostly just mark the location of for the Dominos on the appropriate face and line the cursor up with the lines. That has always been accurate enough unless the Domino moves during cutting. Have you tried this? I still would send it back to Festool before I'd start filing on a tool that costs as much as the Domino does. I know people have complained about service recently, but I still have a lot of faith in them. They have always given me good information. It's worth a try anyway. That's what the warranty is for.
 
texpilot said:
I believe the gap is about 1/32". This project is a home theater renovation, with quite a bit of MDF in use (will be painted), thus wood movement is not going to be a factor.

The image below is a good example that shows how bad the gap would affect say a credenza carcass that would have a flush face frame attached. Quite a gap to fill.  (This is looking at the backside of a column frame, thus the unaddressed glue squeeze-out)

I got my Domino last Christmas, so it's definitely out of the return period. I guess what I'm looking for more than anything would to understand whether Festool could do anything about it, as once I send it in I'll be without it for a while I presume.

This gap is not the end of the world and certainly something that can be easily sorted out at the time of glue-up.

Let me explain about the "adjustment" of Domino joints a little more. When you put a domino into a slot at the time of gluing you cannot guarantee that it goes in perfectly straight, particularly in a material like MDF. That indicates that there is wiggle room for dominos otherwise they would only go in dead straight every time.

Knowing that there is a possibility of an adjustment the woodworker should check for flush joints during glue assembly and make any minor adjustments as I have indicated in my previous post. I have just had a quick look at some recent videos and cannot find any clips of me doing this type of adjustment and so I will include it in my next Workshop Notes video.

Now, given that [member=64201]texpilot[/member] has completed the gluing I would suggest a very simple trim operation to correct the defects. This could be done by planing or using a tracksaw.

Peter
 
I have now found a clip which shows the technique which I have tried to describe in earlier posts. I have uploaded it to YouTube as an unlisted video:


Peter
 
Thanks for the demo video Peter, I understood what you meant from your first post describing adjusting the joint.

I don't know how I missed your tag line in your wig though, I've watched many of your very helpful videos in the past. I didn't know you were THAT guy!

I'll try the "joint wiggle room adjustment hammer trick" this weekend on fresh joints and see if that does the trick. I never thought of doing that because the whole reason I bought the Domino was to achieve "perfectly flush joints, every time" (quoting one of many Festool demo videos) using the edge dogs for fast, error free cuts. My hope was that Festool could deliver on that promise!

When I have a lull in my project I'll call Festool Support to ask them if my expectations are overly high and, if not, I'll send it in for service.
 
Where the Domino joint should always be flush is across the face sides as there is no wiggle room and the machine is perfectly designed to guarantee flush alignment. If anyone is getting a face side mismatch then the first thing to look at is technique (assuming the setting have not been changed from one Domino cut to the other).

There can sometimes be a technique error across the joints where the "wiggle room" demo above saves the day. If the Domino machine is not held perfectly still it can wander slightly in one direction. When that slight wander happens on the other side of the joint it is making matters worse. So, it is always worth looking at one's own technique just in case. I use the Domino a huge amount yet I still, now and again, make a mistake by allowing the machine to move a small fraction during the cutting of the joint. These errors have always been corrected using the technique shown in the short video clip above.

Peter
 
Peter Parfitt said:
There can sometimes be a technique error across the joints where the "wiggle room" demo above saves the day. If the Domino machine is not held perfectly still it can wander slightly in one direction. When that slight wander happens on the other side of the joint it is making matters worse. So, it is always worth looking at one's own technique just in case. I use the Domino a huge amount yet I still, now and again, make a mistake by allowing the machine to move a small fraction during the cutting of the joint. These errors have always been corrected using the technique shown in the short video clip above.
Errors like that should show up when dry-fitting (using sanded down or microwaved dominos for easier insertion/removal) and can, in case the error is so big that clamping dosn't help anymore, be corrected by cutting one of the mortices in question again (possibly at a wider setting, if needed) - just keep in mind to always plunge-cut with the Domino, no sliding/sideward-pushing it like one would approach the job when working with a router or a handhelp powerdrill.
 
Bohdan said:
Had a similar problem and after replacing the stop it was still slightly out. Grabbed a file and fine adjusted the stop and now they are both perfect. Of course this will only work if your stop is too thick.

This is exactly what I would do.

At the end of the day you should be able to plunge for perfect joins and not have to go to extra effort in hammering them flush.

I'm fortunate to have the original pins that are a breeze to adjust, and it's got me beat why festool changed over to the awful paddles.
 
I am not sure if this will help the discussion but I have made a video that explains the "wiggle room" adjustment capability of the domino. It is not aimed at seasoned professionals but those people who might be new to the Domino.

Here is the link:


Peter
 
Peter Parfitt said:
I am not sure if this will help the discussion but I have made a video that explains the "wiggle room" adjustment capability of the domino. It is not aimed at seasoned professionals but those people who might be new to the Domino.

Thanks Peter, very good tips to be found throughout that video! You have a lot of great information and experience to share and it is greatly appreciated.

I want to finally report back on my latest results with my Domino after you shared your alignment technique. First, I swapped my left dog with the thinner one provided with my Domino and made some new test cuts using some larger stock scraps to minimize the chance of drift (due to user error) while making the mortises.

The first test cuts in 1/2" mdf with 4mm Dominos went very well. I thought "Problem solved, the smaller edge dog was the solution and my last test must have been a technique error." But with the next test, the edges were not flush. With the faces against my bench I tried to see if I could push on the pieces to ease them alignment, but they wouldn't budge.

But even with the faces still flat on the bench, all it took was the tiniest of taps with a long flat piece of scrap wood and violá! Perfectly flush!

Based on that success I resumed work on my home theater columns and out of the next 16 joints I did with the Domino in 1/2" MDF, only 3 needed an alignment whack. I believe paying extra attention with my technique certainly helped, but also that the smaller dog was definitely needed as well in my Domino's case.

I (always) dry-fit first, and during glue up I was careful to ensure proper alignment before clamping. I think maybe I had to do a tap on 2 joints out of 16 during glue up. Now that I'm aware of what to look out for and how to address it if it occurs, I doubt I'll have further issues.

So Peter, thank you for all the help and for your many helpful videos!
 
That is great feedback [member=64201]texpilot[/member] - many thanks.

I am glad that your work is now progressing as it should.

Cheers.

Peter
 
Back
Top