Thebesciak
Member
- Joined
- Oct 27, 2014
- Messages
- 85
Hi,
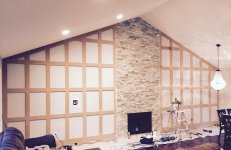
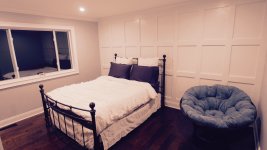
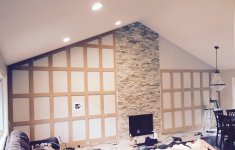
I just wanted to share my recent over the weekend project :
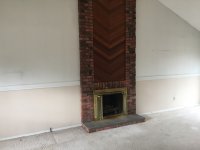
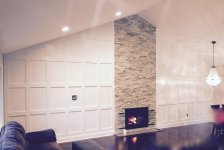
How I turned
this
[attachimg=1]
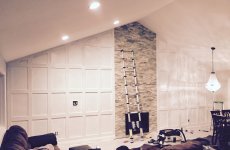
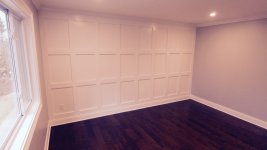
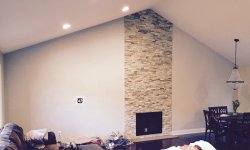
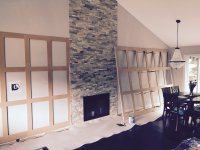
into that:
[attachimg=2]
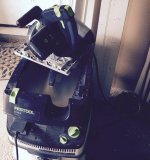
Tools and materials:
- 3x 0.75 MDF 4x8 boards,
- Gorilla original glue, -1
- Water,
- caulk, primer, gloss paint,
- 6x40 Dominos - a lot of these,
- TS 55 with CT26,
- Domino 500, DTS 400, and RO 150, 80-120 grit sand paper,
- Dewalt 12" miter - very... very dusty saw - not recommended for cutting MDF,
- messy garage")
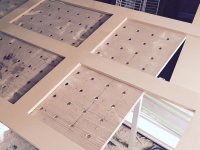
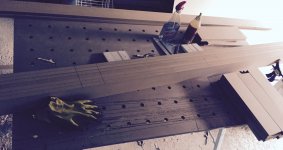
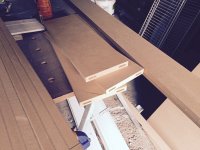
Project started with breaking the MDF sheets into 4" and 5.5" strips..
5.5" is was going to the bottom (1.5" as a little nailer for the base molding)
[attachimg=3]
[attachimg=4]
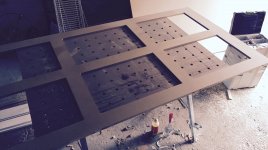
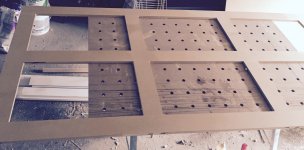
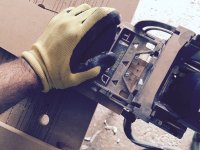
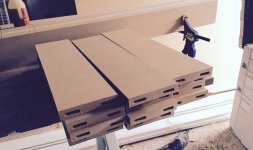
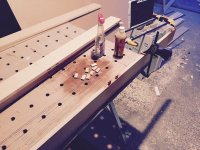
Finally - time for cutting some domino holes, a lot of them because every board is joined using just two dominos and a glue,
[attachimg=5]
Boards waiting ready to be joined for forever
[attachimg=6]
[attachimg=7]
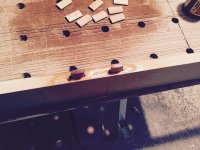
Dump it - with water, all parts like dominos, boards etc..
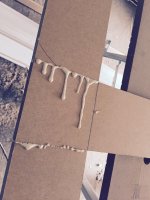
Add glue - not so easy to control gorilla glue out of this bottle...
[attachimg=8]
[attachimg=9]
Clamp it for about 2 hours,
[attachimg=10]
[attachimg=11]
Glue is bleading
[attachimg=12]
After quick sand off, all joins looks like that:
[attachimg=13]
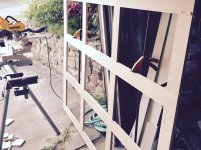
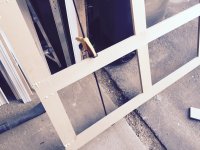
I wish to join all sections together here in the garage but... my front door doesn't allow pieces taller then 7ft something bigger...
[attachimg=14]
[attachimg=15]
[attachimg=16]
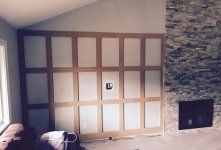
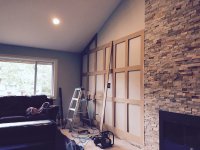
Installation on the wall:
[attachimg=17]
[attachimg=18]
[attachimg=19]
Now, where the fun is coming - joining upper pieces...
[attachimg=20]
I just wanted to share my recent over the weekend project :
How I turned
this
[attachimg=1]
into that:
[attachimg=2]
Tools and materials:
- 3x 0.75 MDF 4x8 boards,
- Gorilla original glue, -1
- Water,
- caulk, primer, gloss paint,
- 6x40 Dominos - a lot of these,
- TS 55 with CT26,
- Domino 500, DTS 400, and RO 150, 80-120 grit sand paper,
- Dewalt 12" miter - very... very dusty saw - not recommended for cutting MDF,
- messy garage
Project started with breaking the MDF sheets into 4" and 5.5" strips..
5.5" is was going to the bottom (1.5" as a little nailer for the base molding)
[attachimg=3]
[attachimg=4]
Finally - time for cutting some domino holes, a lot of them because every board is joined using just two dominos and a glue,
[attachimg=5]
Boards waiting ready to be joined for forever
[attachimg=6]
[attachimg=7]
Dump it - with water, all parts like dominos, boards etc..
Add glue - not so easy to control gorilla glue out of this bottle...
[attachimg=8]
[attachimg=9]
Clamp it for about 2 hours,
[attachimg=10]
[attachimg=11]
Glue is bleading
[attachimg=12]
After quick sand off, all joins looks like that:
[attachimg=13]
I wish to join all sections together here in the garage but... my front door doesn't allow pieces taller then 7ft something bigger...
[attachimg=14]
[attachimg=15]
[attachimg=16]
Installation on the wall:
[attachimg=17]
[attachimg=18]
[attachimg=19]
Now, where the fun is coming - joining upper pieces...
[attachimg=20]
Attachments
-
 a.jpg1.2 MB · Views: 5,518
 -
 11.jpg1.7 MB · Views: 5,132
 -
 14.jpg621.8 KB · Views: 5,014
 -
 13.jpg1.3 MB · Views: 5,064
 -
 12.jpg982.2 KB · Views: 5,026
 -
 IMG_0460.jpg1.3 MB · Views: 5,015
 -
 IMG_0461.jpg1.5 MB · Views: 5,007
 -
 IMG_0462.jpg1.7 MB · Views: 4,984
 -
 IMG_0463.jpg1.3 MB · Views: 5,044
 -
 8.jpg909.9 KB · Views: 5,159
 -
 10.jpg1.1 MB · Views: 5,158
 -
 9.jpg2.1 MB · Views: 5,429
 -
 b.jpg493.8 KB · Views: 5,437
 -
 2.jpg1.2 MB · Views: 5,457
 -
 3.jpg1.2 MB · Views: 5,396
 -
 1.jpg1.8 MB · Views: 5,413
 -
 5.jpg1.7 MB · Views: 5,352
 -
 4.jpg1.2 MB · Views: 5,311
 -
 6.jpg1.7 MB · Views: 5,324
 -
 7.jpg1.7 MB · Views: 5,292