onocoffee
Member
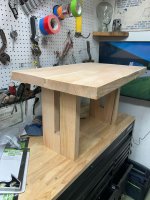
My friend is working on a white oak slab table for his little daughters and asked me for advice. Instead of mounting plates to screw the base to the table, he was wondering if he could domino them together. I thought Yeah, that should work.
However, as I'm sitting here thinking about it, I'm wondering if that's still a good route. If he glues the legs to the top with dominos do we need to be concerned about wood shift and what happens if/when it does shift?
At the moment I'm thinking that maybe to use dominos to align the legs to the table but no glue - just cut some slots into the lefts and screw those clips to the top to keep them together.
What do you think?
Thanks!