Door Construction on a Roubo workbench?

patriot

Member
Joined
Apr 15, 2015
Messages
164
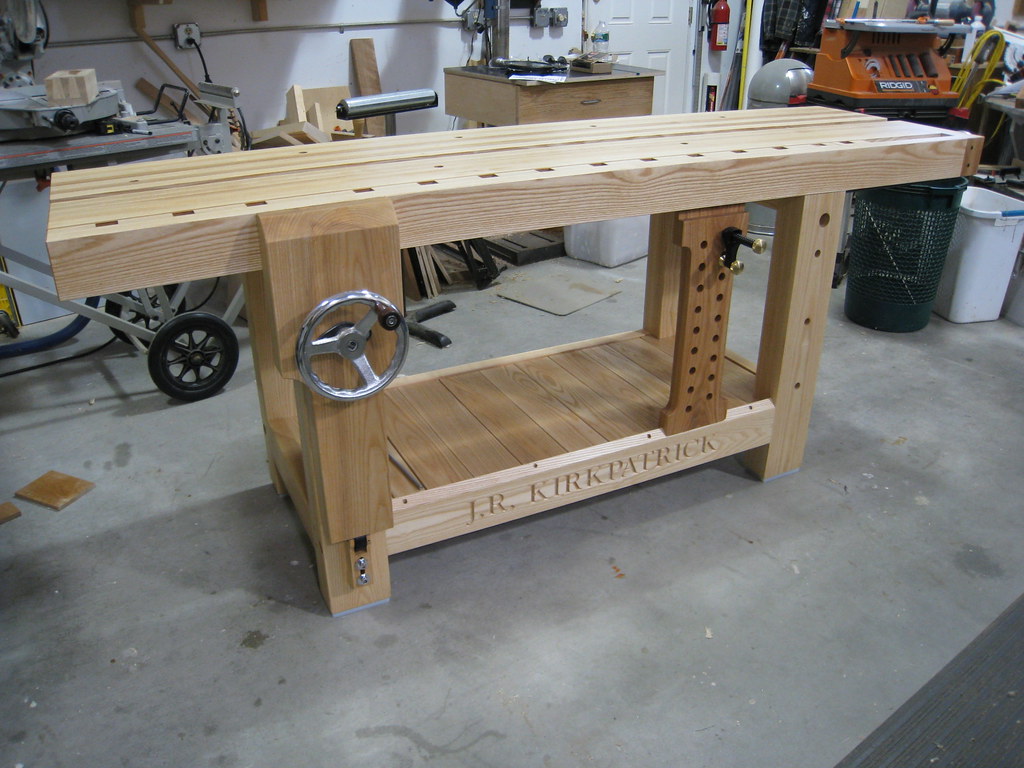
I have several exterior door projects in my near future and am looking VERY hard at building a Roubo workbench based on the Benchcrafted plans.  Fact is, I'd love to have that workbench in my shop.

My 'issue' is that I have never worked on a narrow 24-inch wide workbench.  All of my workbenches have been at least 30-inches wide.  Perhaps the truth to building 80"x36" doors is that the only time a wide surface is required is during glue-up.  The rest of the door construction is plunging domino mortises, planing, etc. on individual members. 

Perhaps I just answered my own question?

Someone is probably going to say, 'Well, why don't you just make the top wider?'  Great question, but as I understand it the 4-inch x 87-inch top (as shown in the plans) weighs - from what I have read- nearly two-hundred pounds or so.  So adding 6-inches more  to the width of the top? [scared]  Ok, so I'll order a couple of cranes and I should be good to go. Yes? [wink]

I like some feedback on those who construct doors on narrow workbenches.

Thanks!
 
My .02, if you're often constructing doors that wide...and you have the floor space, you should alter the plans and make it that wide.  On the downside, it's a lot of material to buy and then the weight of the extra width is considerable.  When I built mine, the weight and width of the standard size was just about all I could handle by myself.  Also, the standard width minimizes the risk of wrenching your lower back reaching across the bench top.

Alternatively, you could make some swing-out, or removable brackets for the backside to get you the extra width.  It doesn't need to be made from iron.  Functioning something along the lines of Jameel's new "Swing-Away Seat".
On another note, the roubo bench is also great for clamping a door to the front side for mortising lock sets.  You made a great choice in bench types.  You're going to love it!

16986038509_d266341623_c.jpg
 
[member=3220]Jim Kirkpatrick[/member]

Thanks for your very informative post.

The swing out brackets is a great idea.  Thinking about this a bit, I think that 'slide-in' supports may also work via wooden 'mortises' beneath the bench top.  They would not have to be overly strong because the bench itself would support the weight of the door.

I have heard of door builder's laying a full sheet of plywood on their too narrow workbenches to support doors safely, but that concept never appealed to me. I would much rather have a light 'folding' melamine-top table that could be used for door assembly and glue up and spare my workbench from glue spills. 

(Note. I know melamine is a heavy sheet good, but my plan would be to cut it lengthwise to reduce its weight and lay these sheets over the fold-up table which would have supporting cross-members to help keep the melamine relatively flat.  I will post this when I build it.)

And you also hit on another aspect of door construction that I have not given sufficent thought to: mortising in the lock sets.  I had not overlooked this, but your comment (and photo) made the point perfectly.  IMHO, nothing ruins a well made door quicker than poor lockset installation.  Thanks for pointing that out.

Off topic:  I understand that the tail-vise is the most difficult aspect of the Roubo workbench construction.  That said, did you get some help with this installation?  I understand that there is a website that offers detailed (or so I read) videos that help construct the entire workbench.  I have the Roubo Benchcrafted plans, but am thinking that getting all the help I can before I get started may be a wise thing to do.

Thanks again for your help.
 
[member=49475]patriot[/member] ,

I'm sure you'll come up with the solution.  Be sure to post pictures here.  When you're talking about the tail vise being difficult, you must mean the giant dovetails.  I made a feeble attempt at making the pins  with a router going the full depth freehand.  There was a bit of a blip in them so I scrapped them and went with a mortise and tenon.

jimkirkpatrick-albums-my-benchcrafted-roubo-build-picture6627-condor-dovetails.jpg


Looking back at them I probably could have come up with a fix, but I was pressed for time and started over using a simple mortise and tenon.  The dovetails are purely for aesthetics.  A Domino 700 would be great for this task.
After I completed my bench, Jameel published an article in PWW on his method for making "condor dovetails  It's genius, I wish I thought of this earlier. He only freehands the first 1/4" or so, sharpens the edges with a chisel, then switches to a flush trim bit to complete the deep pins.

You can read about my trials and tribulations over on TalkFestool.  I used a fair amount of Festools for many of the tasks.

4777831901_352bcd31ea_b.jpg

 
[member=3220]Jim Kirkpatrick[/member]

Wow!!!  That is one BA workbench!!  I'm green with envy.  You did a great job, but I have no doubt you worked very hard to make it happen.  I'm sure you are very proud of your accomplishment and you should be ... in spades!  Great job! [thumbs up]

What I meant by the tail-vise remark was the installation of the BC tail-vise hardware.  From what I can tell that seems one installation whose instructions should be followed very closely.  The dovetails look challenging as well.

Thanks for the links.  I know they will come in very handy for me.  I used to hang out @ TalkFestool a few years back.  I have very little spare time so prefer to hang out at one WWing site if I can.

When I do begin the bench build I will post all of my progress on my website for anyone who wishes to visit.

Question for you:  Is there anything you would change on your bench now that you have used it for some time?

I worry about its length, but I'm sure those wiser than I will ever be have a very good reason for making it 87-inches long.

Thanks again for all of your comments and images. 

 
Installing the tail vise hardware is not a big thing.  It was harder when I built mine because the inside of the mortise or rabbet was curved.  But even then it wasn't no thang.  I cut out the full sized diagram then glued it to the end of the slab and followed along with many passes with the router.  Just a lot of repetition.  They have since changed their hardware to allow for a square bottomed mortise/rabbett.  I wouldn't really have done anything different other than give those big ole dovetails another go round.

4826257387_0d5fe6ca28_b.jpg


4826865744_2dcb239cea_b.jpg
 
[member=49475]patriot[/member] you might also want to take a look at Luke's (iamnothim) Roubo build documented here:
http://festoolownersgroup.com/member-projects/split-top-roubo-bench-build/

He used plans from the Wood Whisperer.

Ron
[/quote]

Thanks for the link, Ron.

I came across that thread the other day and will go over it carefully very soon.  That's a heck of a long thread.

I appreciate your help.

P.S.  Here is another link on the subject:
Renaissance Woodworker
 
[member=3220]Jim Kirkpatrick[/member]

Thanks for the feedback on my question. 

Good to know you're happy with the bench as it is.  This is encouraging to me because as I noted earlier, I have never worked on a narrow workbench, but am willing to do so.

I see in your photo how you pasted up the diagram and cut out the excess.  Great idea!

I appreciate all of your help.
 
Back
Top