Drawer Organization

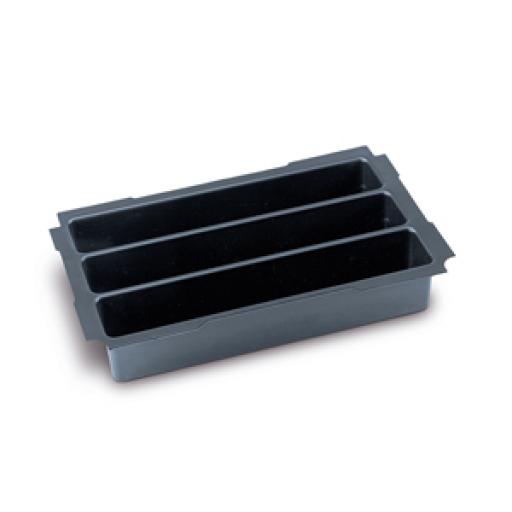
[member=73094]afish[/member] They make square inserts, I'll find them for you when I get back.

[member=44099]Cheese[/member] Nitogen springs solve some of this issue. On the mixer lifts the only ones we order now are the Strong Arm assist no more spring models for me.

Tom
 
I planned out (look closely at the first image) and then made my own.
3/8" maple dividers and 1/4" maple plywood bottom, a few coats of urethane.
No fasteners, just glue.
This was before I bought my planer, so the dividers were taken from 3/4" to 3/8" with a table saw and belt sander.
 

Attachments

  • Drawer Organizer 2.JPG
    Drawer Organizer 2.JPG
    108.5 KB · Views: 204
  • Drawer Organizer 3.JPG
    Drawer Organizer 3.JPG
    720 KB · Views: 240
Cheese said:
My parents had one of those drop down knife holders in their home. The problem is that for large, full tang, heavy bolster knives (think Wüsthof or Henckels) the increased weight of the knives soon overpowers the magnet that keeps the knife holder closed. Slowly but surely the knife holder slowly opens up and you're always walking by and closing the thing...PITA.

Can you add more magnets to overcome the additional weight?
 
Bob D. said:
Can you add more magnets to overcome the additional weight?

I don't know Bob, I never looked at that aspect of it. I guess I was just underwhelmed with the construction in general because when you closed it back up you had to push it with both hands or the extended arms would flex sideways and make closing difficult. It was sold with the house...problem resolved.  [big grin]
 
Lots of great ideals here for store bought and custom built.  Thanks to [member=73094]afish[/member] for starting.  The magnetic knife organization @tjbnwi shared is the bomb. Would have never thought of that. 

I got a Onefinity recently and have just about got it figured out.  One early project is custom organization using CNC capabilities.
 
well, here is my first attempt at drawer organizer.  Actually this is the first time I used the laser too.  I tested it when it arrived just to make sure it was working and it has been collecting dust for months.  Well today was the the day to knock the dust off.  there was a lot of learning involved today with new software test cuts etc.  This was first try after figuring out the burn offsets.  I was a little worried about the 1/4" actual .205" material but once its together its incredibly strong and light.  Thing assembles like a zipper and almost needs no glue its so snug. 

I need to put some finish on it and thinking some Howards butcher block conditioner or clear polycrylic.  Leaning towards the Howards since its a wipe on finish. Open to suggestions on the finish. 

I have some others planned but this was the easiest and wanted to figure out the process on the easy one.  So far I'm liking it. Its sturdy, light, and I can make the compartments any size or shape without being locked into store bought sizes.  This will be double stacked over top of some of the lesser used utensils. However I wanted the basic most used ones to be able to come out in a single container. There is a fork and knife engraving also just like the spoon. Im planning on engraving a pic for each cubby so everything can get put back in its correct location easily. 
 

Attachments

  • silver 2.jpg
    silver 2.jpg
    173.9 KB · Views: 201
  • silver tray1.jpg
    silver tray1.jpg
    153.4 KB · Views: 188
Here is a solid wood knife organizer (knives sit in kerfs), and drawer dividers made from 1/8" baltic birch plywood.
 

Attachments

  • Utensils.jpeg
    Utensils.jpeg
    826.1 KB · Views: 185
  • Knives.jpeg
    Knives.jpeg
    1.3 MB · Views: 195
afish said:
Thanks, Ill check BBB I was thinking it would be good to have the silverware in a group of 3-4 baskets instead of removing/carrying individual baskets. So, you can just grab a single handle and pull out everything needed in one easy to carry package that will pop in and out. 
Maybe one of these trays? Just drop it into a Mini Systainer and go! [tongue]
735a0f355f33a7c73580c59d2fd85882.jpg
 
Getting a little more fancy.  Upper tray lifts out if need to access the shish kabob skewers and provides a little extra storage. 
 

Attachments

  • UT1.jpg
    UT1.jpg
    258.8 KB · Views: 175
  • ut2.jpg
    ut2.jpg
    1.1 MB · Views: 169
  • ut3.jpg
    ut3.jpg
    234.8 KB · Views: 167
Here is a pic of the parts for the lower tray only, pre assembly. You can see the engravings for each of the items and all the tab holes. Still kind of amazed on how this stuff goes together once you get your burn offsets dialed in.  For the trays that sit down inside the drawers I dont even think im going to glue them anymore.  The silverware one needed glue since the silverware will be banging front to back every time the drawer opens/closes and the stuff is heavy so eventually it would probably tap it apart. but when all 4 sides are captured glue is not even needed.  The lower tray from today drops in by itself but it takes about 45 seconds to reach the bottom since there is a cushion of air that needs to escape the fit is so precise, eventually it settles to the bottom...
 

Attachments

  • utun.jpg
    utun.jpg
    221.8 KB · Views: 200
[member=73094]afish[/member] this is looking really good. Where did you find the artwork for the utensil outlines?
 
Nice, which laser do you have? This is 10mm material?
 
4nthony said:
[member=73094]afish[/member] this is looking really good. Where did you find the artwork for the utensil outlines?

I draw/trace it. first I take picture with my cell phone and load the pic into a vector editing program. there are lots of different softwares to choose from for vectors.  lightburn (laser software) does too but I only use that for basic laser function since I am faster with other programs, Iam more familiar with. Then I load the jpeg and start tracing it usually using the spline tool to draw the main shapes. Its actually a fair amount of work to turn one of these out between figuring out the drawer layout to make everything fit, photographing, tracing, drawing/manipulating the box. some of this is more complicated do to new kitchen and trying to figure out whats best where etc. plus still learning the laser but getting faster. the box today took me about the same time to make as the simple silverware tote.
 
Bob D. said:
Nice, which laser do you have? This is 10mm material?

100watt 2440 The material is 1/4sande ply its actual thickness is .205" or 5.2mm. the 100w is supposed to be able to handle 12mm but I havent tried yet. I have the cnc router for cutting the bigger stuff I wanted the laser for working with finer more detailed work and engraving which usually is thinner stock anyways. I bought the sande ply originally to practice on since its reasonably priced but it works so well im just sticking with it.  once all those tabs lock everything together its way stronger than needed.  Thats the real secret sauce otherwise it would be waaaaaay to flimsy. I think I could make an airplane out of this stuff.
 
Back
Top