Drill Press Table

Scott in Bend said:
Why not use a round insert in the existing square hole?  You could use the four open corners as an insert lifting/rotating access point.

Or...an octagon, which would give you 8 fresh points vs. 4, and you could still cut it with straight-line equipment.
 
Mike Goetzke said:
How often do most change out these inserts?
Depends on what you're cutting and how critical back side tear out is to you. For furniture and cabinet work, where the back of the cut will be exposed, you want a fully clean surface directly under the hole. For rough work, it probably doesn't matter.
 
Mike Goetzke said:
How often do most change out these inserts?

It really depends on usage Mike. My inserts are circular, and quite big, with a fair drill point offset. As I use Forstners and hole saws quite a bit, these can eat the inserts quite quickly but, when drilling up to 10mm they last well. When cutting real large holes, I clamp a sacrificial board to the table.
One afternoon I made up a stack of inserts that should last a while.
 
Jiggy Joiner said:
Mike Goetzke said:
How often do most change out these inserts?

It really depends on usage Mike. My inserts are circular, and quite big, with a fair drill point offset. As I use Forstners and hole saws quite a bit, these can eat the inserts quite quickly but, when drilling up to 10mm they last well. When cutting real large holes, I clamp a sacrificial board to the table.
One afternoon I made up a stack of inserts that should last a while.

This is why I asked. I built a DP table many years ago from a Wood Magazine design. It has seen it's day and needs replacement. I made several inserts for the table but have only used a couple over probably 20 years! I usually use a backer board like you suggest.

Also, I use my DP about 30-40% of the time for aluminum/steel. Do others use separate DP's for wood/metal work?

Thanks
Mike
 
jeffinsgf said:
Scott in Bend said:
Why not use a round insert in the existing square hole?  You could use the four open corners as an insert lifting/rotating access point.

Or...an octagon, which would give you 8 fresh points vs. 4, and you could still cut it with straight-line equipment.

And if you flip it over, 8 more.
 
Bob D. said:
jeffinsgf said:
Scott in Bend said:
Why not use a round insert in the existing square hole?  You could use the four open corners as an insert lifting/rotating access point.

Or...an octagon, which would give you 8 fresh points vs. 4, and you could still cut it with straight-line equipment.

And if you flip it over, 8 more.

And another thing you can do to get more usage out your insert is to swing (rotate) the table left or right slightly.
 
I replaced the Nova chuck (which is actually a cheapish Chinese-made keyed chuck), with a 13mm keyless Albrecht clone I have used for several years. I had good results with this in my previous drill press, and was wondering whether to upgrade it or not. Consequently, I completed some run out tests for it.

Set up ...

Runout1.jpg


I used a 1/4" shank carbide router bit as the test piece. This was a one-time test, so I may have had better results from another router bit, or from re-positioning it. It is what it is ...

Runout2.jpg


Results ...

Runout3.jpg


This reads 0.045mm run out. That is 0.0017" run out. Is that good or bad?

My understanding is: there is run out that may occur with the spindle, then there is run out that will occur at the chuck and quill (which could also be measured separately), and finally there is the run out measured at the bit. The results here are a total of all these together. It was mentioned to me that around 5 thousands of an inch would be acceptable. I have 1 thousand inch. 

The other item I attended to was to add a Wixey laser guide ...

Wixey1.jpg


It tucks aware and is quite unobtrusive ...

Wixey2.jpg


It leaves a nice, clean line ...

Wixey3.jpg


... but it is a little wider than expected. The jury is out whether it is just a gimmick, or whether it will prove to be useful.

Regards from Perth

Derek
 
Did you also check the spindle above the chuck?


Attachments

  • Nova DP spindle.png
    Nova DP spindle.png
    672.1 KB · Views: 514
[member=4358]derekcohen[/member] consider picking up a precision ground dowel pin from 4 - 6 inches long. I use a 1/2 inch one. IF you are all metric a 12 mm would probably be your choice. They are manufactured to very tight tolerance. Here is a 12mm from McMaster Carr, you should be able to find similar from a supply house down there.
https://www.mcmaster.com/91585a972

This gives a bigger target fro the caliper and you know it is straight and hasn't been flexed.

You can also do some other tests as well in addition to the run out. Chuck it up and then use an engineer's square or a 1-2-3 block to check that everything is perpendicular to the table in all directions. You may have to shim your table to get it straight.

With the pin chucked, you always know the outside edge of the pin is a constant half the diameter to the center point. With my !/2 pin, if I want to place a hole 1.5 inches from an edge, I place a 1 inch and a 1/4 inch spacer between the fence and the pin and it is 1 1/2 every time.

Ron
 
derekcohen said:
This reads 0.045mm run out. That is 0.0017" run out. Is that good or bad?

My understanding is: there is run out that may occur with the spindle, then there is run out that will occur at the chuck and quill (which could also be measured separately), and finally there is the run out measured at the bit. The results here are a total of all these together. It was mentioned to me that around 5 thousands of an inch would be acceptable. I have 1 thousand inch. 

Albrecht guarantees their chucks to have .0015" run out or less. As you're measuring .0017" total for everything....you're good to go.

You do point out one of the potential disadvantages in having a chuck with a removable arbor. Every interface provides another opportunity for a small amount of error.

However, in the real world I've never seen that as a viable issue because all of those interfaces are ground surfaces. Where the issue usually lies is in the quill itself or how well the chuck jaws center the drill bit.

I think you'll come to enjoy using the Wixey laser, I know I have. It gets you consistency and repeatability rather than just eyeballing it. If I need absolute accuracy say between 2 holes, I'll shut off the laser, insert this wiggler/center finder and manually pick up the centers.

[attachimg=1]
 

Attachments

  • S828.png
    S828.png
    84.2 KB · Views: 630
I was concerned also with having a separate arbor, for the reasons Cheese has stated but, I wanted the option to be able to use the chuck on other machines, which might have different to MT 2 fitment.

To clear any doubts about runout, I first tested just the quill on my Voyager, the result was very good almost no needle movement. Then I did tests with various arbors, and the best was with a Rohm, as I couldn’t source an Albrecht.
Then I ran a test with the chuck, which was well within range, I can’t remember the actual reading but, it was good.

As your chuck isn’t a genuine Albrecht, I’d be very happy with that reading, and you saved a few bob too.

I think the reading that matters most is at the quill/spindle. If that’s all good you have a great starting point.

The wide beam on the Wixey, was something that niggled me a little at first but, I’m used to it now, and take no notice. It was only a previous Jet drill press, that had a fine laser on it, that made me aware.
The Jet had awful runout though, and was returned after two days.
 
It’s easier to “read” the laser lines if you shine a bright light on the same spot. It kinda washes away the peripheral part of the laser line leaving just the center.

An led on a gooseneck would be good but I haven’t gotten around to it. In the meant I use an led flashlight that has a magnet. The magnet is just to store the light on the machine.
 
[member=4358]derekcohen[/member] About the laser. The thing I appreciated the most with the laser, is the fact that the table can swing left or right. Each time you move the table, up or down, it will slightly shift out from the center. With the laser it's easy to lock it in the center, or on your stock.

Nice addition.  [thumbs up]
 
Mario, that occured to me as well. Thanks.

Hey, it's a new drill press, and it's Christmas. So I added lights ...

Good lighting is helpful. On my old drill press I used a LED book light. This was transferred over ..

DP11a.jpg


It occurred to me to try another light I have used on other equipment, and that I should pass this on to everyone.

Light off ...

light3.jpg


Light on ...

light4.jpg


For such a small light, it is very bright ...

light5.jpg


light6.jpg


... and cheap (from eBay) ...

light7.jpg


Adds light to the bandsaw ...

light8.jpg


... and bench grinder ..

light9.jpg


Regards from Perth

Derek
 
Inspired by Derek Cohen [member=4358]derekcohen[/member], I designed and built a table for my old Delta Drill press.

I couldn't find a UHMW slab to use, so I used 3/4" baltic birch plywood.  I like the Kreg bench clamps, so I decided to use the clamps along with the Kreg clamp tracks.  They are designed to sit below 3/4" plywood, are very strong, and have dual T-slots to secure them.  I glued up two layers of baltic birch plywood and used separate pieces between the tracks.  The result is very strong and stiff.

I used one section of track cut in half for the top for the clamps.  I took me a while to figure out I could use another piece as a fence with some attachments that I made.    I think with some other brackets, I can also use the fence on it's edge if needed.

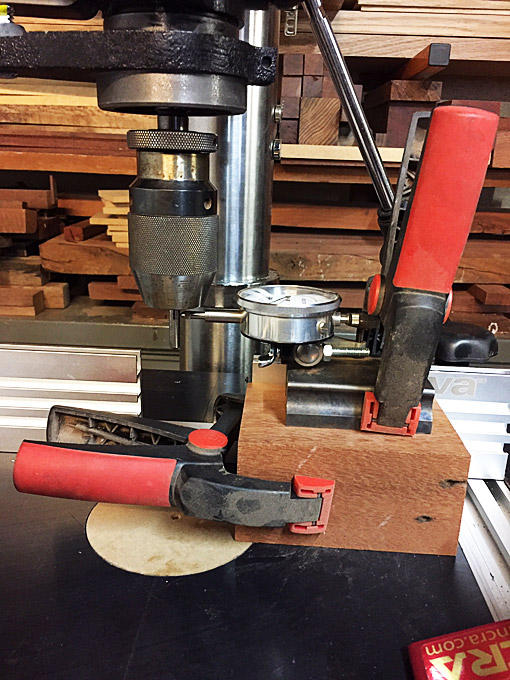
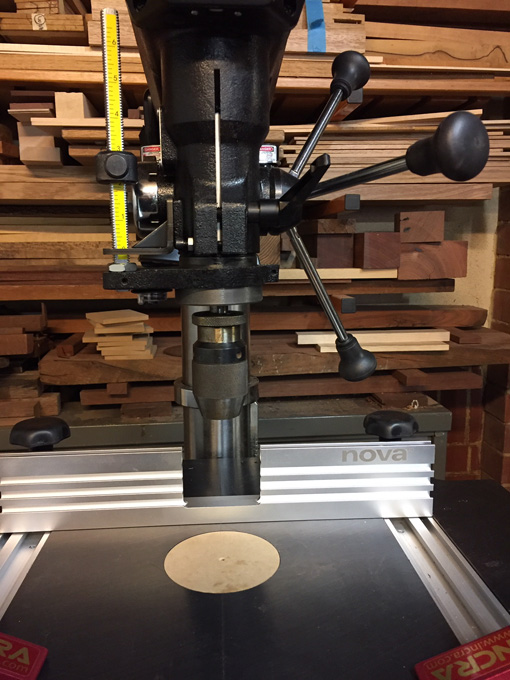
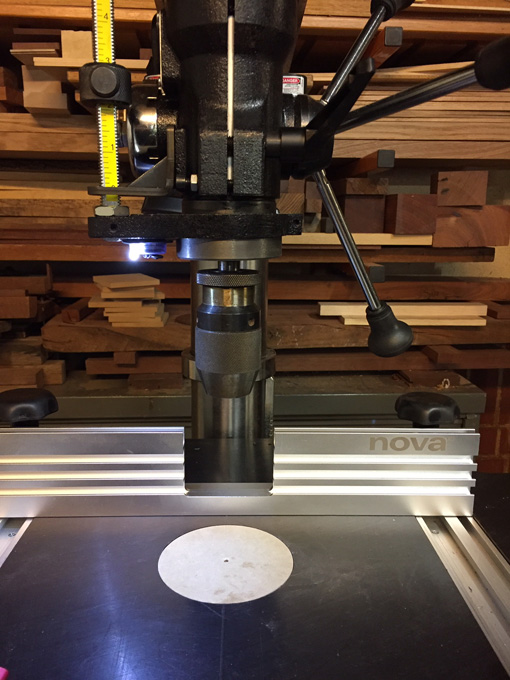
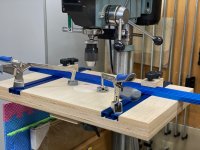
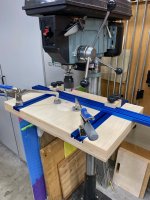
Here is how it came out:

[attachimg=1]

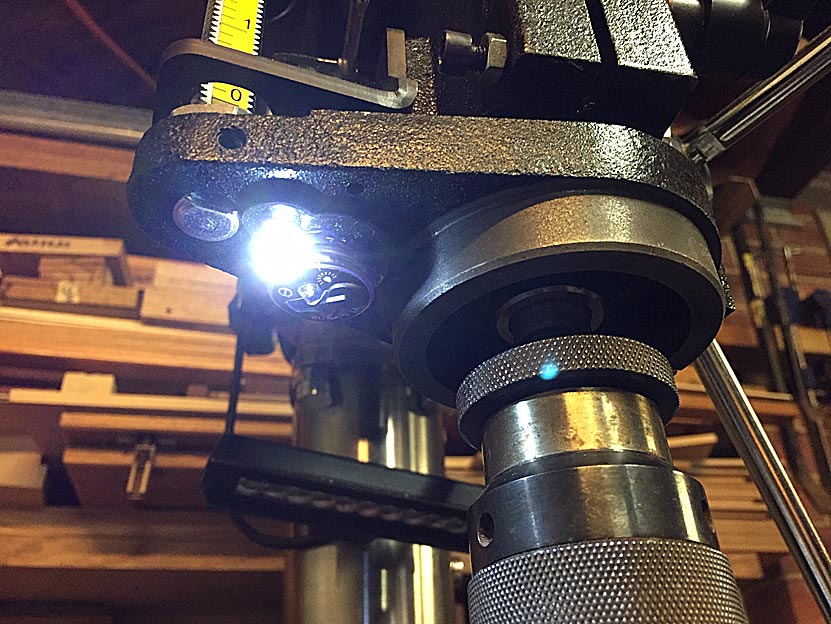
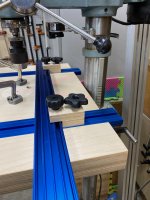
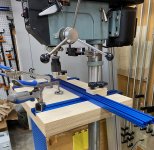
and a close up of the way the track are secured:

[attachimg=2]

I started out with a deeper table (w/ a notch for the drill press column), but decided it was too big and made it hard to raise the table.  When I made is shorter, I realized that the tracks would extend over the edge.  I thought about shortening them, but then noticed I can move the track further back, so I left them.

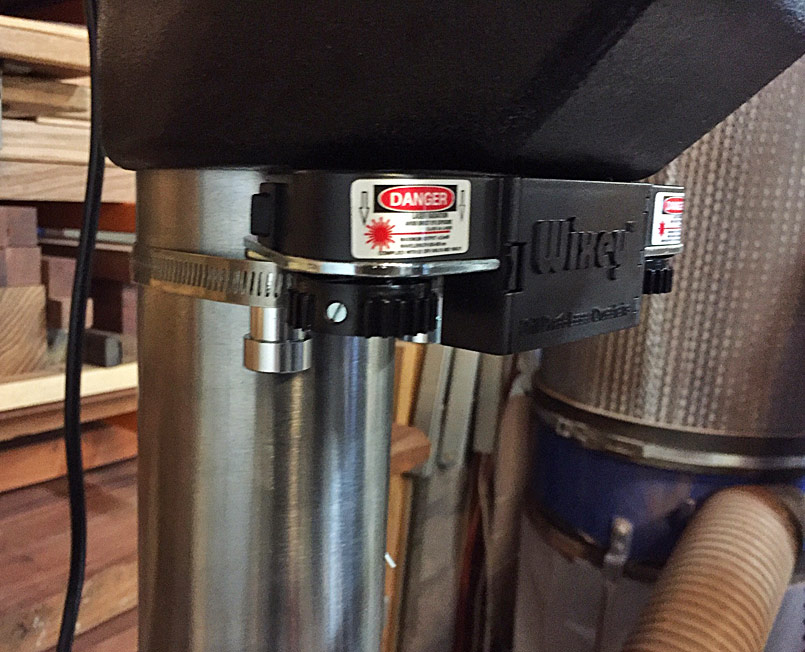
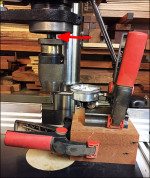
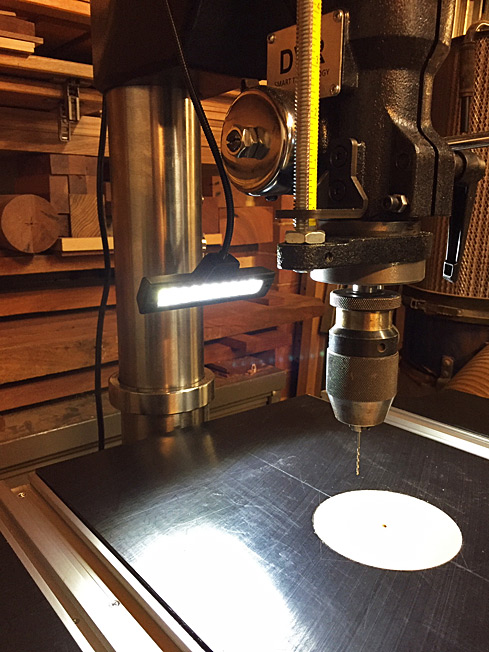
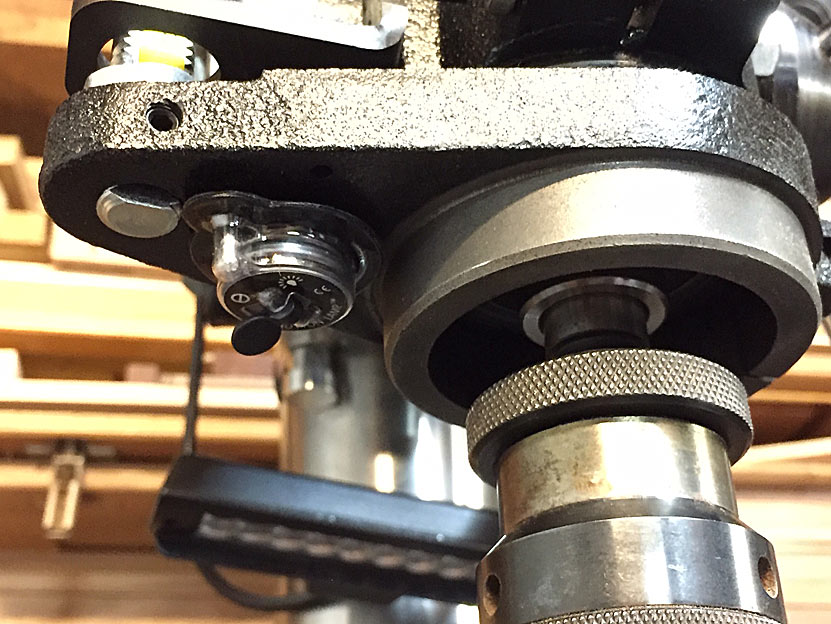
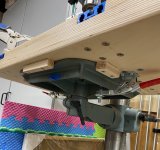
The table is secured to the drill press metal table with cleats and clamps.  It is very secure and easy to remove.  In the picture, you can also see the bolts that hold the track.

[attachimg=3]

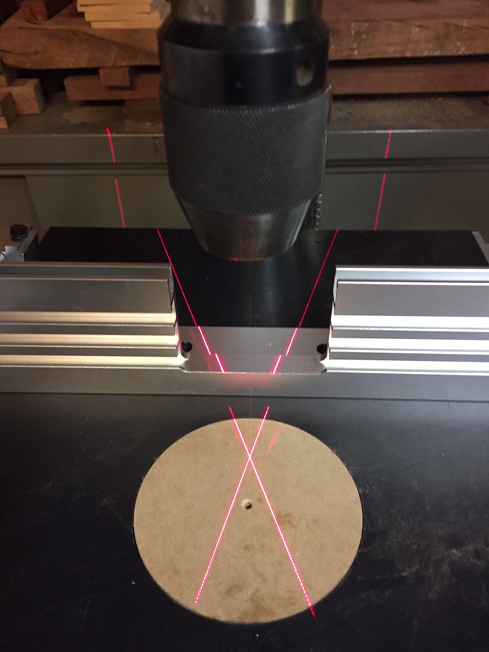
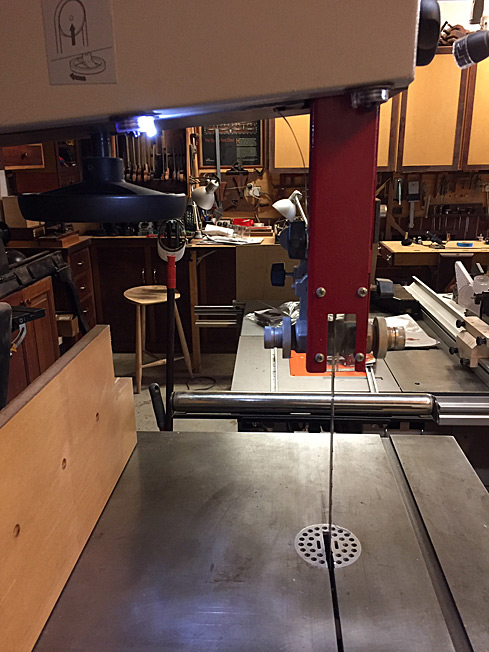
I made a 4" diameter hole to have removable inserts.  I did this with my OF1010 and a round circle template.  Then made a circle cutting jig for my bandsaw to cut the 4" inserts.  I now have enough inserts for a long while :-)

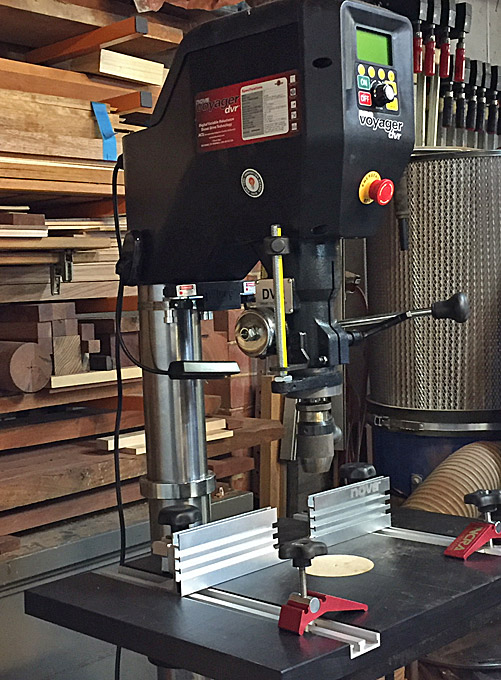
Overall, I think it came out very well.  Using the Kreg clamps and track was somewhat of an experiment, I haven't seen them used for a drill press before.  The result seems very good.  I really like the auto-adjusting feature of the clamps.  A few more pictures below.

Bob

[attachimg=4]

[attachimg=5]


Attachments

  • IMG_7986.jpg
    IMG_7986.jpg
    1.2 MB · Views: 492
  • IMG_7990.jpg
    IMG_7990.jpg
    1.3 MB · Views: 489
  • IMG_7992.jpg
    IMG_7992.jpg
    1.6 MB · Views: 476
  • IMG_7985.jpg
    IMG_7985.jpg
    1.3 MB · Views: 480
  • IMG_7995.jpg
    IMG_7995.jpg
    1.9 MB · Views: 603
Nice, I attached my DP table using the same type clamps. It has worked out great for the past year and as you said easy on and off.

I like your fence.
 
Looks good. The bit I'd do differently would be to make the inserts square instead of round - that way it's a few quick cuts on the table saw to make a new one
 
Bernmc said:
Looks good. The bit I'd do differently would be to make the inserts square instead of round - that way it's a few quick cuts on the table saw to make a new one

Thanks,  I think I will get more use out of the rounds ones.

Also, now that I have a circle cutting jig for my bandsaw, it quite easy to make more round inserts.

[attachimg=1]

I marked a line on it so I can get repeatable settings.
 

Attachments

  • IMG_7968.jpg
    IMG_7968.jpg
    1 MB · Views: 386
Bernmc said:
Looks good. The bit I'd do differently would be to make the inserts square instead of round - that way it's a few quick cuts on the table saw to make a new one

Bern, I mentioned why round earlier on. I made a bunch, and these took a short period of time. Of course, others may not find this so. Round offers infinite turning and a fresh face. Square is much more limited in this regard.

Regards from Perth

Derek
 
Back
Top