Edge Band Clamping

Good grief. You guys really know how to complicate matters. I simply stretch blue tape across the edges. The tape will stretch and apply enough pressure. It also enables easier adjustment after clamping.

Tape-Clamping-Edging.jpg


Regards from Perth

Derek
 
Hi Derek, I regularly use edge banding that is between 10 and 20 mm thick. Especially with contrasting wood colours I like the way that looks. I've found that tape will not close all the gaps when the edge banding is more than a few millimetres thick. What is your experience  with that?
 
hdv said:
Hi Derek, I regularly use edge banding that is between 10 and 20 mm thick. Especially with contrasting wood colours I like the way that looks. I've found that tape will not close all the gaps when the edge banding is more than a few millimetres thick. What is your experience  with that?

I don't do edge banding deeper than about 10mm.

Does this count? :) These are about 30mm deep ...

ApothecaryChestWeekendThree_html_m30f75b62.jpg


ApothecaryChestWeekendThree_html_2876e739.jpg


ApothecaryChestWeekendSix_html_m4edfa3d.jpg


Regards from Perth

Derek
 
To me edge “band” means something so thin it would sag if you tried to stand it on end. That thickness is suitable for low pressure clamps like the op used or simply taping.

Once you get over 1/2”x1/2” it’s a stick (to me) and it will need to be clamped with something that can apply real pressure unless it’s shape conforms very closely to the substrate. If it does (or is very short like Derek’s example) you can use low pressure methods.
 
[member=4358]derekcohen[/member] There are two reasons I think a clamp is justified here.  First, the main panel is plywood, essentially end grain.  Second is how it will be used.  As a worktop in a shop, weight will be placed on the edge banding and being 3/4” wide, than can easily separate the banding from the plywood.  Proper clamps (which he has to buy anyway), provide the best chance at a strong bond. Mechanical reinforcement is even better, but at least clamp it well. In light of that, still blue tape?
 
still blue tape?

I think that many underestimate the power of blue tape, or overestimate clamping pressure. Blue tape was enough to pull these panels together ...

ApothecaryChestWeekendOne_html_51268b6.jpg


ApothecaryChestWeekendOne_html_m219424a3.jpg


Regards from Perth

Derek
 
Thanks for showing the examples. Your blue tape is definitely much better than mine (Tesa). If I pull it even with moderate force it will just stretch and only partially rebound. However I can see how it should work with edge banding more subtle than what I do. Maybe I should reconsider and start using thinner strips, like I do when the edge banding is made of the same wood as the panel.
 
Edge banding like many aspects of joinery and cabinet making, varies greatly.
There are certain types of banding that will hold fine with tape, depending on the material it’s being bonded too, and the glue used.

I sometimes use scrap lengths of wood, and place them between the edge banding and the clamps. This helps spread the load pressure.
Also seen a few examples where the banding was held with tape, and the banding dried rippled, as in between the tape, the banding didn’t hold, or wrong glue maybe?

Years ago, we did edge banding with Evo Stik, if any wasn’t straight when the glue had set, the fumes of the glue were blamed  [doh]
That stuff was lethal! How some people siniff it to get high is beyond me?
 
I've mostly used tape on guitar binding.  I think if the banding is straight enough and the moisture in the glue doesn't cause it to warp, as long as there's an even glue line with some squeeze out with the tape the glue will probably hold.

Tough to predict tho.
 
hdv said:
If you find setting up specific types of router bits troublesome, here's a tip.

I always have some small blocks of UHMW ready. Once I have found a proper setting for a router bit that requires a very precise setup I always make a setup block of the stuff for later use. That makes repeating the same setup at a later time a breeze. I just grab the setup block I need and place that against the router bit in the table. I then adjust the height 'til the bit fits just right. Sometimes I write an offset for the fence on the blocks as well. But that might not work for you. I have an Incra LS Positioner on my router table with one scale that I never move just for this. This allows for almost perfect repeatability.

I do this for drawer lock bits, lock miter bits, tongue & groove bits, and all other "complex" bits. Sometimes I need to do this for a few different thicknesses, but the small variations in say 18mm ply thickness do not even require this.
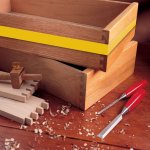
I don't have any UHMW but figured I'd make some setup blocks from the material I'm using, 3/4" plywood and edge banding at the moment.  With regards to edge banding bit setup, how do you know when you have it perfect?  For example, I cut the channel out of the plywood below by eyeballing it and using the router lift to adjust until I thought the cutter was perfectly aligned on the corners but I'm not sure how to validate it's perfect?  Afterwards, I did the same with the edge banding.  It seems the edge banding is less critical and only needs to be deep enough to be flush or have overhang?  Is it better to set it so there's no overhang and therefore only one side to flush trim or better to have overhang on both sides and flush trim both sides?

Seems to fit well, do I keep this piece as a setup block?
View attachment 1

Nearly flush
View attachment 2

Moderate overhang, not sure if I should center the bit more or try to get one side nearly flush?
View attachment 3

BTW, I hadn't aligned my Incra fence well for the router table and ended up having to shim it a bit to get the 2 halves parallel and adjusted with minimal gap to keep a consistent movement/alignment of the piece being pushed through.  As far as setting the depth is concerned, I kept moving the fence back with the micro adjuster until the bearing just began to move when I moved the piece across towards the outfeed fence ... is this the typical setup?
 

Attachments

  • 1.jpg
    1.jpg
    404 KB · Views: 193
  • 2.jpg
    2.jpg
    266.9 KB · Views: 192
  • 3.jpg
    3.jpg
    447.6 KB · Views: 131
For the concave side you can use a square. If the V is centered the thin edges will both contact the square’s blade. If it’s good you can save a scrap but plywood does vary in thickness. Maybe not enough to matter.

 
When edge banding I prefer to have it sticking out a little bit on both sides.

For the lock miter and the drawer lock bit I try to stay as close to "perfect" as possible. Due to the variations in thickness of the wood it never is really perfect. But most of the time the following procedure is good enough for me. I adjust the height of the bit 'til it fits the profile of the setup block as good as possible. Then I do the same for the distance of the fence for bits that don't have a bearing. Then I use a piece of scrap to test. Often a single adjustment after that gets me close enough.
 
hdv said:
When edge banding I prefer to have it sticking out a little bit on both sides.

For the lock miter and the drawer lock bit I try to stay as close to "perfect" as possible. Due to the variations in thickness of the wood it never is really perfect. But most of the time the following procedure is good enough for me. I adjust the height of the bit 'til it fits the profile of the setup block as good as possible. Then I do the same for the distance of the fence for bits that don't have a bearing. Then I use a piece of scrap to test. Often a single adjustment after that gets me close enough.

Thanks, unless you're a wood worker or perfectionist, most people will never be close enough to glue joints to notice slight imperfections.  I'll use this method and get it as close as possible without being overly scientific about it.
 
Michael Kellough said:
For the concave side you can use a square. If the V is centered the thin edges will both contact the square’s blade. If it’s good you can save a scrap but plywood does vary in thickness. Maybe not enough to matter.

I'd done this but wasn't certain it was the right method or not, thanks for clarifying.
 
Back
Top