End grain cutting boards

luka1972

Member
Joined
Mar 15, 2016
Messages
6
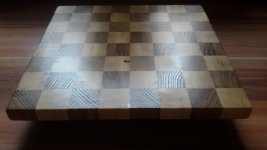
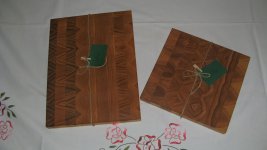
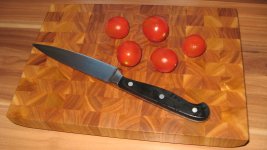
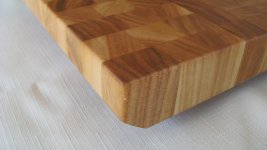
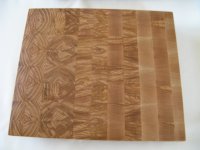
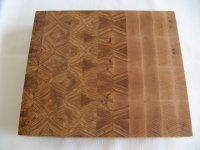
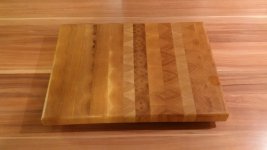
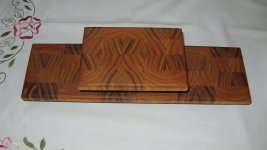
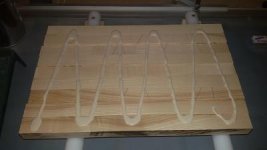
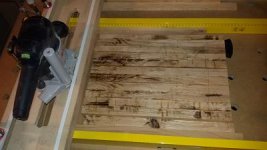
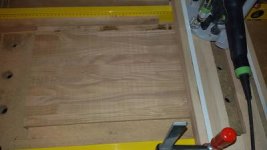
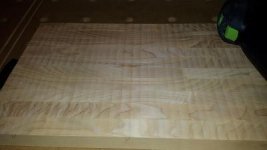
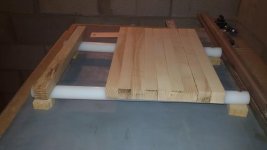
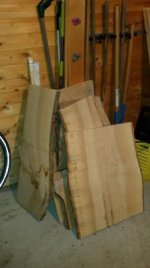
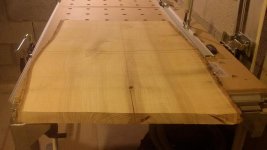
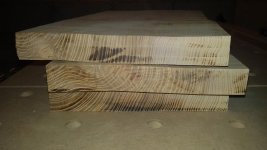
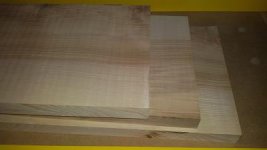
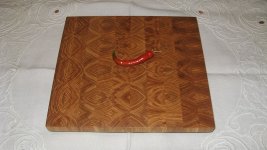
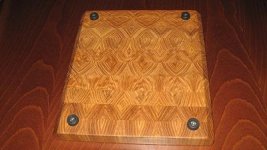
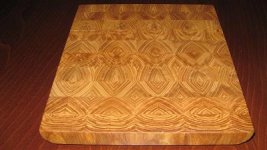
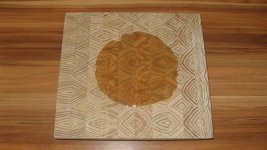
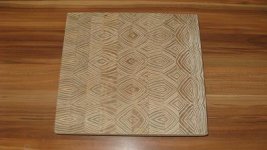
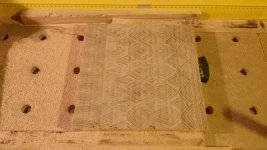
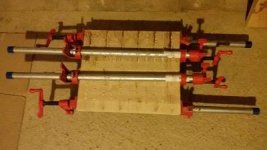
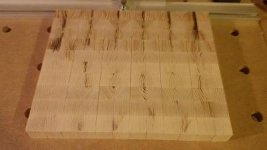
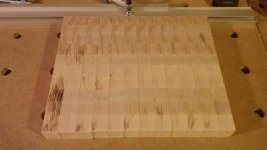
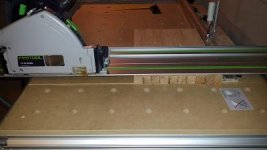
This year I started making end grain cutting boards.

My tools are:
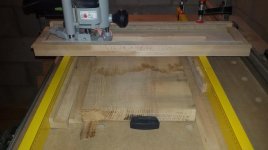
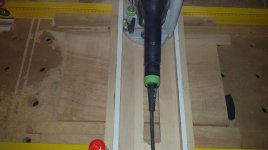
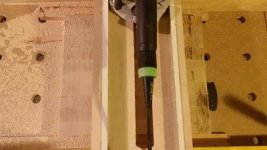
- festool mft3, ts 55 rebq, of 1010 ebq and ro 125 feq

Luka
 

Attachments

  • 2016-03-27 09-03-09 - IMG_0257.JPG
    2016-03-27 09-03-09 - IMG_0257.JPG
    104.3 KB · Views: 590
  • index.jpg
    index.jpg
    27.5 KB · Views: 586
  • IMG_0338.JPG
    IMG_0338.JPG
    1.1 MB · Views: 643
  • IMG_0331.JPG
    IMG_0331.JPG
    965.7 KB · Views: 502
  • IMG_0326.JPG
    IMG_0326.JPG
    732.1 KB · Views: 549
  • IMG_0324.JPG
    IMG_0324.JPG
    1 MB · Views: 650
  • 2016-05-09 22-28-12 - 20160509_222812.jpg
    2016-05-09 22-28-12 - 20160509_222812.jpg
    1.6 MB · Views: 524
  • 2016-04-27 10-47-45 - IMG_0262.JPG
    2016-04-27 10-47-45 - IMG_0262.JPG
    107.2 KB · Views: 528
Nice Wusthof knife. They are great knives for people that cook.

The end boards look nice. I tried making something like this 20-30 some odd years ago but gave up. It was beyond my capabilities with the few tools I had. Bamboo is also a nice cutting surface, since it doesn't dull the knife blades, when chopping, cutting, slicing, mincing etc.
 
I really like the pair in the second picture ... I'll send you my postal address [big grin]

[welcome] to the FOG [smile]
 
Really nice work, word be great to see pictures of the process. I want to make a checkerboard style cutting board and would think the glue up process is similar.

 
Looks great. Would like to hear your process for making the cuts to get nice glue up joints without a planer or jointer?
 
mkasdin said:
Bamboo is also a nice cutting surface, since it doesn't dull the knife blades, when chopping, cutting, slicing, mincing etc.

That is the complete opposite of the truth. Bamboo is terrible on metal.
 
petersd said:
Looks great. Would like to hear your process for making the cuts to get nice glue up joints without a planer or jointer?

1. For this project I use cherry wood
View attachment 1

2. I choose to cut lumber into four smaller pieces
View attachment 2

3. One piece was not appropriate for continuing
View attachment 3

4. Planing all three boards with router and jig
View attachment 4

View attachment 5

5. Planed boards
View attachment 6

6. Cutting the wood lengthwise.
View attachment 7

7. Turn every strip by 90 degrees. Then turn every second strip for 180 degrees. You can mix strips of wood to archive some interesting patterns.
View attachment 8

8. Apply glue to strips …
View attachment 9

View attachment 10

9. Use pipe clamps for tighten.
View attachment 11

10. Planing for second time
View attachment 12

View attachment 13

View attachment 14

More in the following post ...

Luka
 

Attachments

  • 09.jpg
    09.jpg
    10.5 KB · Views: 137
  • 10.jpg
    10.jpg
    12 KB · Views: 116
  • 11.jpg
    11.jpg
    15.9 KB · Views: 144
  • 12.jpg
    12.jpg
    15.6 KB · Views: 166
  • 13.jpg
    13.jpg
    12.9 KB · Views: 146
  • 14.jpg
    14.jpg
    10.2 KB · Views: 153
  • 08.jpg
    08.jpg
    13 KB · Views: 166
  • 07.jpg
    07.jpg
    22.3 KB · Views: 172
  • 01.jpg
    01.jpg
    28.4 KB · Views: 147
  • 02.jpg
    02.jpg
    38.9 KB · Views: 145
  • 03.jpg
    03.jpg
    43.7 KB · Views: 158
  • 04.jpg
    04.jpg
    31.4 KB · Views: 182
  • 05.jpg
    05.jpg
    22.8 KB · Views: 157
  • 06.jpg
    06.jpg
    9.3 KB · Views: 143
11. Cutting the wood crosswise.
View attachment 1

12. Again turn every strip by 90 degrees.
View attachment 2

13. Then turn every second strip for 180 degrees.
View attachment 3

14. Vary the position of strips.The face grain of the board should look great
View attachment 4

15. Glue the strips for last time
View attachment 5

16. Plane the board
View attachment 6

View attachment 7

17. Round the edges from board with router
View attachment 8

18. Moister the wood surface before sanding for improved surface quality. Sand the board with different grains.
Grains: 40, 60, 80, 120 in rotary orbital motion and 120, 180 and 320 in random orbital motion. I repeat this step few times.
View attachment 9

19. Apply the mineral oil
View attachment 10

20. Apply mixture from mineral oil and beeswax
View attachment 11

21. Attach the rubber bumper with screws on cutting board
View attachment 12

22. Use and enjoy your cutting board for a long time …  [wink]
View attachment 13

Luka
 

Attachments

  • 27.jpg
    27.jpg
    245.2 KB · Views: 181
  • 26.jpg
    26.jpg
    17.6 KB · Views: 157
  • 25.jpg
    25.jpg
    18.2 KB · Views: 176
  • 24.jpg
    24.jpg
    16.5 KB · Views: 116
  • 23.jpg
    23.jpg
    16.8 KB · Views: 138
  • 22.jpg
    22.jpg
    10 KB · Views: 138
  • 21.jpg
    21.jpg
    16.6 KB · Views: 129
  • 20.jpg
    20.jpg
    15.3 KB · Views: 135
  • 19.jpg
    19.jpg
    15.5 KB · Views: 119
  • 18.jpg
    18.jpg
    12 KB · Views: 134
  • 17.jpg
    17.jpg
    11.9 KB · Views: 123
  • 16.jpg
    16.jpg
    15.5 KB · Views: 149
  • 15.jpg
    15.jpg
    14.1 KB · Views: 152
Here is the latest one - endgrain chessboard-like cutting board.  :)

Luka


Attachments

  • 20160925_095612.jpg
    20160925_095612.jpg
    1.3 MB · Views: 227
Back
Top