Entry table for myself (finished pics)

Crazyraceguy

Member
Joined
Oct 16, 2015
Messages
4,897
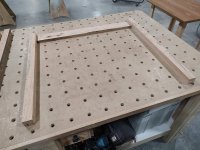
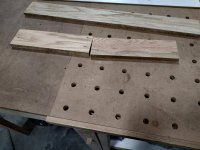
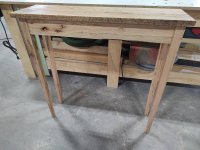
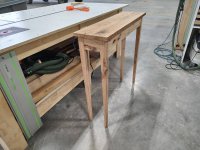
I've had a need for something inside my front door for a while. I had some free time Saturday, so I milled up some of the thicker pieces on the reclaimed pile.
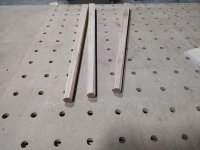
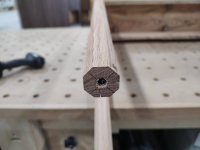
I have an idea for a leg shape, but I'm just not sure about it, so if it doesn't work as well as I imagine....no loss.
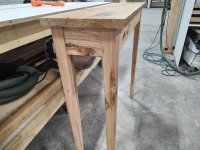
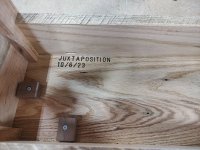
I'm thinking about leaving the rough edge on the front edge, undecided about the back too?
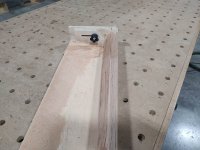
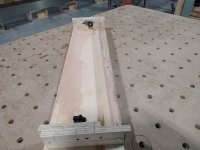
The bottom edges of the aprons might get the same. They'll get sanded some, but leaving the appearance of the saw marks that happened when it was still green.
It's all Red Oak that finished at almost exactly 1" thick, though the aprons will likely get thinned


Attachments

  • tableentry.jpg
    tableentry.jpg
    402.5 KB · Views: 131
  • tableentry2.jpg
    tableentry2.jpg
    402.5 KB · Views: 106
  • tableentry3.jpg
    tableentry3.jpg
    310.6 KB · Views: 110
I had a little time for this today. I built a jig to be able to not only taper, but index the legs from a center hole on each end.
Both ends are slide-adjustable, done as an alternate use for the Domino. A threaded insert and knob for the adjuster. Once the size of the small end (octagon) is determined, it doesn't need to move again.
The big end needs to move from the 90 degree cuts, to the 45 degree cuts, otherwise the octagonal facets would not meet at the same height.
There is a sliding fixture at the big end to index the leg. One edge is square, which holds the leg square to the blade. You then turn it around to hold the leg at 45 degrees, for the other 4 sides.

I did consider cutting the octagon off-set toward one corner. This would result in two square sides and a more aggressive taper to the inside, more like a typical square tapered leg. I may still do this as a later project, but it seemed too much for this particular table.
It might already be "too much". Tapered to octagonal legs made from reclaimed wood, with cracks and stains and nail holes, going under a slab top of similar wood is kind of a juxtaposition. I'll be able to tell more after some joinery, so it can stand up on its own.
I may have to "tone it down" some by doing something different to the legs? Maybe a thin "whitewash" to make some contrast to the top? I would hate to cover up the character with an opaque coating.
This is all just an experiment to see if what I imagined would work. (look good, I knew how to physically make it happen) I have never seen this particular style before. I'm sure that I'm not the first person to ever do it though. Somebody probably did this with a hand plane 150 years ago, but I haven't seen it.
 

Attachments

  • TableOctjig2.jpg
    TableOctjig2.jpg
    343.8 KB · Views: 65
  • TableOctjig.jpg
    TableOctjig.jpg
    417.7 KB · Views: 59
  • TableOct.jpg
    TableOct.jpg
    371.1 KB · Views: 56
I finally got some time to finish this thing. I've been on a little "stay-cation" this week and just worked around the house. This morning I had a breakfast meeting with the usual suspects, so I decided to go on into work and assemble the table.
This is the first time I have ever "named" anything that I built, but Juxtaposition just seemed to fit. The "very fancy" (as one of my co-workers called it) tapered to an octagon legs, but made from Reclaimed barnwood and shipping crate parts. I left all of the nail holes, cracks, insect damage and even rough edges from when it was milled as green wood, but the overall shape is pretty formal.
So instead of the usual "sign and date" with a Sharpie, like I do with everything else, I got out the Shaper Origin and engraved it. I did have one minor screw-up there though. I didn't account for the location of the the hold-down clips. Rather than ruin it, I decided to just add another one on the end aprons and leave that one out  [unsure]
I made those legs last Saturday, then was gone all week. They sat on my bench being "inspected" by everyone. I had two people ask me if I could do something for them with a similar design. They liked the octagonal shape, but had no idea how to do it.
I drilled out the 1/4" holes to 5/16" and added threaded inserts for levelers and filled in the lettering with some filler that is intended for laminate seams. It dries hard as a rock in about 10 minutes.
It needs another coat or two of Polycrylic on the top tomorrow, then it can come home.
 

Attachments

  • TableOct2.jpg
    TableOct2.jpg
    126.4 KB · Views: 49
  • TableOct3.jpg
    TableOct3.jpg
    425.4 KB · Views: 65
  • TableOct4.jpg
    TableOct4.jpg
    343.1 KB · Views: 56
  • TableOct6.jpg
    TableOct6.jpg
    377.4 KB · Views: 88
  • TableOct8.jpg
    TableOct8.jpg
    425.6 KB · Views: 63
Back
Top