Woodwork Wizard
Member
- Joined
- Oct 25, 2013
- Messages
- 431
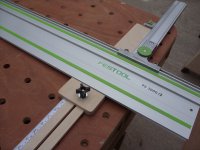
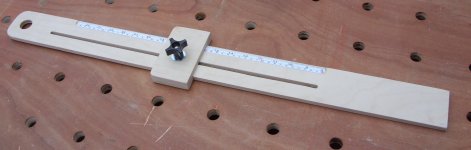
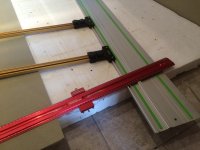
The idea for this I saw in a YouTube video where Dan Pattison ([member=47215]woodman_412[/member]) made a setting jig very similar to this and a set of parallel guides. Seeing as I already had a set of Festool parallel guides I just made a setting jig for my guides.
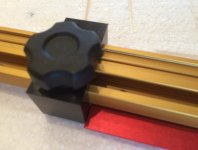
I used to use a piece of scrap that I'd cut to the exact dimension I wanted on my MFT, then used this to set each parallel guide by touch - setting it exactly to the splinter-guard on the guide rail, which works very well, but this is a much neater solution. With this new setting jig there's a sliding block that will butt up to the splinter-guard. This sets both guides exactly the same, so no more user error, or the slightest out of calibration rule on just one of your parallel guides to find your pieces aren't exactly parallel. Also I've found the locking stop on the parallel guide can tilt very slightly as you lock it, this eliminates that as well as the jig keeps the stop from tilting as you lock it down.
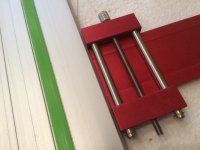
Every rip exactly where you want it and both ends exactly the same width and perfectly parallel, because the one jig sets both parallel guides exactly the same. Absolutely genius. Thanks Dan.

I used to use a piece of scrap that I'd cut to the exact dimension I wanted on my MFT, then used this to set each parallel guide by touch - setting it exactly to the splinter-guard on the guide rail, which works very well, but this is a much neater solution. With this new setting jig there's a sliding block that will butt up to the splinter-guard. This sets both guides exactly the same, so no more user error, or the slightest out of calibration rule on just one of your parallel guides to find your pieces aren't exactly parallel. Also I've found the locking stop on the parallel guide can tilt very slightly as you lock it, this eliminates that as well as the jig keeps the stop from tilting as you lock it down.
Every rip exactly where you want it and both ends exactly the same width and perfectly parallel, because the one jig sets both parallel guides exactly the same. Absolutely genius. Thanks Dan.