Cheese
Member
- Joined
- Jan 16, 2015
- Messages
- 12,501
I've been involved in demoing a bathroom down to the studs for a while now. As it's the only bathroom in the house, it has to be done in a very methodical manner. [eek]
At no time can the bath be out of service for longer than about 6-8 hours...it's challenging to say the least. So far, the new wall mounted vanity & sink/plumbing, the in-wall tank toilet/plumbing and the Robern in-wall storage cabinet have been installed along with some recessed lighting. Time to now focus on the shower area.
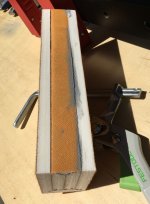
I'll be pulling out the cast iron tub and turning it into a curb-less walk-in shower and putting in 2 shower niches to hold the sundry items that need to be part of any shower. I purchased 2 Schluter KERDI shower niches, a 12" x 12" and a 12" x 20" niche, however, after some sleuthing, I realized neither would fit in the available spaces without completely reframing the wall.
At that instant, I realized it'd be easier and faster just to make my own custom sized shower niches from 1/2" KERDI-BOARD. I decided to make 2 each 10" x 22" shower niches.
I used a Festool OF 1010 router with a MicroFence interface on a Festool FS rail to route the grooves. I also used a Bosch 90º groove cutter that I had on hand. Because the niche would be routed in a flat form and then folded up into a box, it was mandatory that the routed grooves were absolutely parallel to each other.
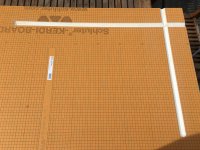
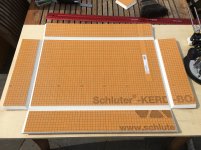
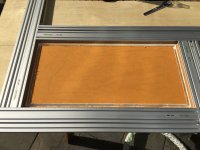
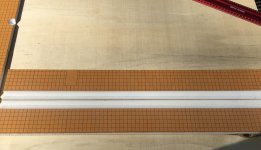
Photo 1: The first 2 grooves are cut in the KERDI. The FS rail is always positioned at a specified distance off of the light red lines marked on the KERDI.
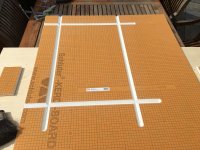
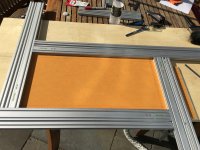
Photo 2: The FS rail is located for the 3rd cut using 2 pieces of maple flooring that I cut to the same length (within .003") and then added a 45º bevel on one end to allow me to see the red layout lines easier.
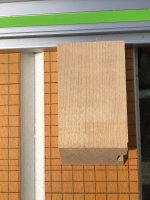
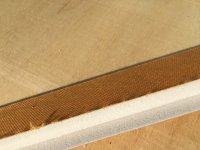
Photo 3: Closeup of the spacer block. Using this block and a thin line (.30mm) permanent marker, I was able to keep any variation of the positions of the routed grooves within about .010".
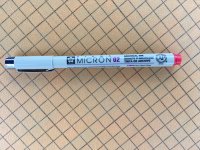
Photo 4: Closeup of the Micron 02 marker that was used.
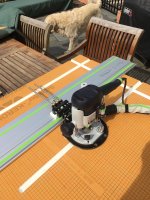
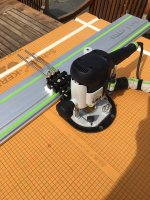
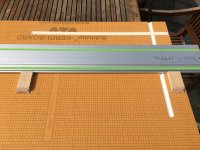
Photo 5: This shows the FS rail in place and the MicroFence interface. Ready to route the 3rd groove.
Photo 6: Third groove routed, just one more left.
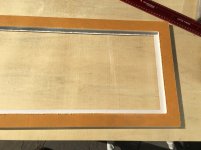
Photo 7: The 4th groove routed and the flat form is ready to be removed from the KERDI.
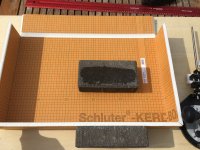
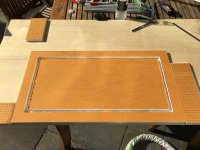
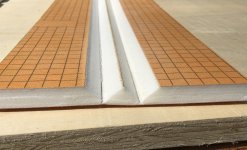
Photo 8: The flat form has been cut from the KERDI and the excess material in the corners removed.
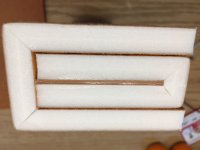
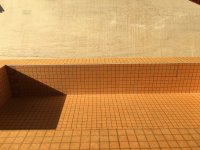
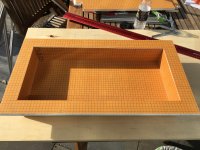
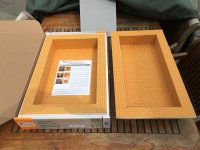
Photo 9: The flat form has now been folded into a box. A mounting flange will still have to be fabricated along with a couple of shelves.
At no time can the bath be out of service for longer than about 6-8 hours...it's challenging to say the least. So far, the new wall mounted vanity & sink/plumbing, the in-wall tank toilet/plumbing and the Robern in-wall storage cabinet have been installed along with some recessed lighting. Time to now focus on the shower area.
I'll be pulling out the cast iron tub and turning it into a curb-less walk-in shower and putting in 2 shower niches to hold the sundry items that need to be part of any shower. I purchased 2 Schluter KERDI shower niches, a 12" x 12" and a 12" x 20" niche, however, after some sleuthing, I realized neither would fit in the available spaces without completely reframing the wall.
At that instant, I realized it'd be easier and faster just to make my own custom sized shower niches from 1/2" KERDI-BOARD. I decided to make 2 each 10" x 22" shower niches.
I used a Festool OF 1010 router with a MicroFence interface on a Festool FS rail to route the grooves. I also used a Bosch 90º groove cutter that I had on hand. Because the niche would be routed in a flat form and then folded up into a box, it was mandatory that the routed grooves were absolutely parallel to each other.
Photo 1: The first 2 grooves are cut in the KERDI. The FS rail is always positioned at a specified distance off of the light red lines marked on the KERDI.
Photo 2: The FS rail is located for the 3rd cut using 2 pieces of maple flooring that I cut to the same length (within .003") and then added a 45º bevel on one end to allow me to see the red layout lines easier.
Photo 3: Closeup of the spacer block. Using this block and a thin line (.30mm) permanent marker, I was able to keep any variation of the positions of the routed grooves within about .010".
Photo 4: Closeup of the Micron 02 marker that was used.
Photo 5: This shows the FS rail in place and the MicroFence interface. Ready to route the 3rd groove.
Photo 6: Third groove routed, just one more left.
Photo 7: The 4th groove routed and the flat form is ready to be removed from the KERDI.
Photo 8: The flat form has been cut from the KERDI and the excess material in the corners removed.
Photo 9: The flat form has now been folded into a box. A mounting flange will still have to be fabricated along with a couple of shelves.

 for the complement Peter...After closely examining the Schluter factory niche, it appears to be held together with a low heat hot melt glue. I tried normal hot melt and it destroyed the foam. I then looked at a 3M low heat hot melt (being an ex-employee and all) adhesive, and in typical Mother Mining fashion, they sell the low temp glue sticks in minimum quantities of 12# each, that’s around 150 sticks. Glad to see their marketing strategy hasn’t changed much over almost 40 years. [popcorn]
")