Festool Domino Spacing/Alignment Question

mattbyington

Member
Joined
Mar 11, 2018
Messages
797
Hey Team,

Okay, admittedly, this question is going to be very basic. Apologies in advance.

So, in another thread, I mentioned I purchased the Domino DF 500 Set. It arrived yesterday (thanks Bob!).

I haven't gotten a chance really to play with it yet but I was thinking about lining everything up.

I've been watching this video as a tutorial for essentially a shelving unit (I'm actually making toolbox drawer dividers, but same joinery technique as in the video).
=219s

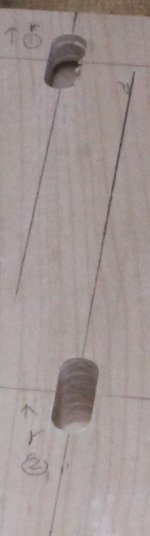
If I want "shelves" (read: dividers) spaced EXACTLY evenly across the face of the panel lying down (3:39 on the video), here's my question:

Normally when you use the domino horizontally, you reference the fence height to determine where along the edge of a board the domino is (like he does at 7:29).

However - back at 3:39 - the distance from the bottom of the domino to the center of the cutting instrument is exactly 10mm right?

Does that mean that at his cut at 7:29, the fence height MUST be set to 10mm (always) regardless of how thick the vertical panel is (the one receiving dominos on the edge)?

It's a little hard to grok because in the video, he is just illustrating placing the "shelf" *anywhere* on the flat panel, but in my case, I want to plan specifically for exactly spaced shelves and that means that the mortise position is really important.

I hope the question makes sense - sorry if it doesn't ... trying to figure this Domino thing out!!

Best, thanks as always,
Matt
 
Halfinchshy has a YouTube video that shows how to do this better than the Festool video.

The 10mm measures from the Domino sole plate to the centerline of the mortise.

If I were trying to space the shelves exactly, I’d pencil mark the locations where you want the top of the shelves to fall allowing for the10mm offset.

I’d also practice on scrap until I had the process down cold.

If you are planning for the shelves to bear a lot of weight, I might look at alternate support methods.
 
1) mark out centerlines
2) mark a 10mm offset to that
3) clamp a straight edge (panel / rail / scrap) along the offset line
4) butt the domino to that edge and it will be centered on your centerline
5) register pin to the edge and cut

Rinse and repeat!
 
Thank you both!

Crazylarry sounds like a good method. Thank you and appreciate it.

I will try that in the next couple days!

Matt
 
My method is similar to Crazylarry except with one difference. When precision mortising is called for, I line up the milled flats with the centreline instead of drawing another line 10mm from the centreline, because every line you create, even with a 0.3mm lead, could introduce a deviation from the original line. The rest of the steps are the same.

Of course, for general mortising purposes, the discrepancy may not matter.
 

Attachments

  • IMG_4894 (2).JPG
    IMG_4894 (2).JPG
    77.3 KB · Views: 843
One of the festool trainers Brian Sedgeley has instagram uploads with many quick tips. I posted the link. I think he has a tip that will answer your question and some you havent asked yet. He updates it ever fridday with a new quick time on various tools and accessories.
https://www.instagram.com/festoolsedge/
 
As posted previously, watch the YouTube video by halfinchshy (#71 I believe). He shows the steps and explains it very clearly. It works for mid-panel Dominos. I think there is no better explanation and video on this subject.
 
Thanks, everyone!

Here's the link to the video:

I just watched it. It was indeed well done.

It sounds like the long story short is basically - it's identical to Crazylarry's method that he put in this thread, but INSTEAD of marking an offset line by 10mm, you use the 10mm height of the edge of the domino lined up with the original, centered-shelf line.

Right?

Thanks!
Matt
 
Just watched Paul's video again.

Maybe I described what I thought I did versus what I actually do!

I do mark an offset but I also use the domino base to verify it at both ends *as* I clamp the second panel down (especially if it's say a 6 domino joint)

So Chuck's right the centerline is the focus :)
 
Ahhh I see! So instead of marking a 10mm offset and lining the *back* of the domino up with it, you actually don't create another line at all, and line up the *front* of the domino (the two side edge/corners that are inline with the cutter bit center) with the center line you create, negating the need really for an offset line at all!

Thanks all I think that makes perfect sense.

Matt
 
Clamping another board offset 10mm from the centerline provides a solid and fixed 2-plane registration that eliminates any sighting errors (by using the two edges of the domino base) and can stabilize the domino a little during the plunge.  I would recommend doing that for greater consistency/accuracy and speed.
 
mattbyington said:
Ahhh I see! So instead of marking a 10mm offset and lining the *back* of the domino up with it, you actually don't create another line at all, and line up the *front* of the domino (the two side edge/corners that are inline with the cutter bit center) with the center line you create, negating the need really for an offset line at all!

Thanks all I think that makes perfect sense.

Matt

Yes!

Although if I want accuracy along a say 2m joint I'd mark the offset anyway (as a guide) and clamp a reference edge using the centerline to the domino to make sure my reference was correct. Maybe it's me but I find it easier to be spot on AND quick if I take the moment to clamp a reference edge. Then whether it's 3 dominos or 12 it's just bam bam bam and they will still be aligned.

Just my experience.
 
"Although if I want accuracy along a say 2m joint I'd mark the offset anyway (as a guide) and clamp a reference edge using the centerline to the domino to make sure my reference was correct. Maybe it's me but I find it easier to be spot on AND quick if I take the moment to clamp a reference edge. Then whether it's 3 dominos or 12 it's just bam bam bam and they will still be aligned."
[/quote]

The most accurate method I have used before in a project (see image) is this (I could not find the cradle jig or I could post an image):

After setting your DF500 in position (lining up with the lines, using the milled flats and the scribed lines on the machine), place a cradle (made of plywood or hardboard) against the DF500 and clamp down the cradle.

This cradle (holding the DF against three of its edges) ensures no movements of the DF when you plunge. It is three times better than a single batten based on my previous cuts.

If TSO or anyone can develop a simple cradle jig along the above line of mine (out of hard plastic with reference lines (aluminum for a deluxe version at a higher price), people would be interested. Or, Festool can work on an accessory for that. Prices need to be competitive because such cradles can be shop-made. Woodpeckers' one-time pricing model may not work. No one needs my permission to use this idea and you can make them with a 3-D printer, which I have no access to.

Dead-on mortises as good as your layout skills allow.
 

Attachments

  • cradle.jpg
    cradle.jpg
    480.7 KB · Views: 660
ChuckM said:
Or, Festool can work on an accessory for that.
They don't have to as all parts you need already exist, possibly you already have them:

You can use the back side of a FS rail as your reference edge (the back fence of a MFT/3 also works, but isn't that easily clampable).

A bunch of FS-RSP #491582 (inserted the other way around so they protrude outside of the rail) turns it from a reference edge into a story stick, even a cradle version if actually needed (which in my experience isn't, at least with the DF 700XL when registered into the right-hand corner created by a FS-RSP, see first image). MFT/3-AR #495542 also work (should you run out of FS-RSP).

If you have FS-PA #495717 you can use that to register a rail into position and assure squareness (good when the reference line is deeper within the workpiece) or use a holey rail and the parts from the LR32 system (SA-LR 32 #496938 and LA-LR 32 FS #496938) for the same near a workpiece edge.

Or (should the both above not being available) a MFT/3-AR (see above) works nicely to take care of at least the sideways alignment of the rail.

Basically same idea as this just with a moveable rail.
 

Attachments

  • IMG_20180417_092401411.jpg
    IMG_20180417_092401411.jpg
    60.9 KB · Views: 1,123
  • IMG_20180417_092449547.jpg
    IMG_20180417_092449547.jpg
    45.7 KB · Views: 571
  • IMG_20180417_092424028.jpg
    IMG_20180417_092424028.jpg
    37.3 KB · Views: 483
Back
Top